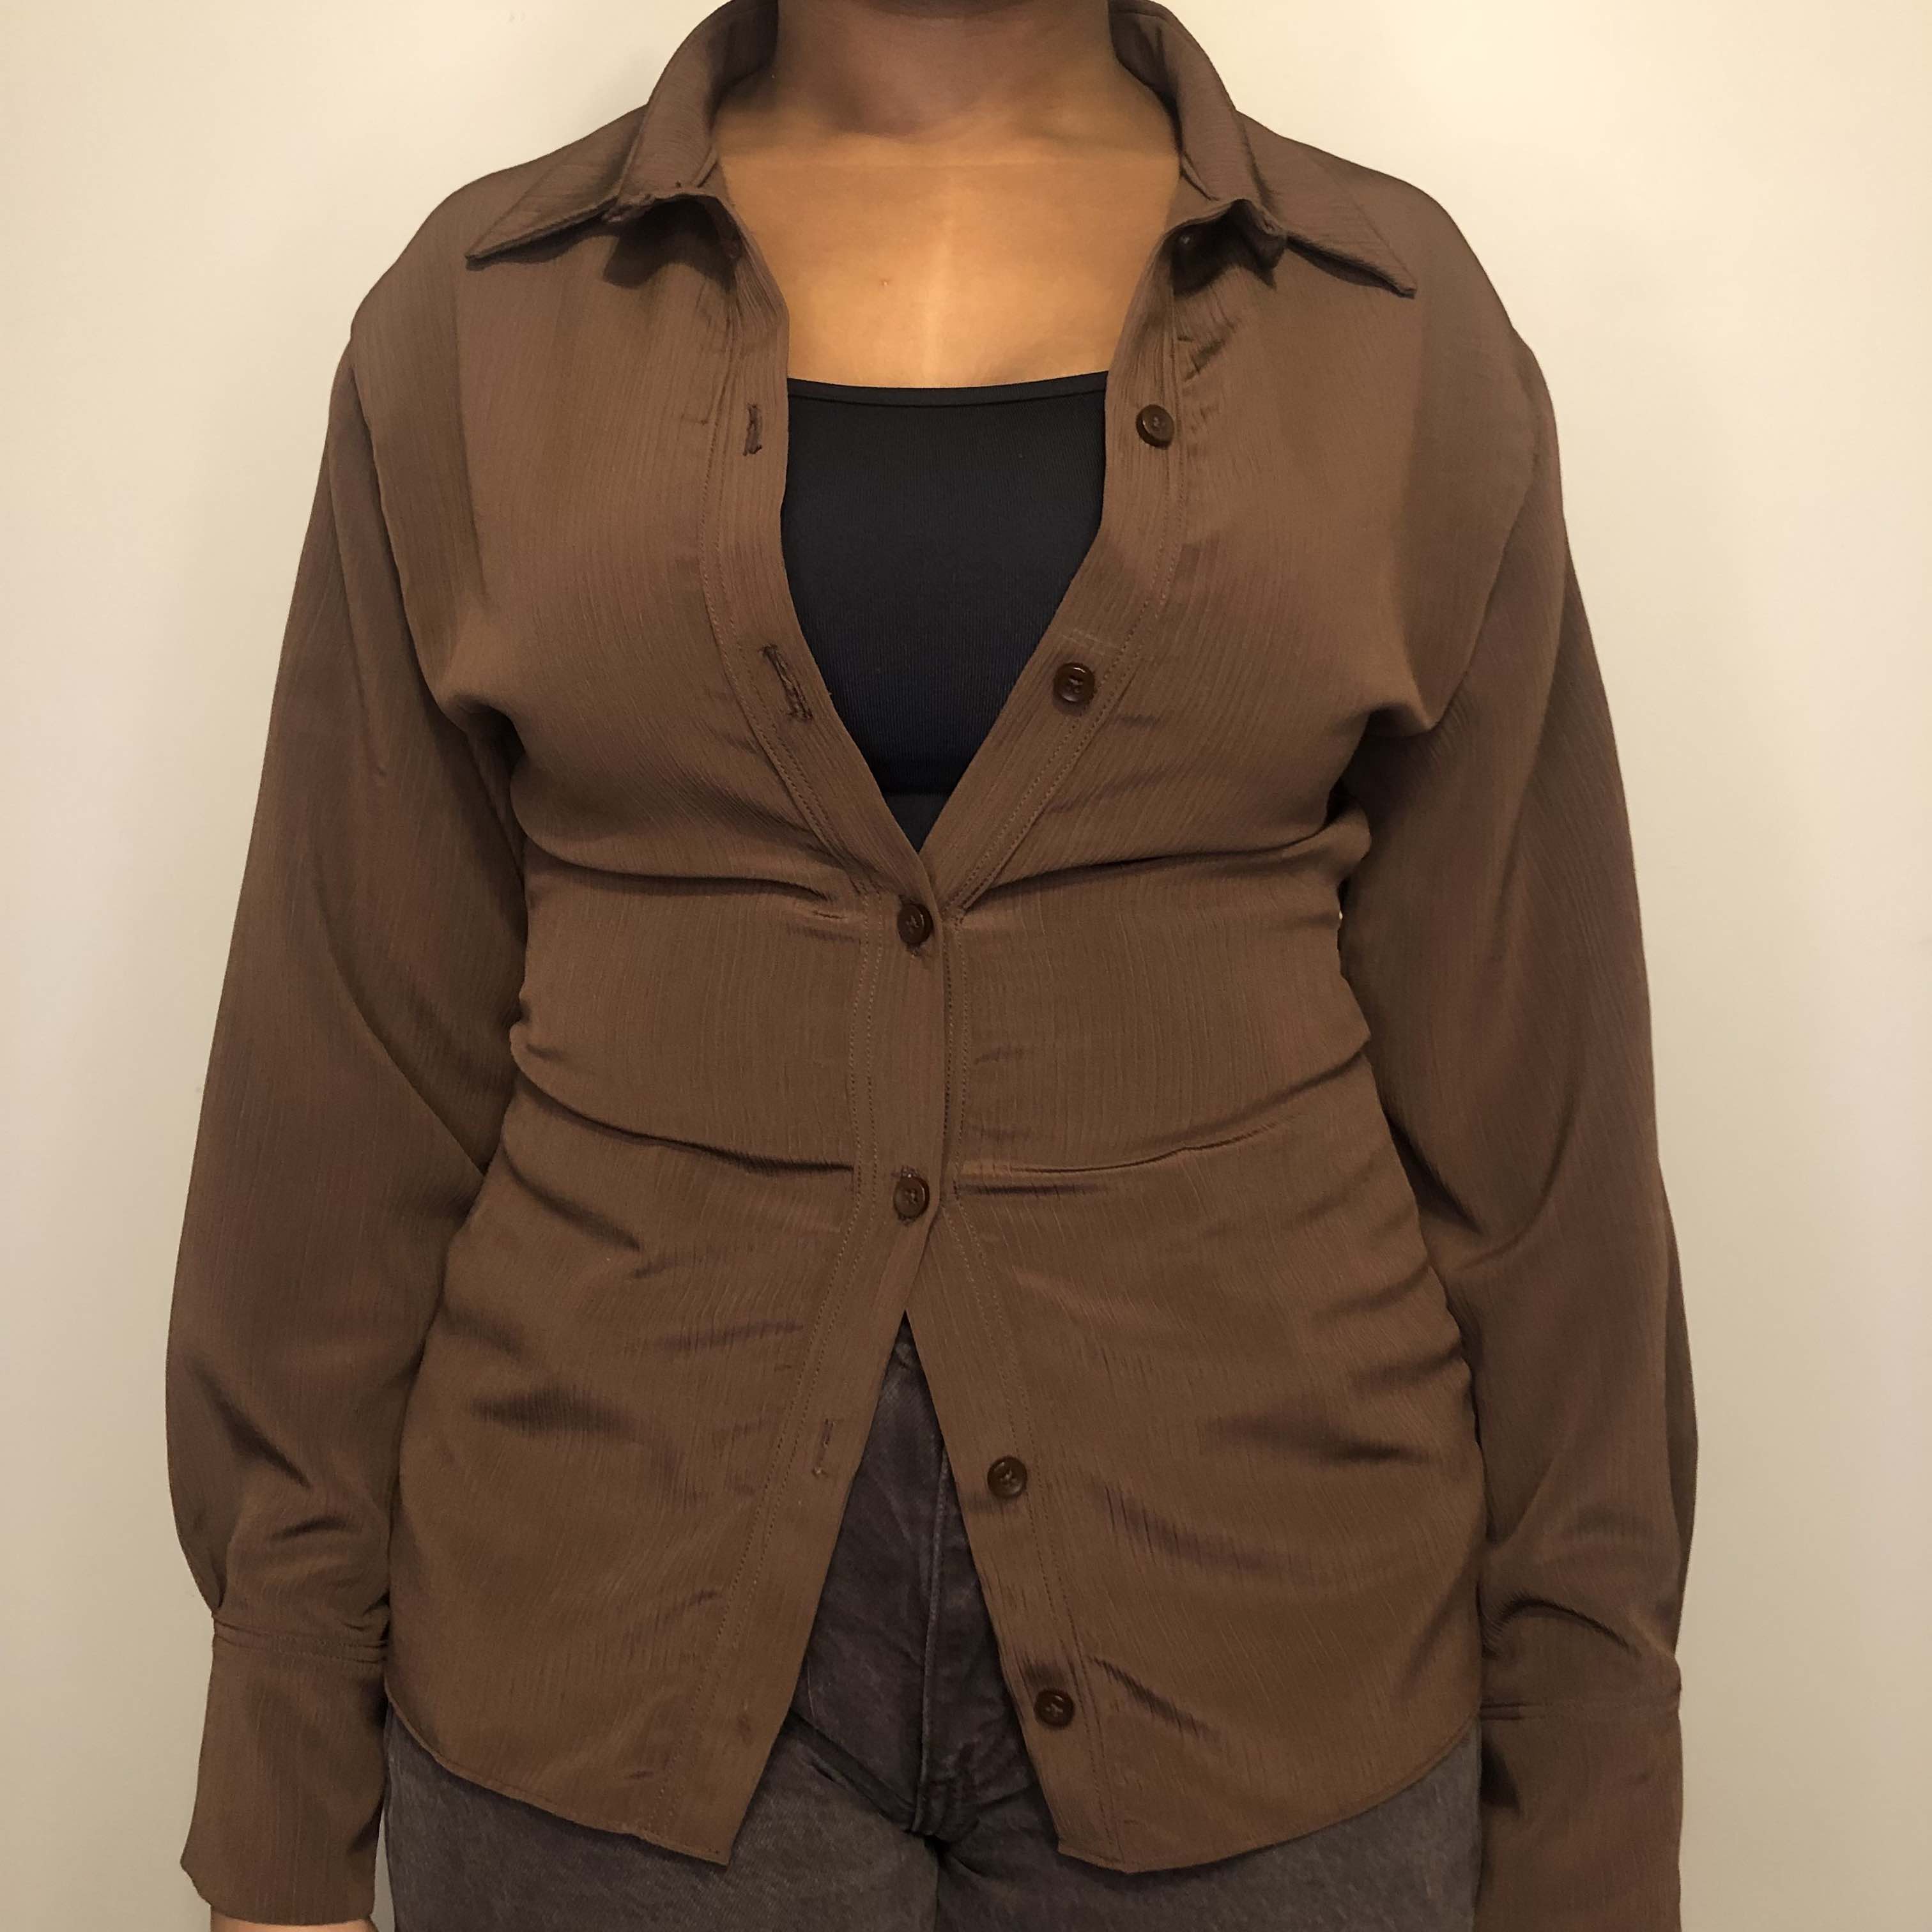
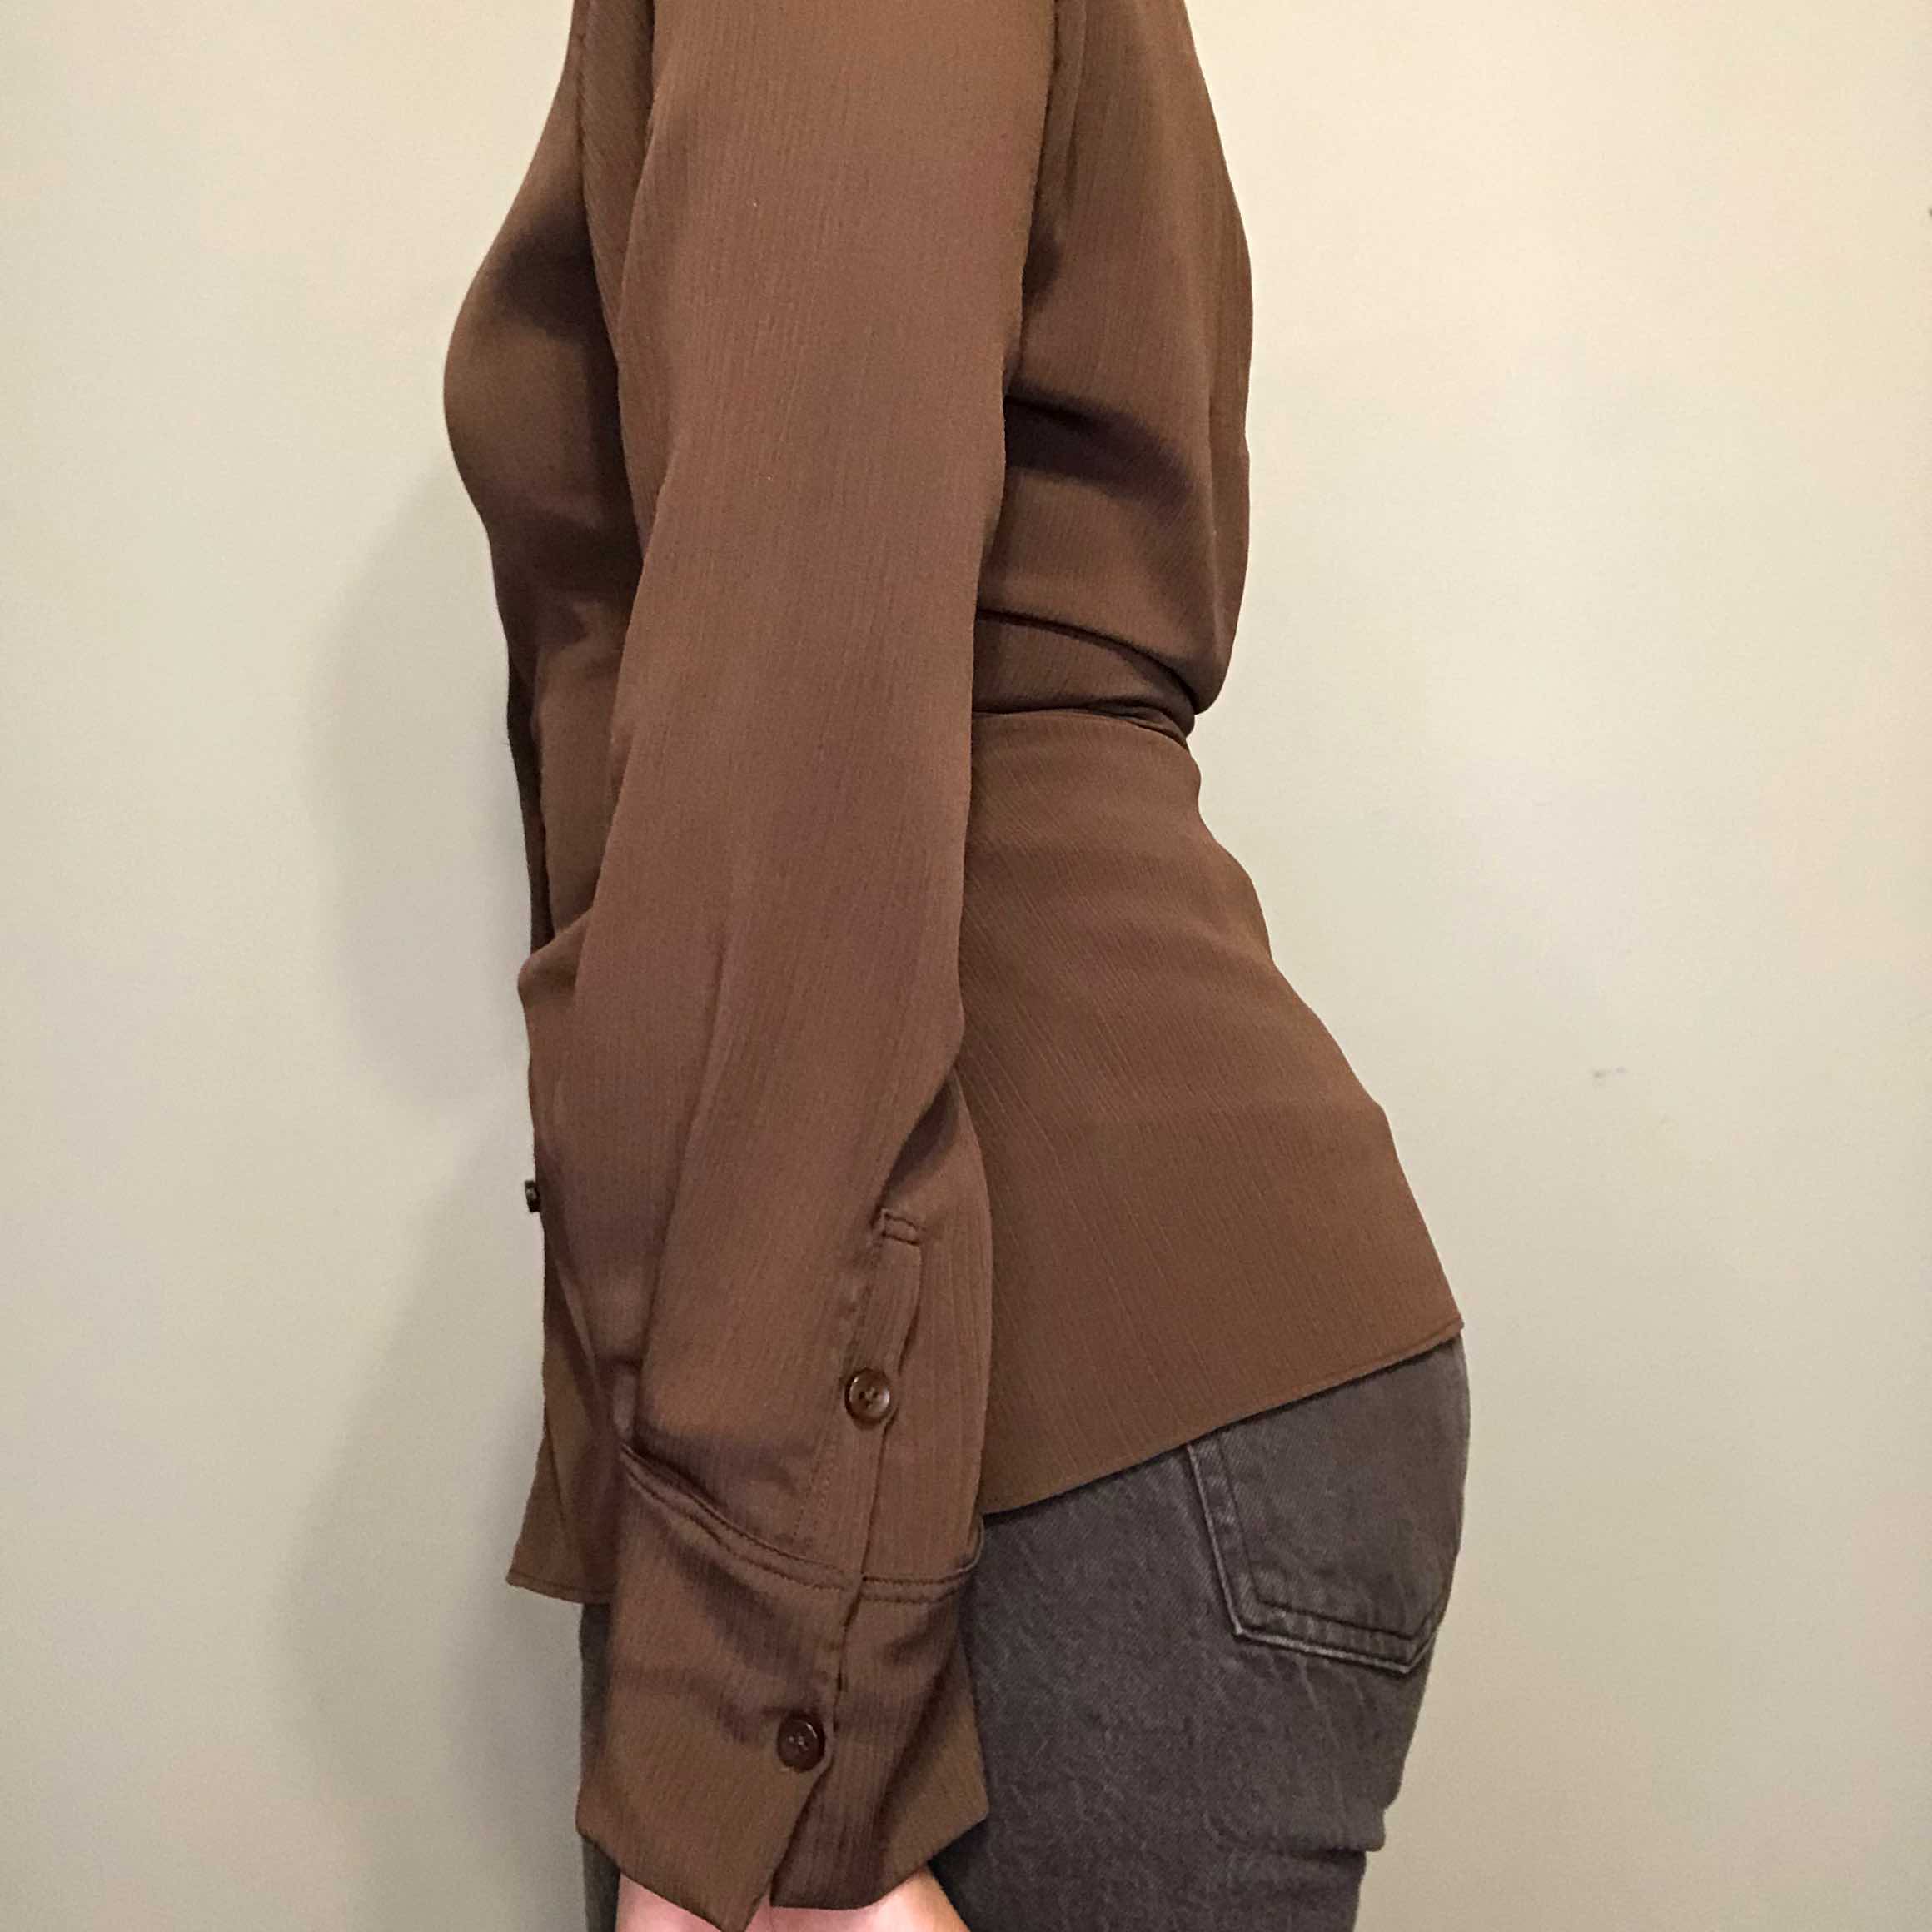
Brown Button-up Shirt
Crafted from crinkle polyester fabric, this button-up shirt boasts a sleek, tight fit. Adorned with coordinating brown buttons along the front closure and cuffs, it exudes a polished yet comfortable style.
- Took me four days to complete
- Completed on July 16, 2023
Materials and Tools
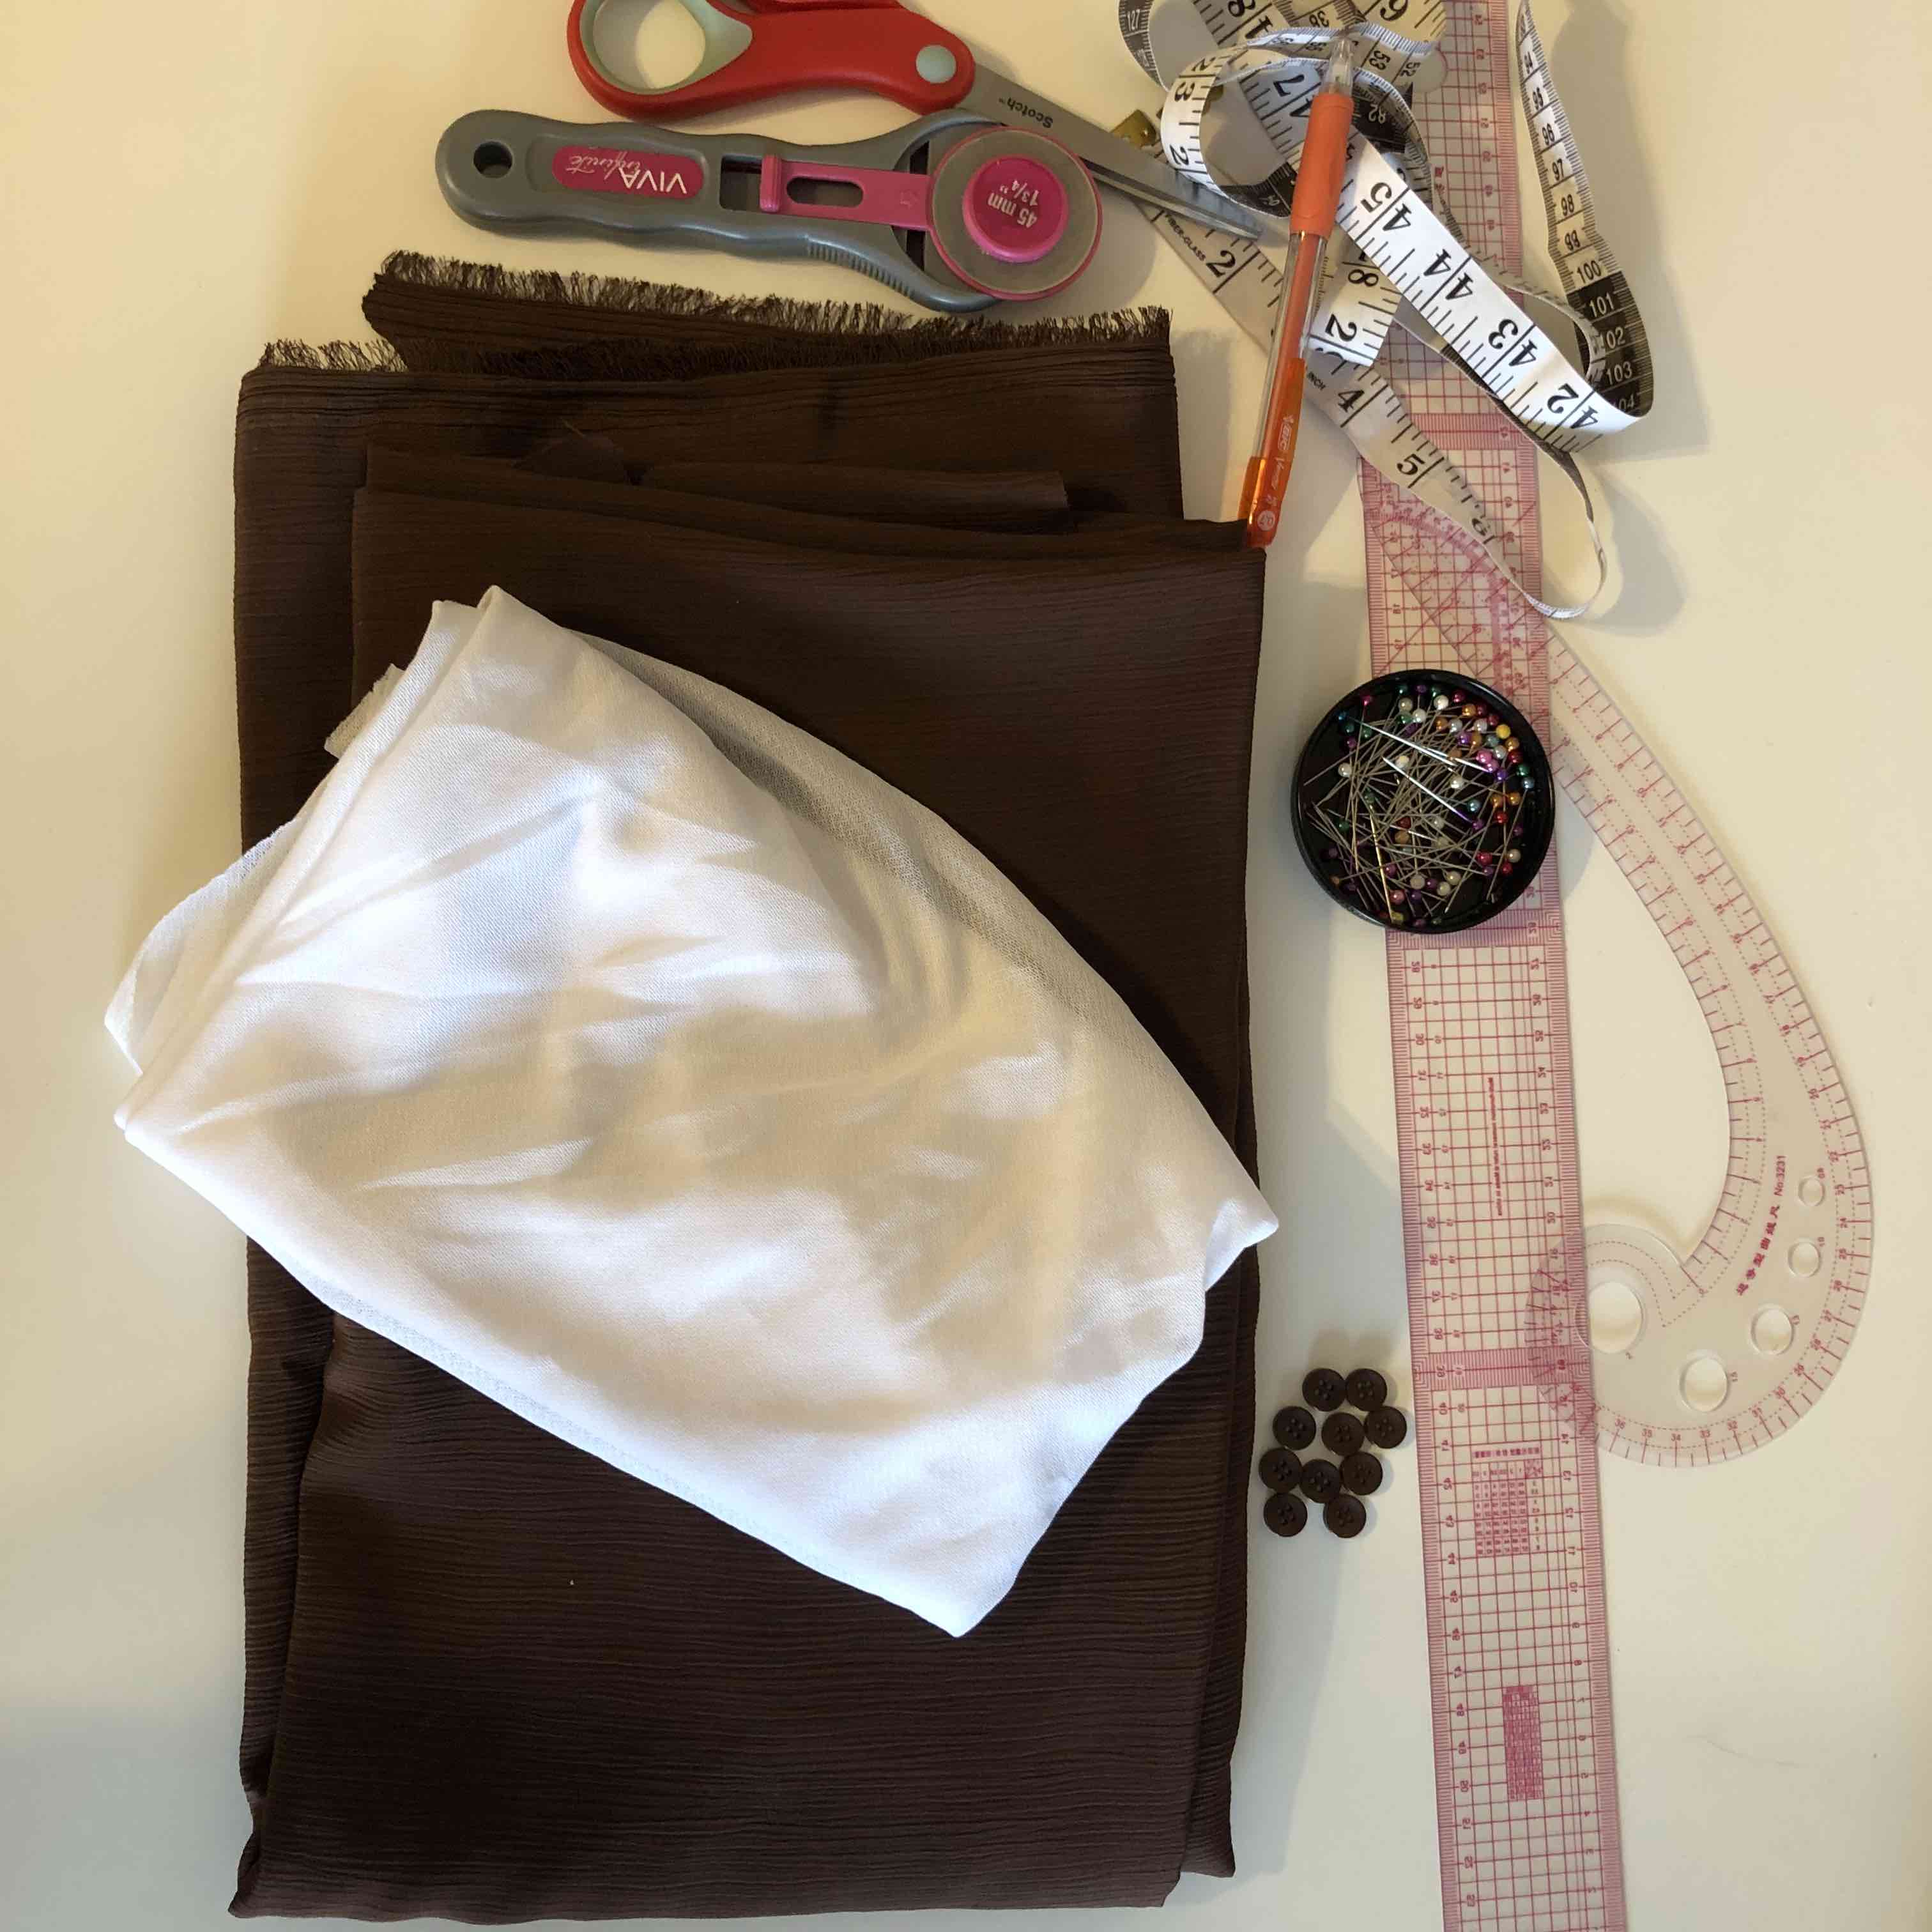
- The fabric I used was a brown crinkle polyester, along with white fusible interfacing from Fabric Wholesale Direct. Additionally, I utilized small brown buttons purchased on Amazon.
- The tools employed include brown polyester thread (in the shade Espresso), a Brother sewing machine, pins, scissors, a rotary cutter, measuring tape, and a ruler.
Assembly Process
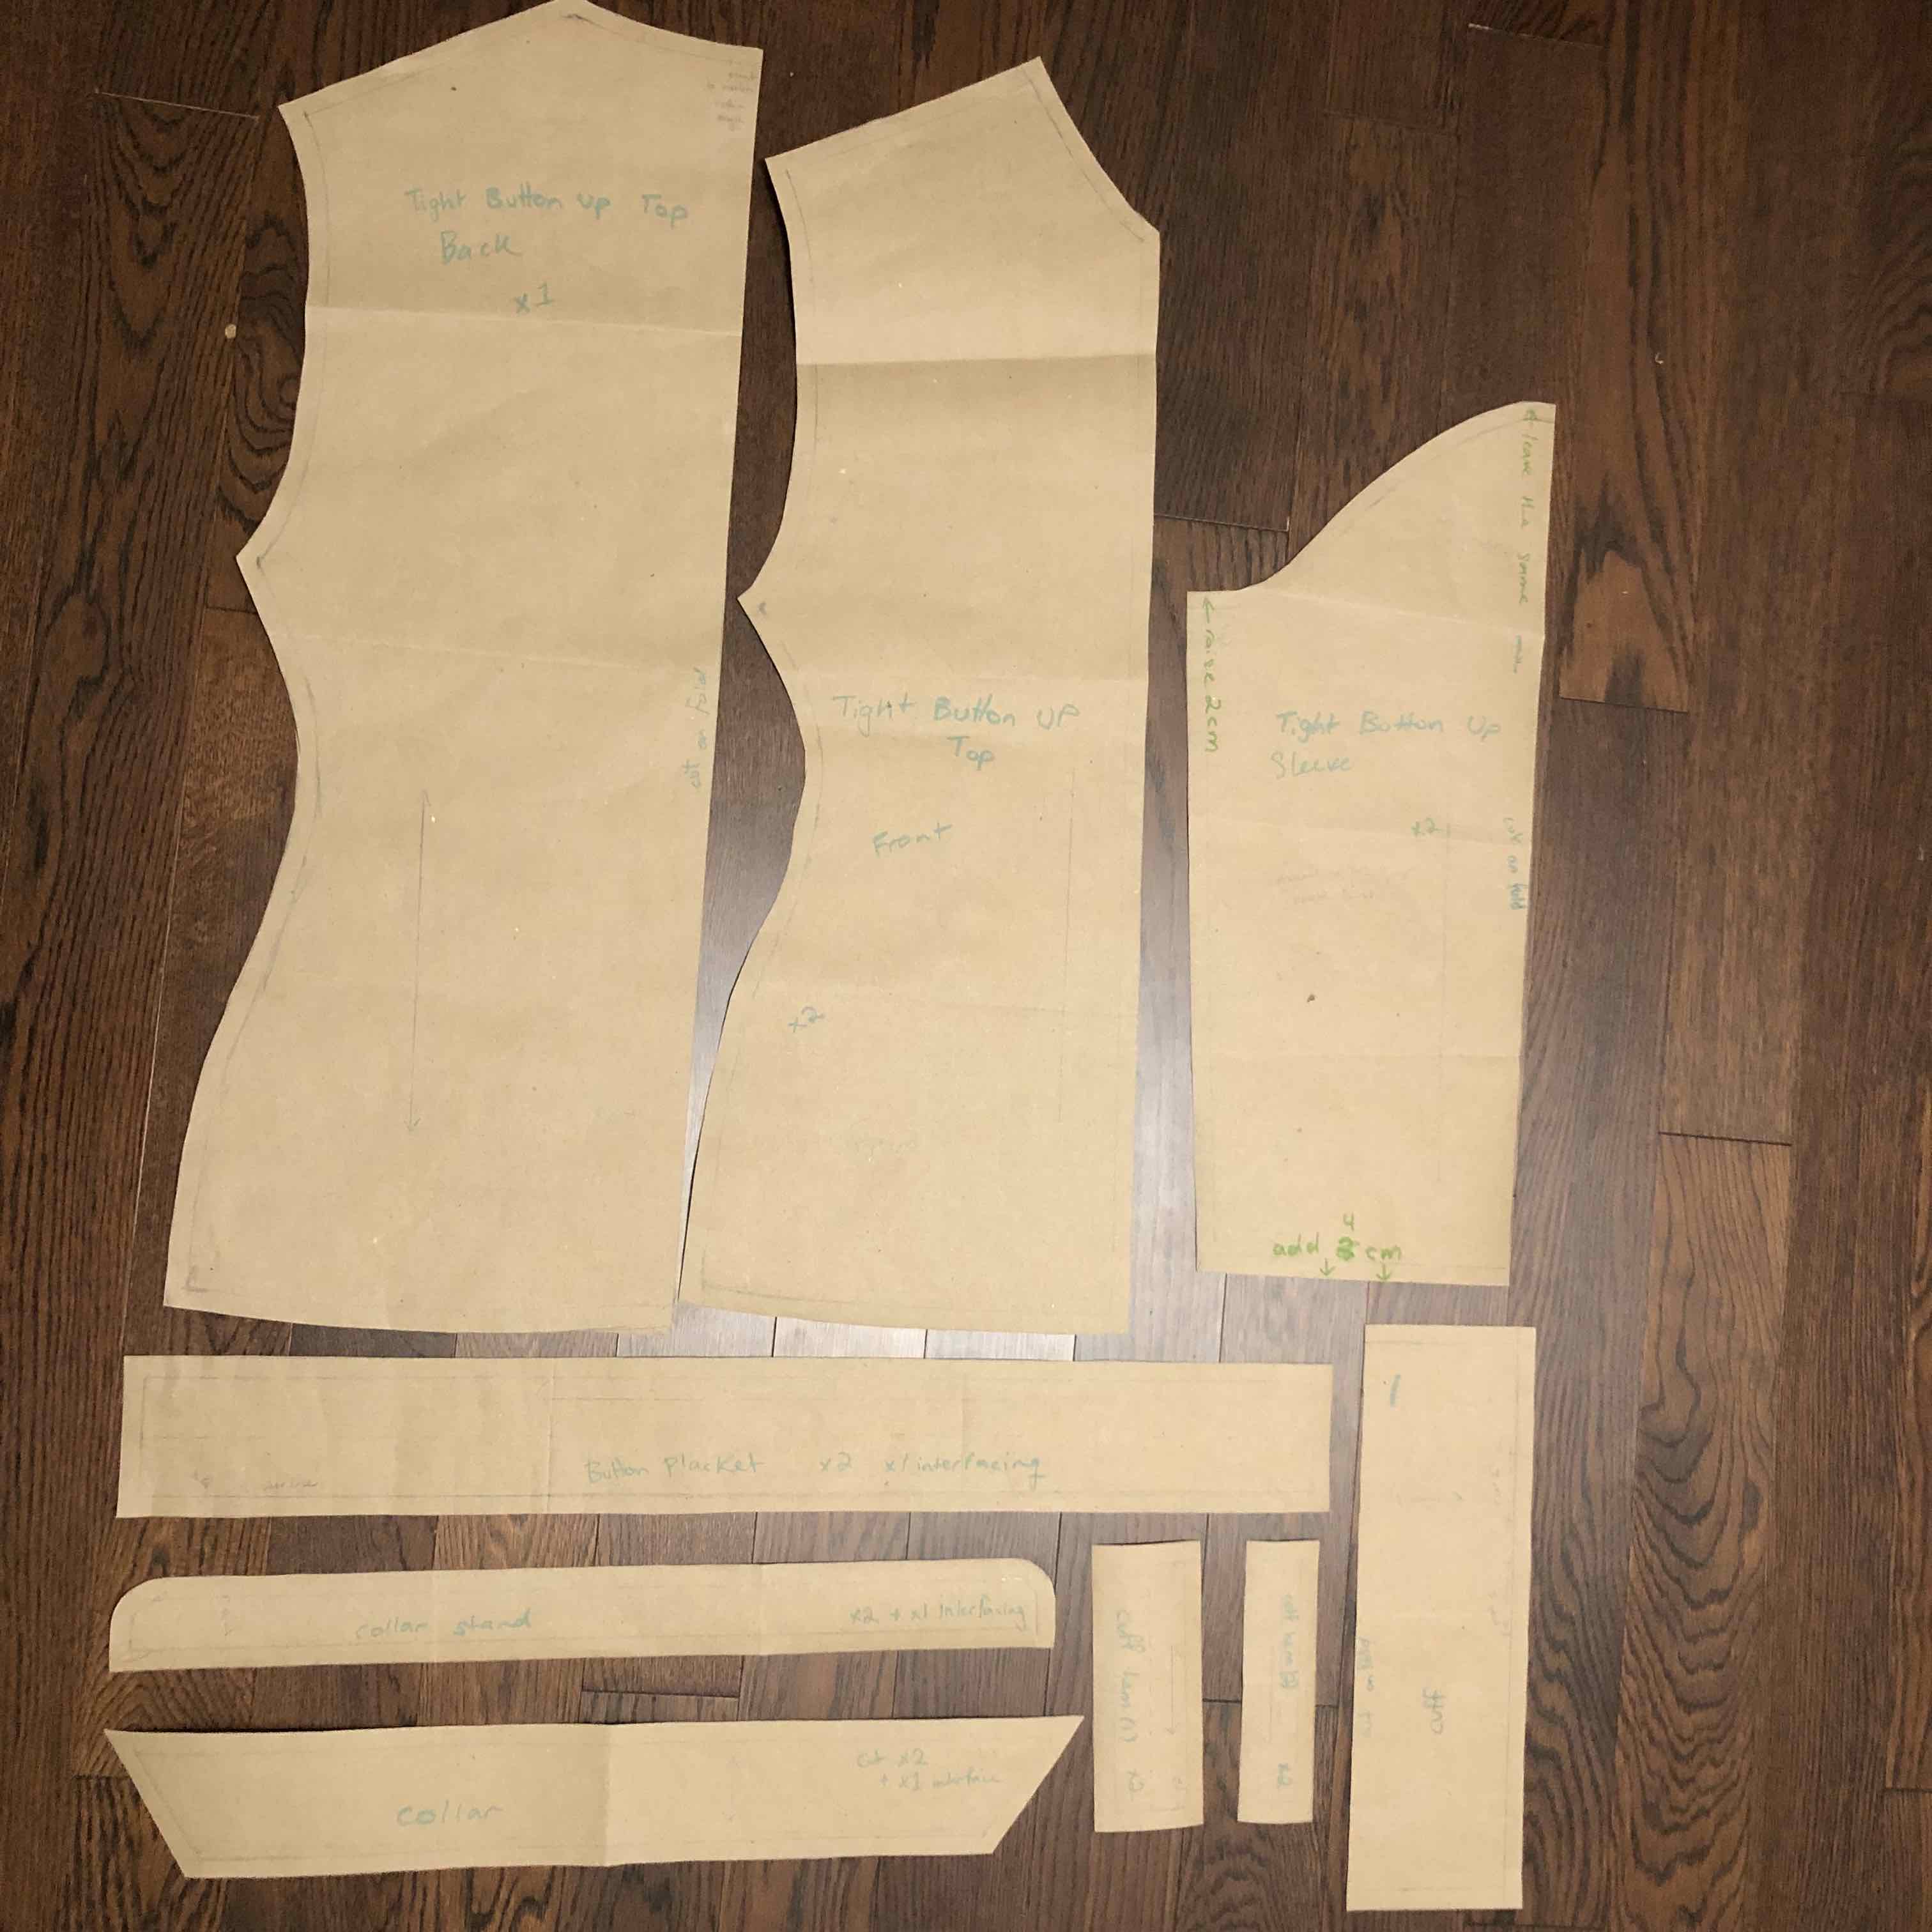

- I drafted the paper pattern for this shirt using a button-up shirt belonging to my sister, Alexa. I traced and adjusted all necessary pieces, ensuring precise alignment during the sewing process.
- After cutting out all the fabric pieces, I began assembling the garment by first attaching the back of the shirt to the two front pieces.
- Then, I added fusible interfacing to the collar, cuffs, and front button tape to enhance their structure.
- Following this, I affixed the two button tapes to the front shirt pieces.
- The collar was then constructed by joining the two collar pieces to the collar stand pieces and attaching it to the front and back of the shirt.
- I refined the cuff slit details and attached the cuffs to the sleeves before joining the sleeves to the shirt.
- Finally, I used the sewing machine to create buttonholes on the front button tape and cuffs. Additionally, I hand-sewed all 11 buttons to complete the shirt.
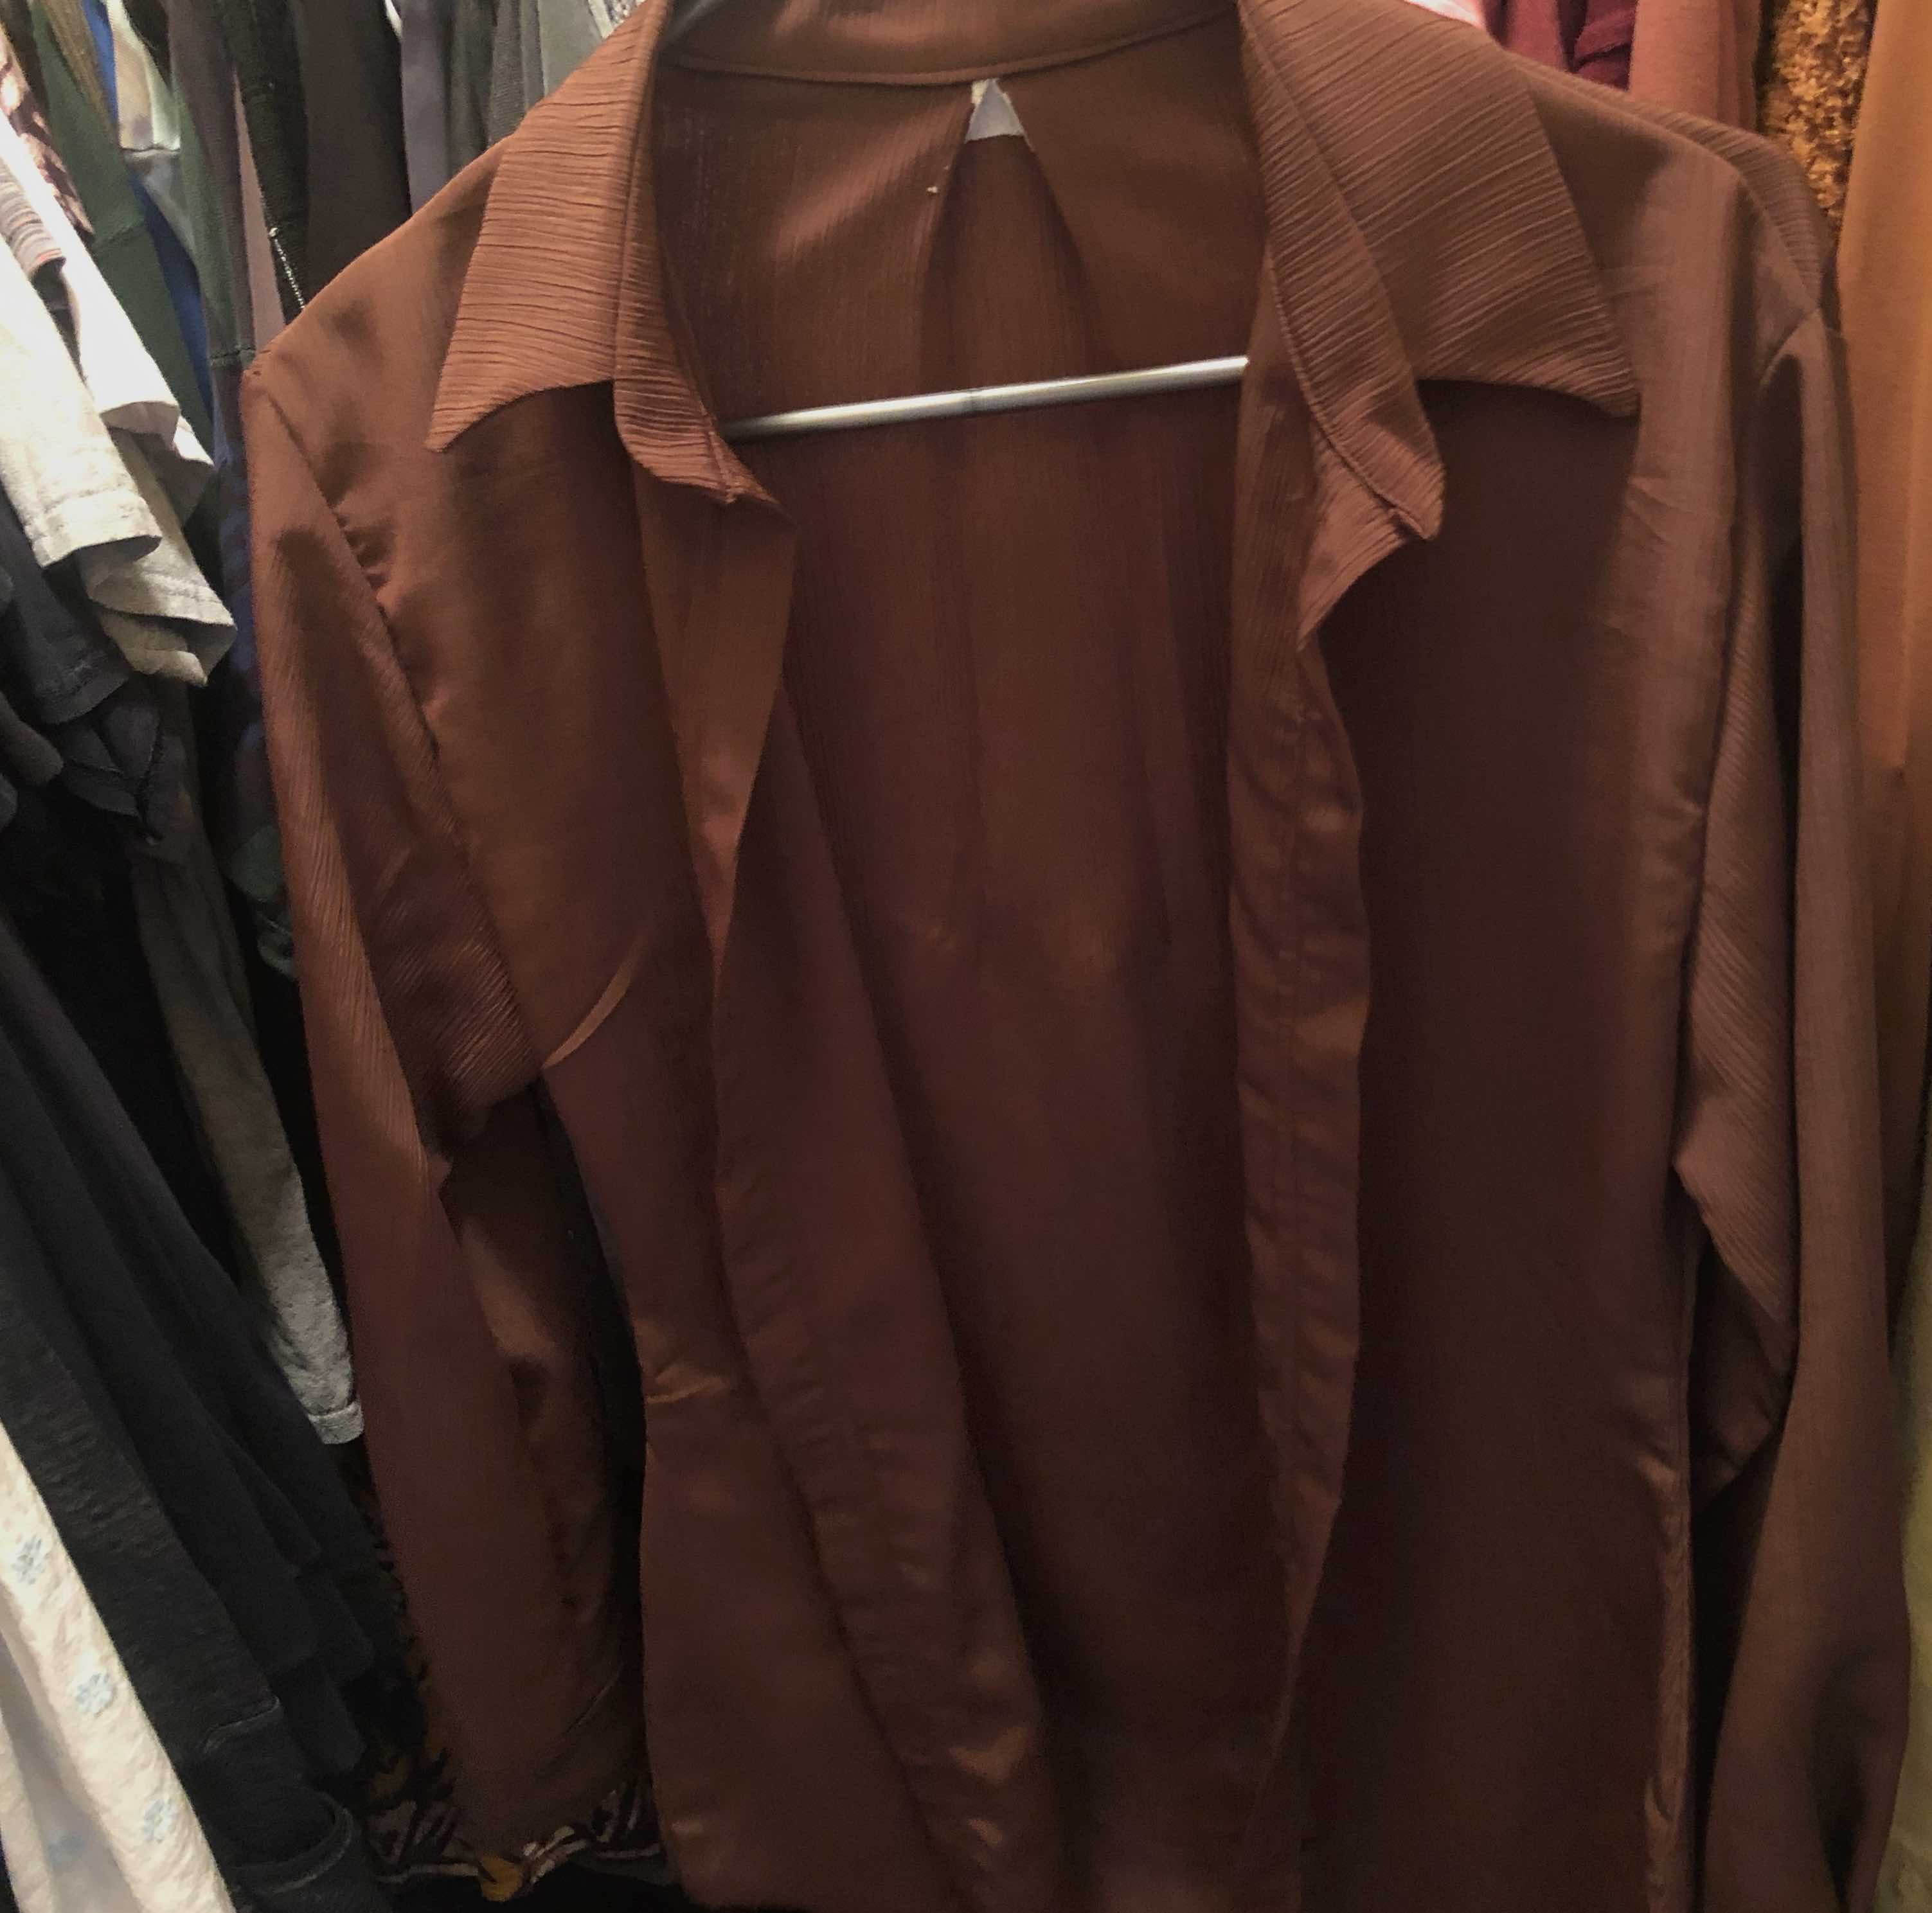
Inspiration/Reference Photo
- This black button-up is the shirt I used to design the paper pattern pieces
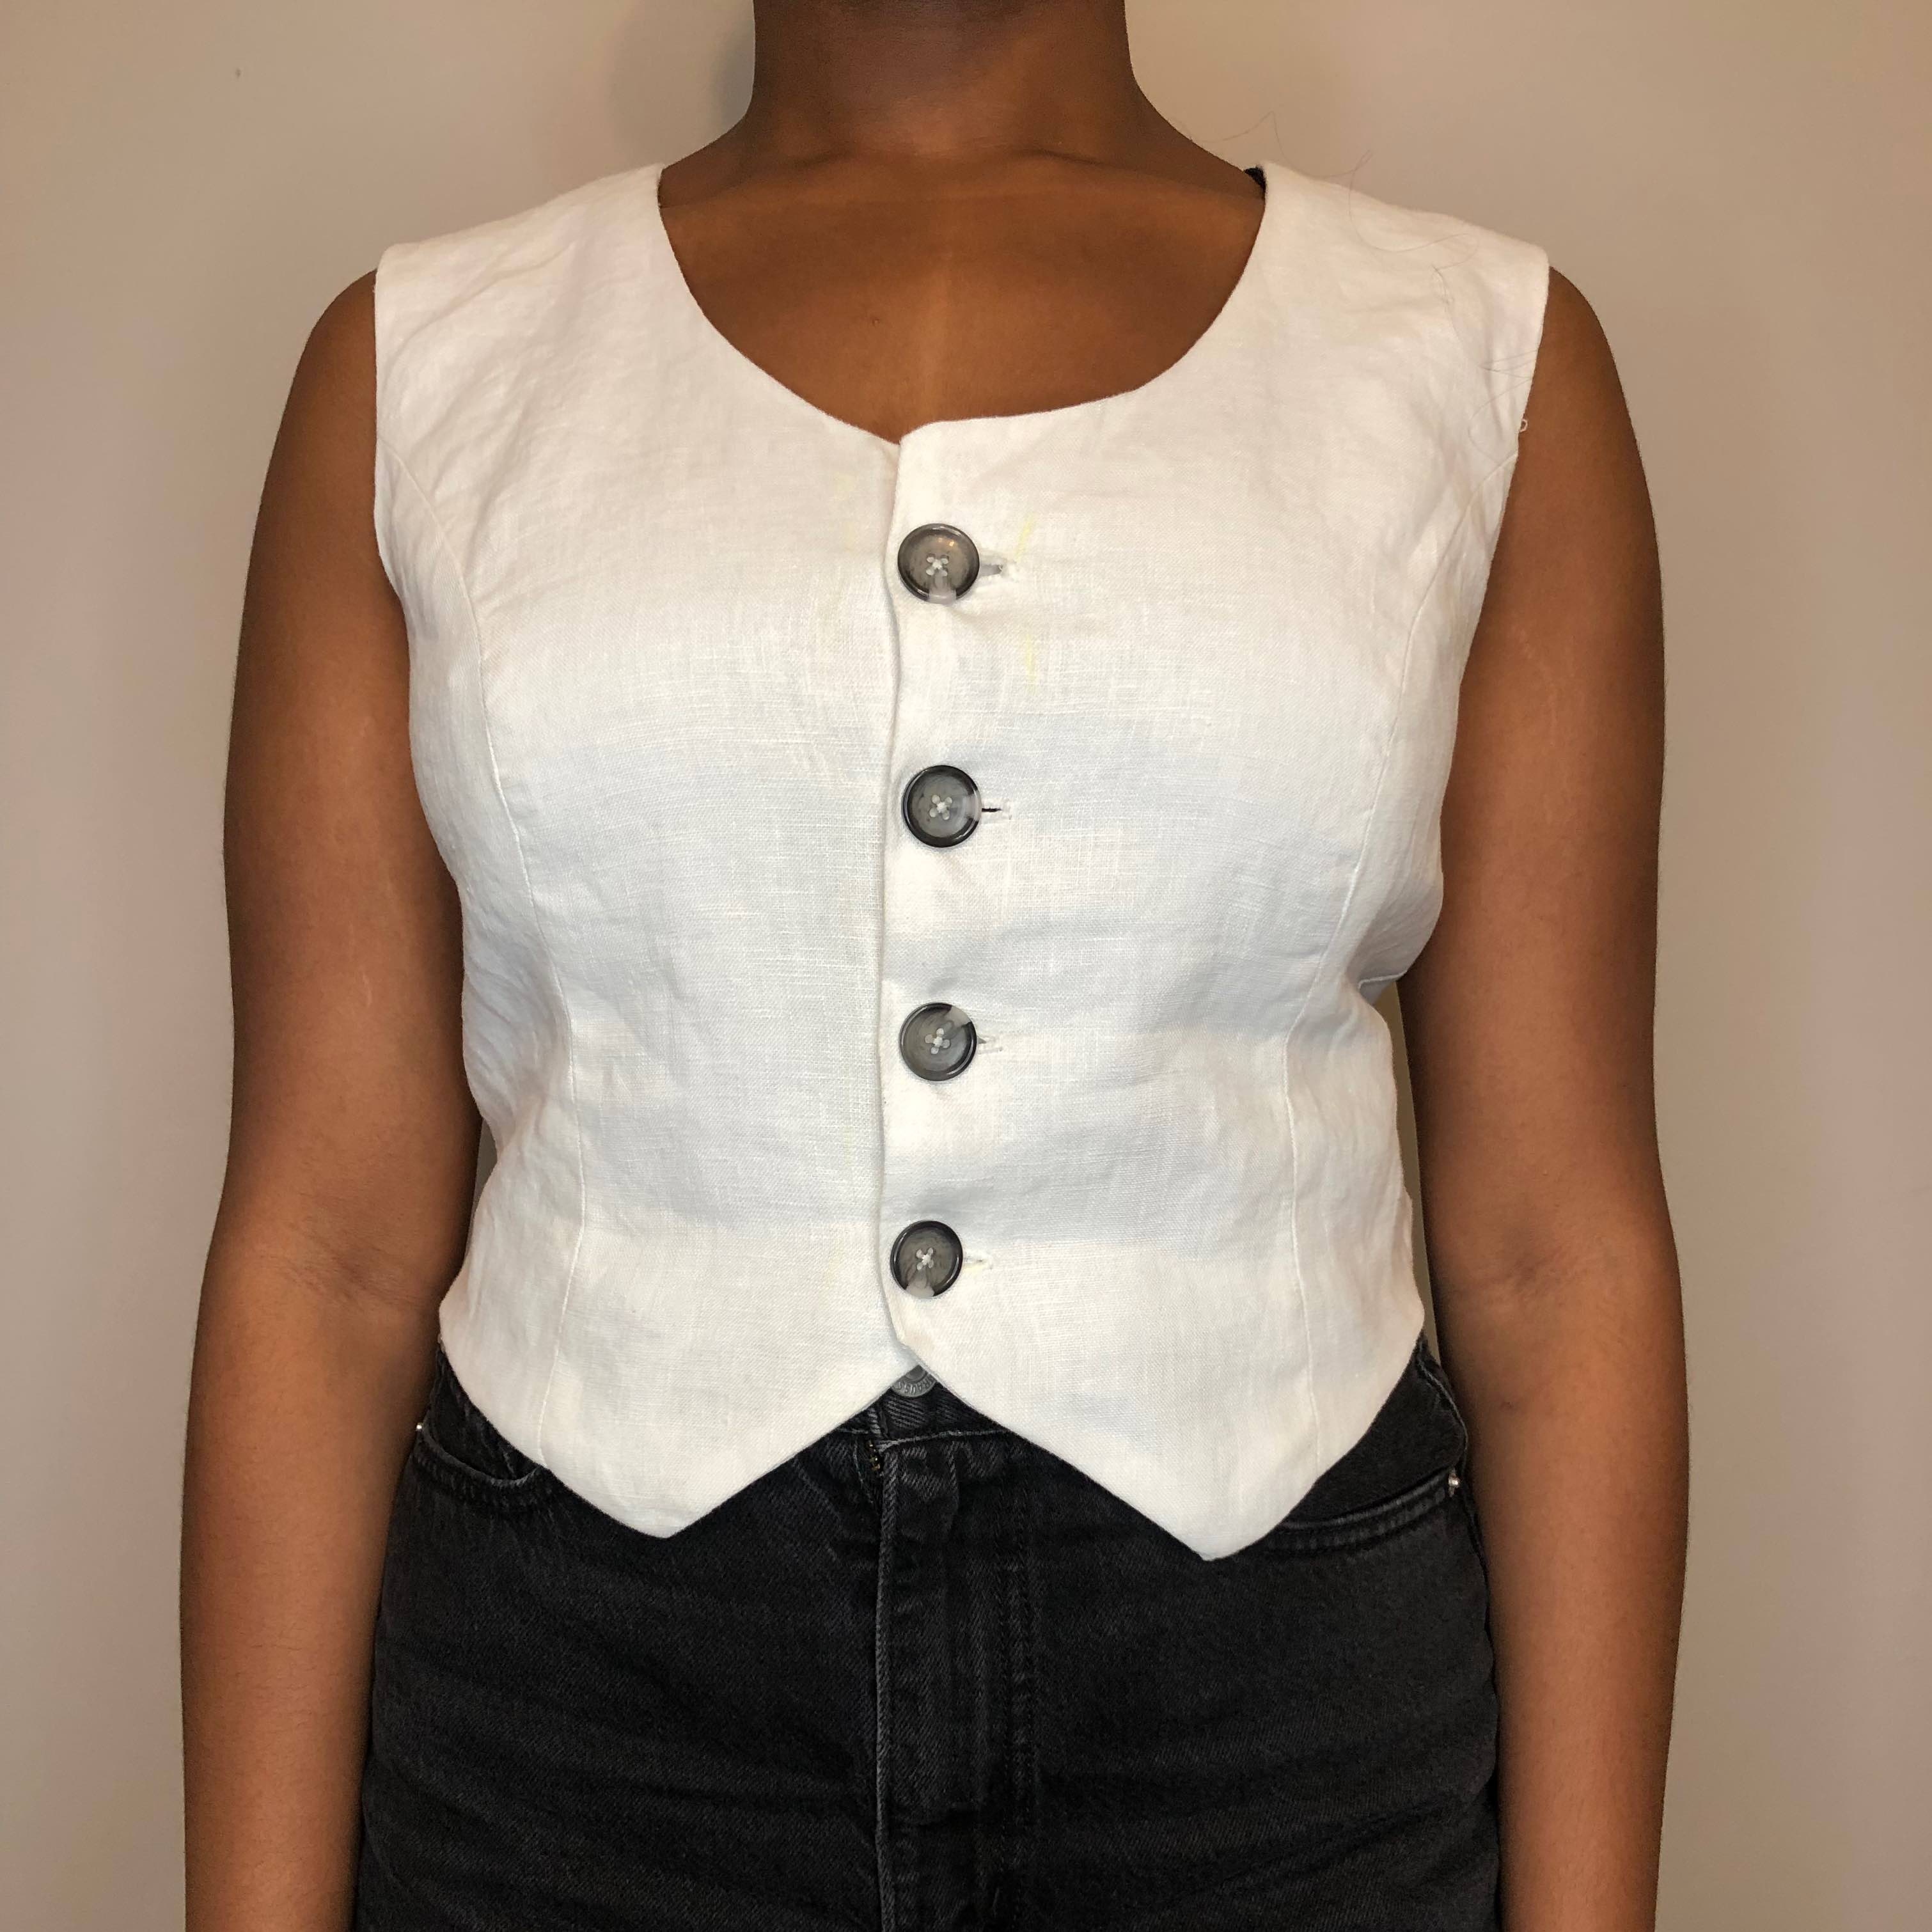
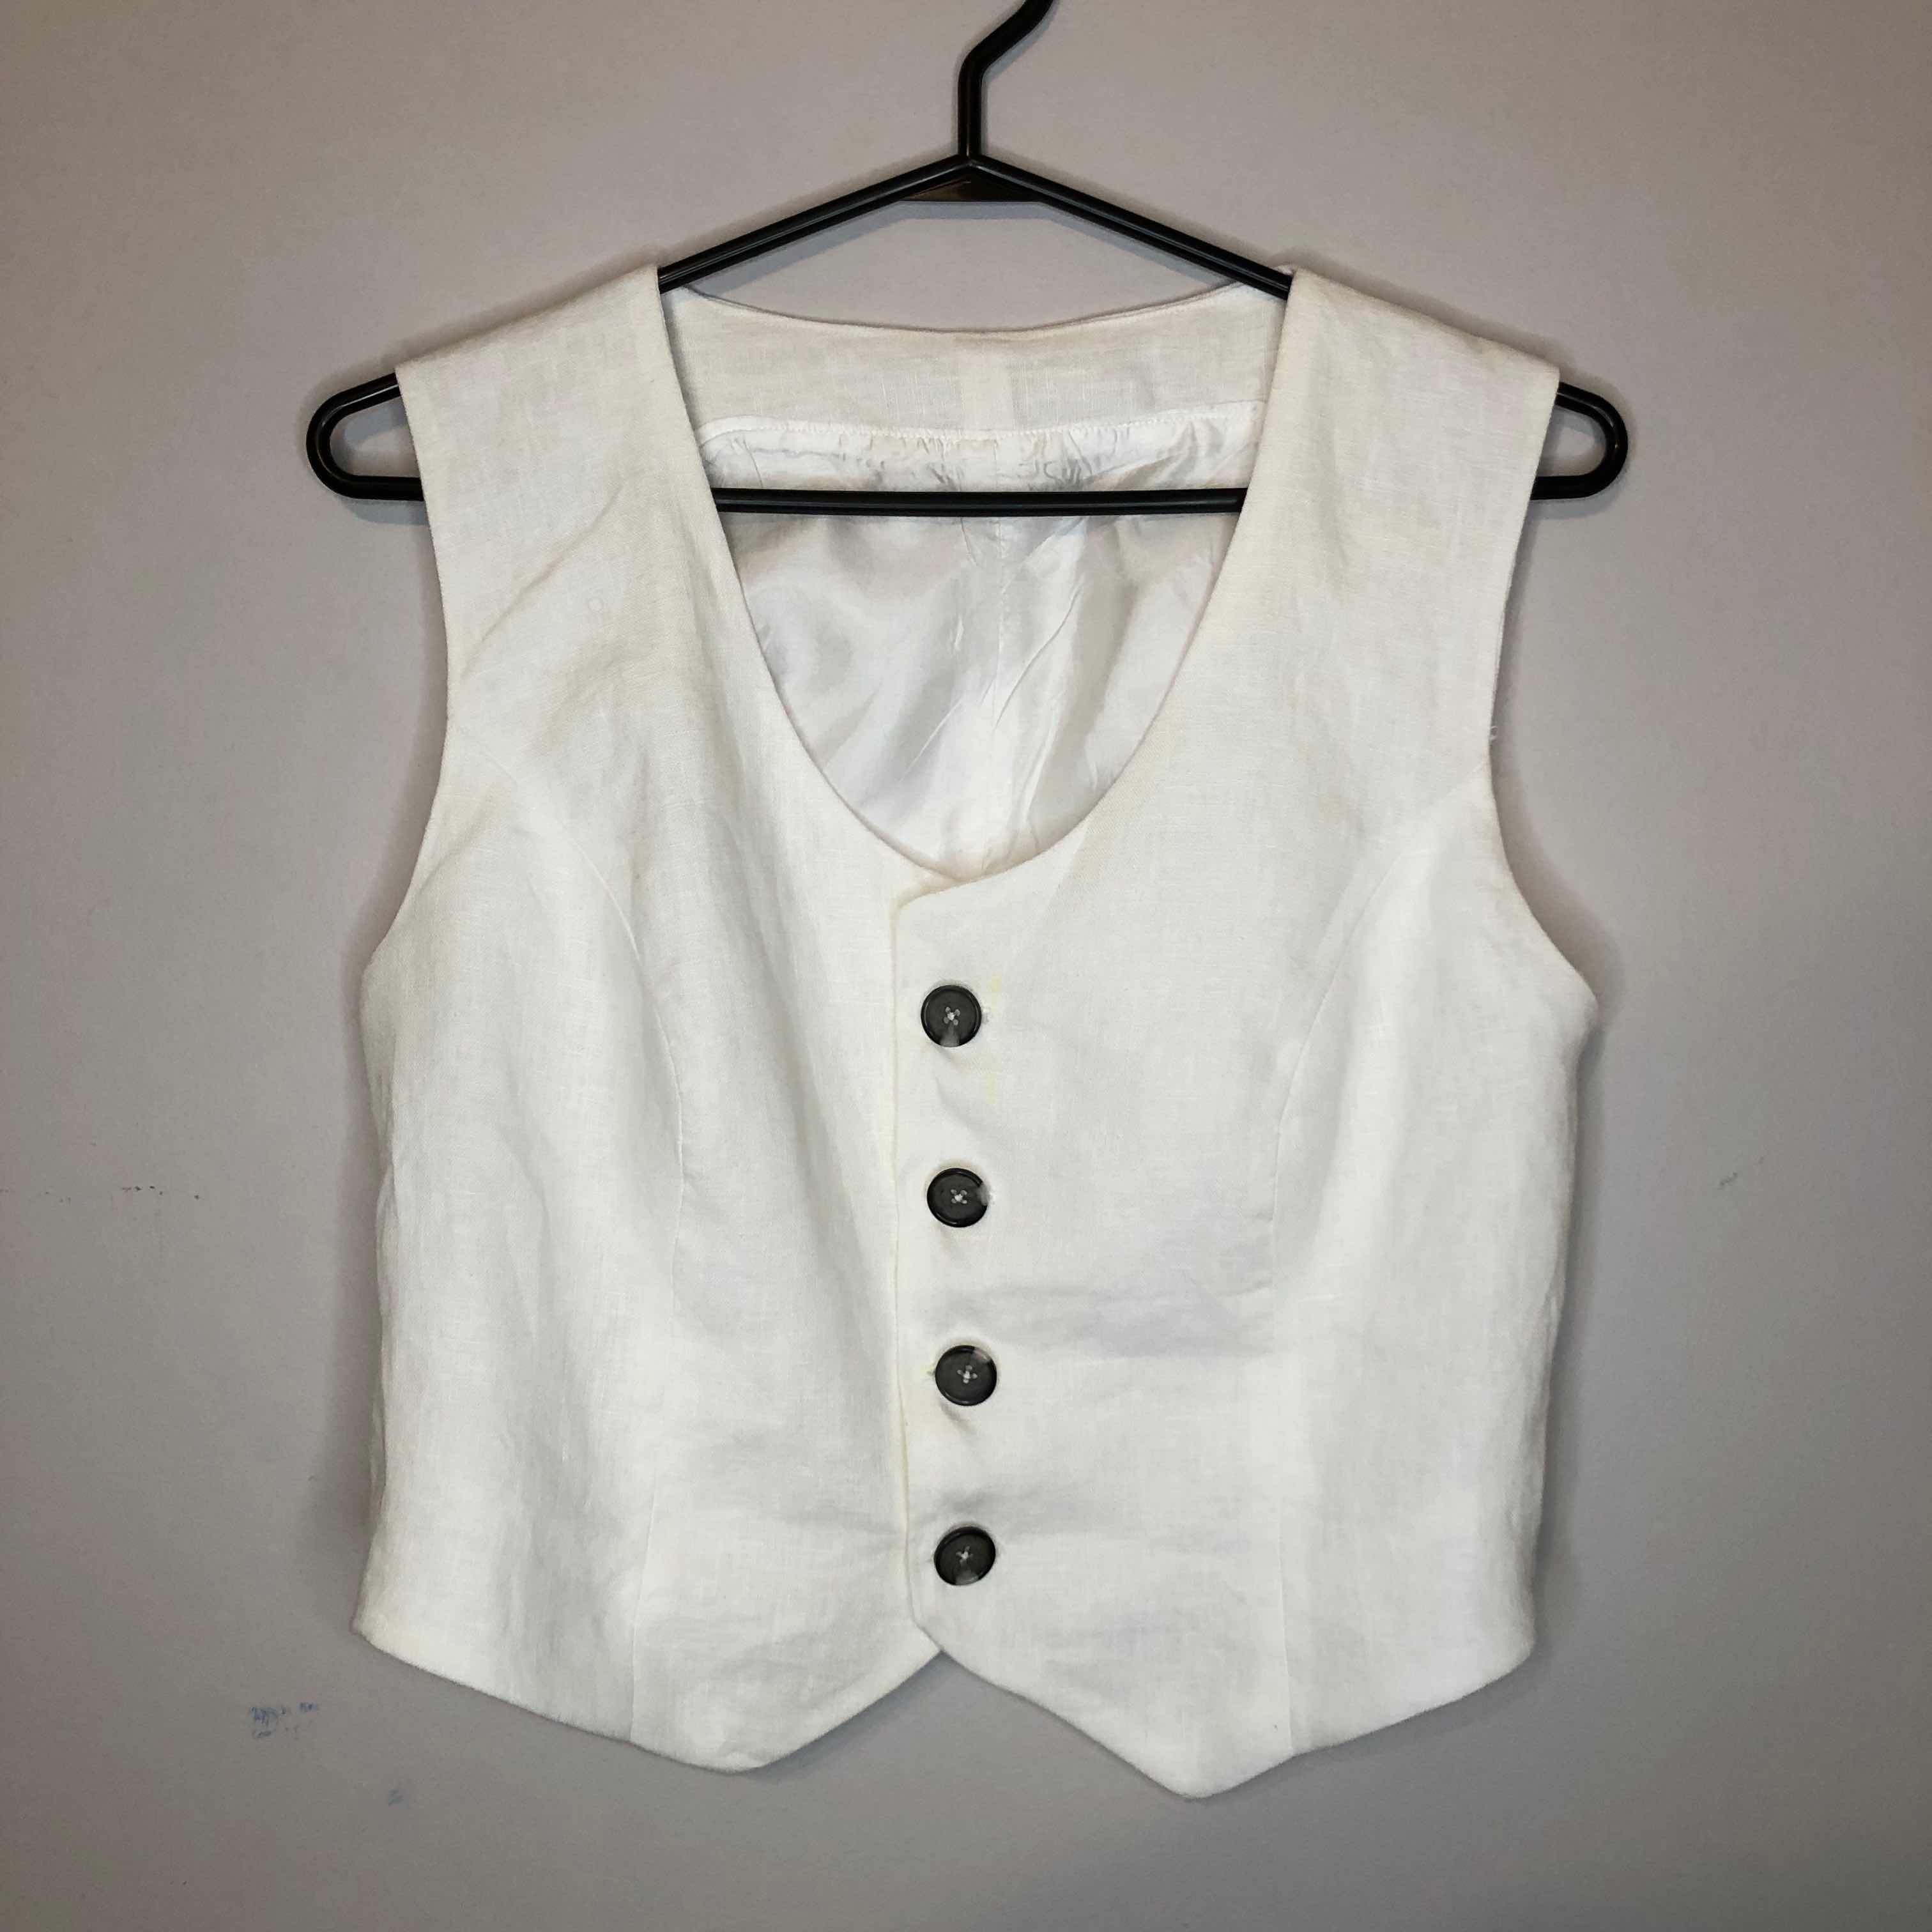
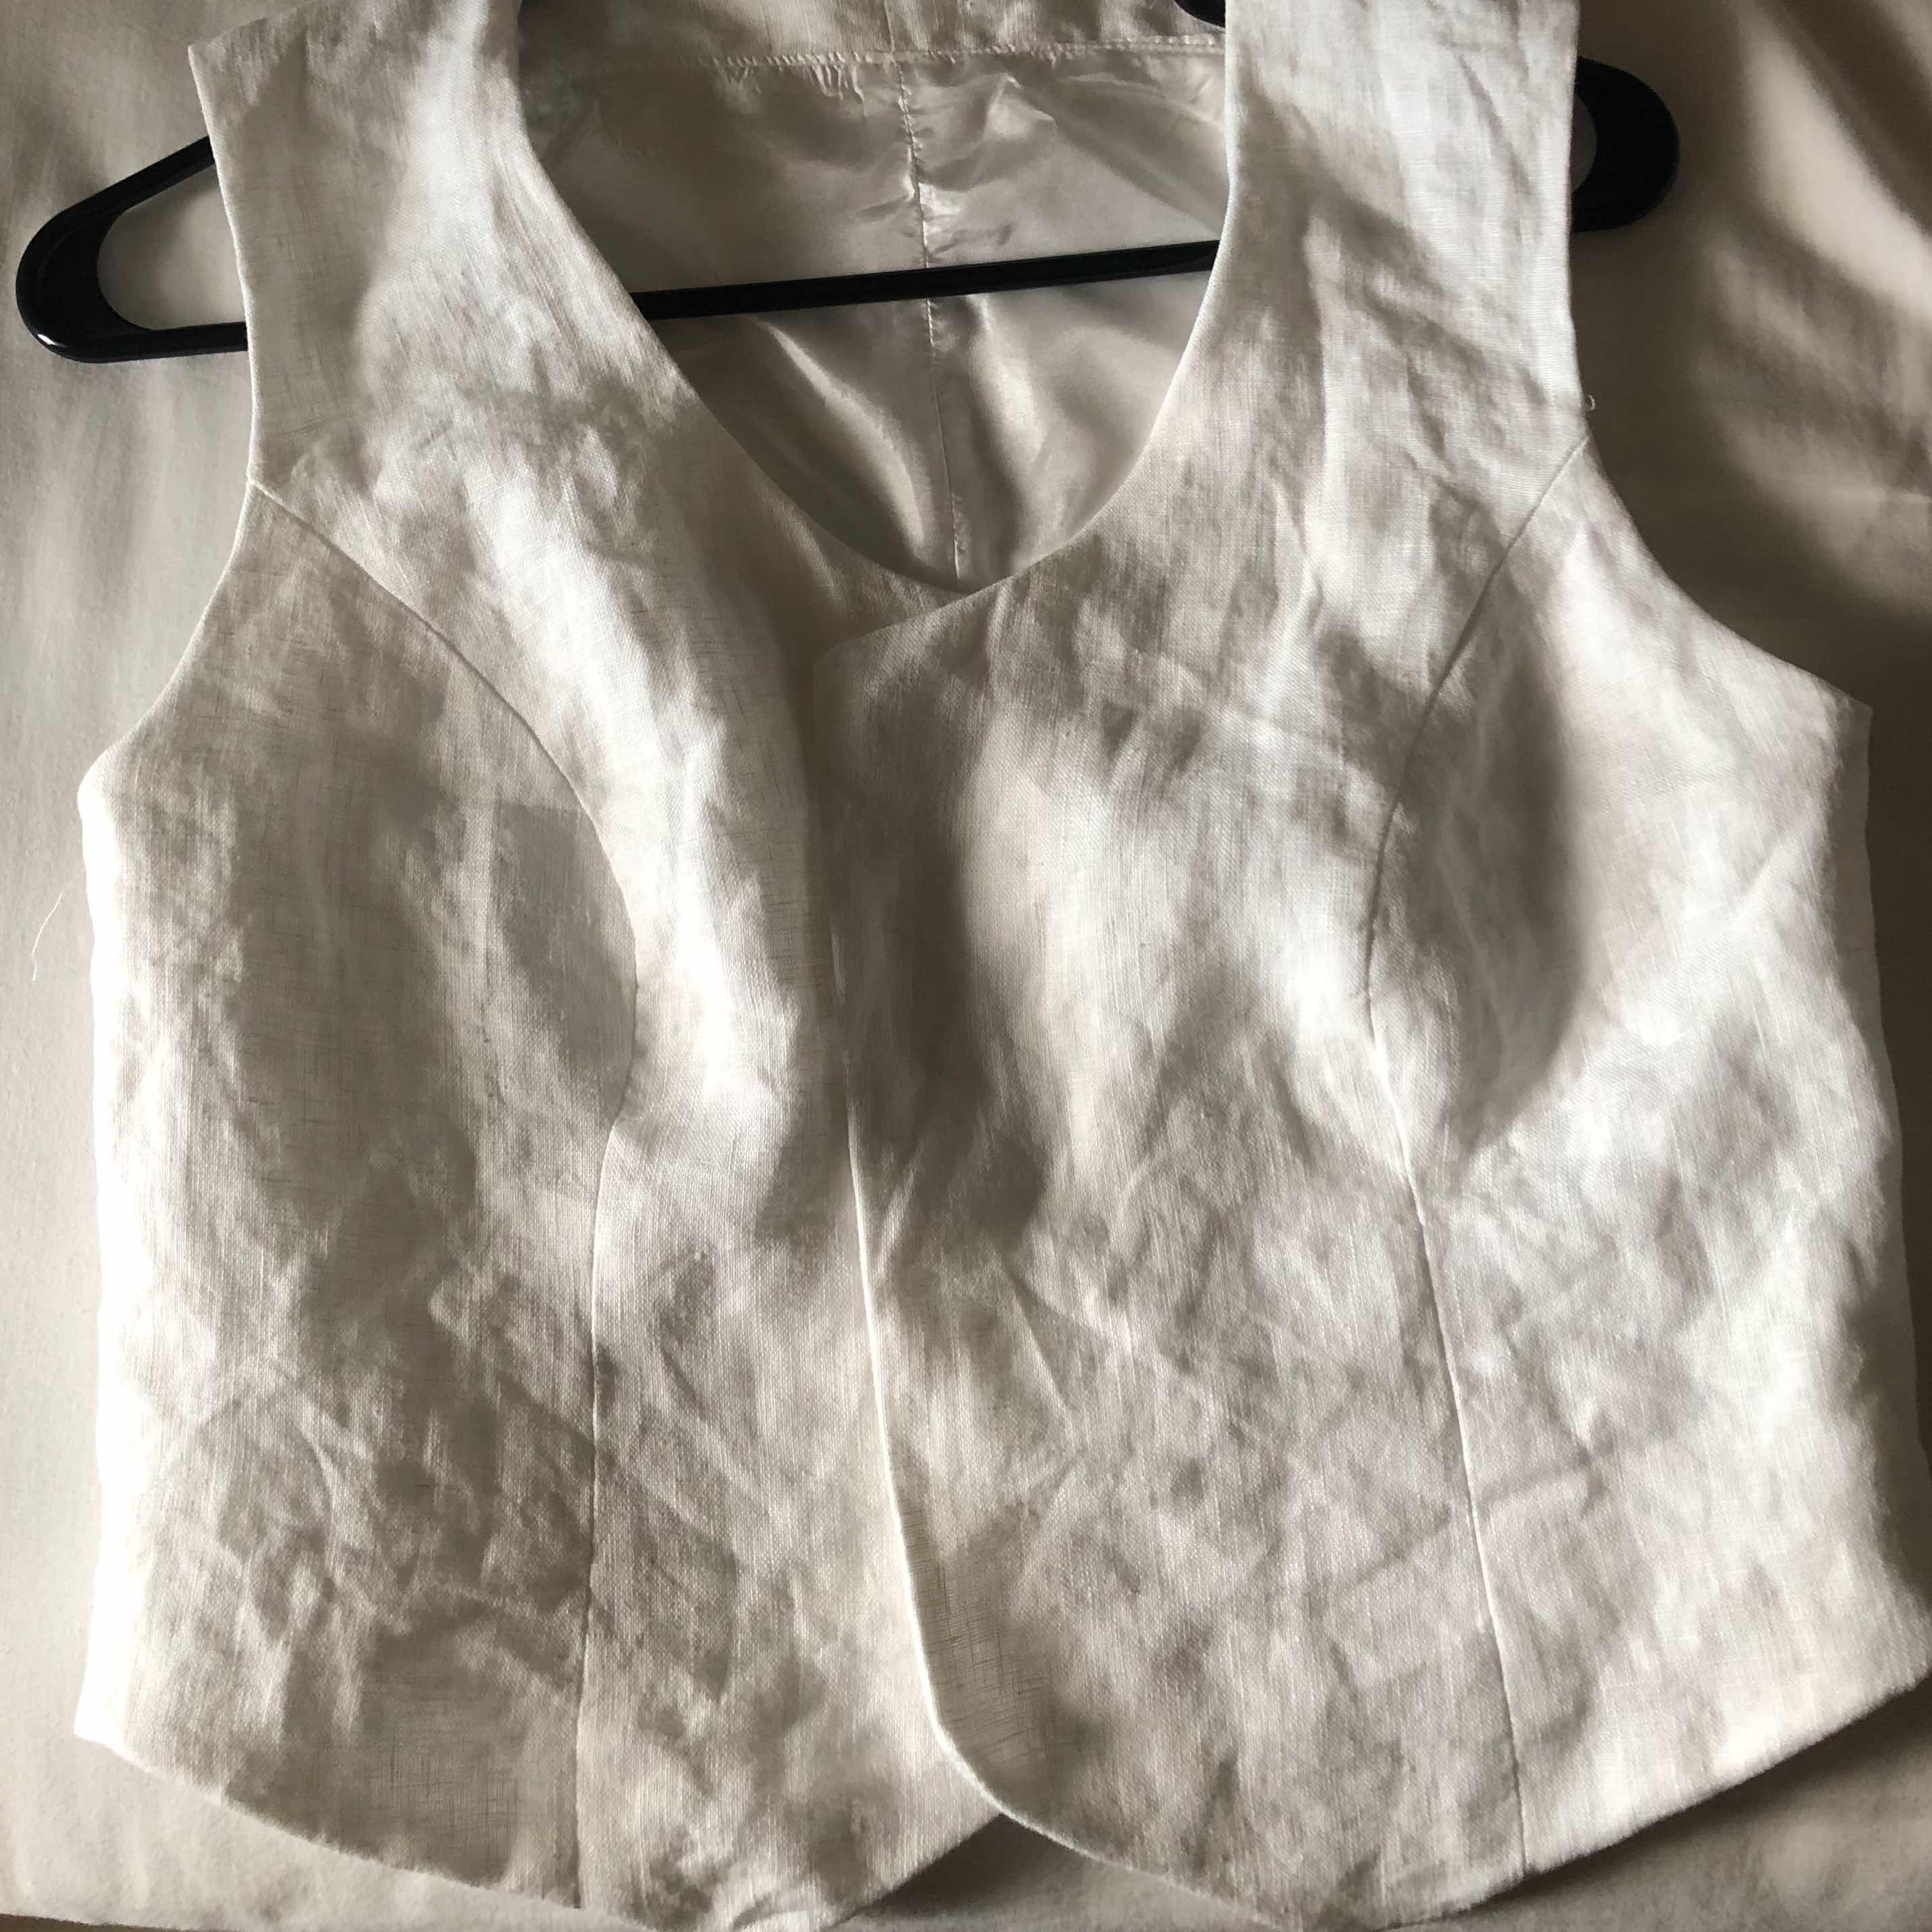
White Linen Vest
Tailored vest crafted from white natural woven linen, elegantly lined with soft white polyester silk. Adorned with four grey and white buttons on the front for a refined finishing touch.
- Took me seven days to complete
- Completed on July 31, 2023
Materials and Tools
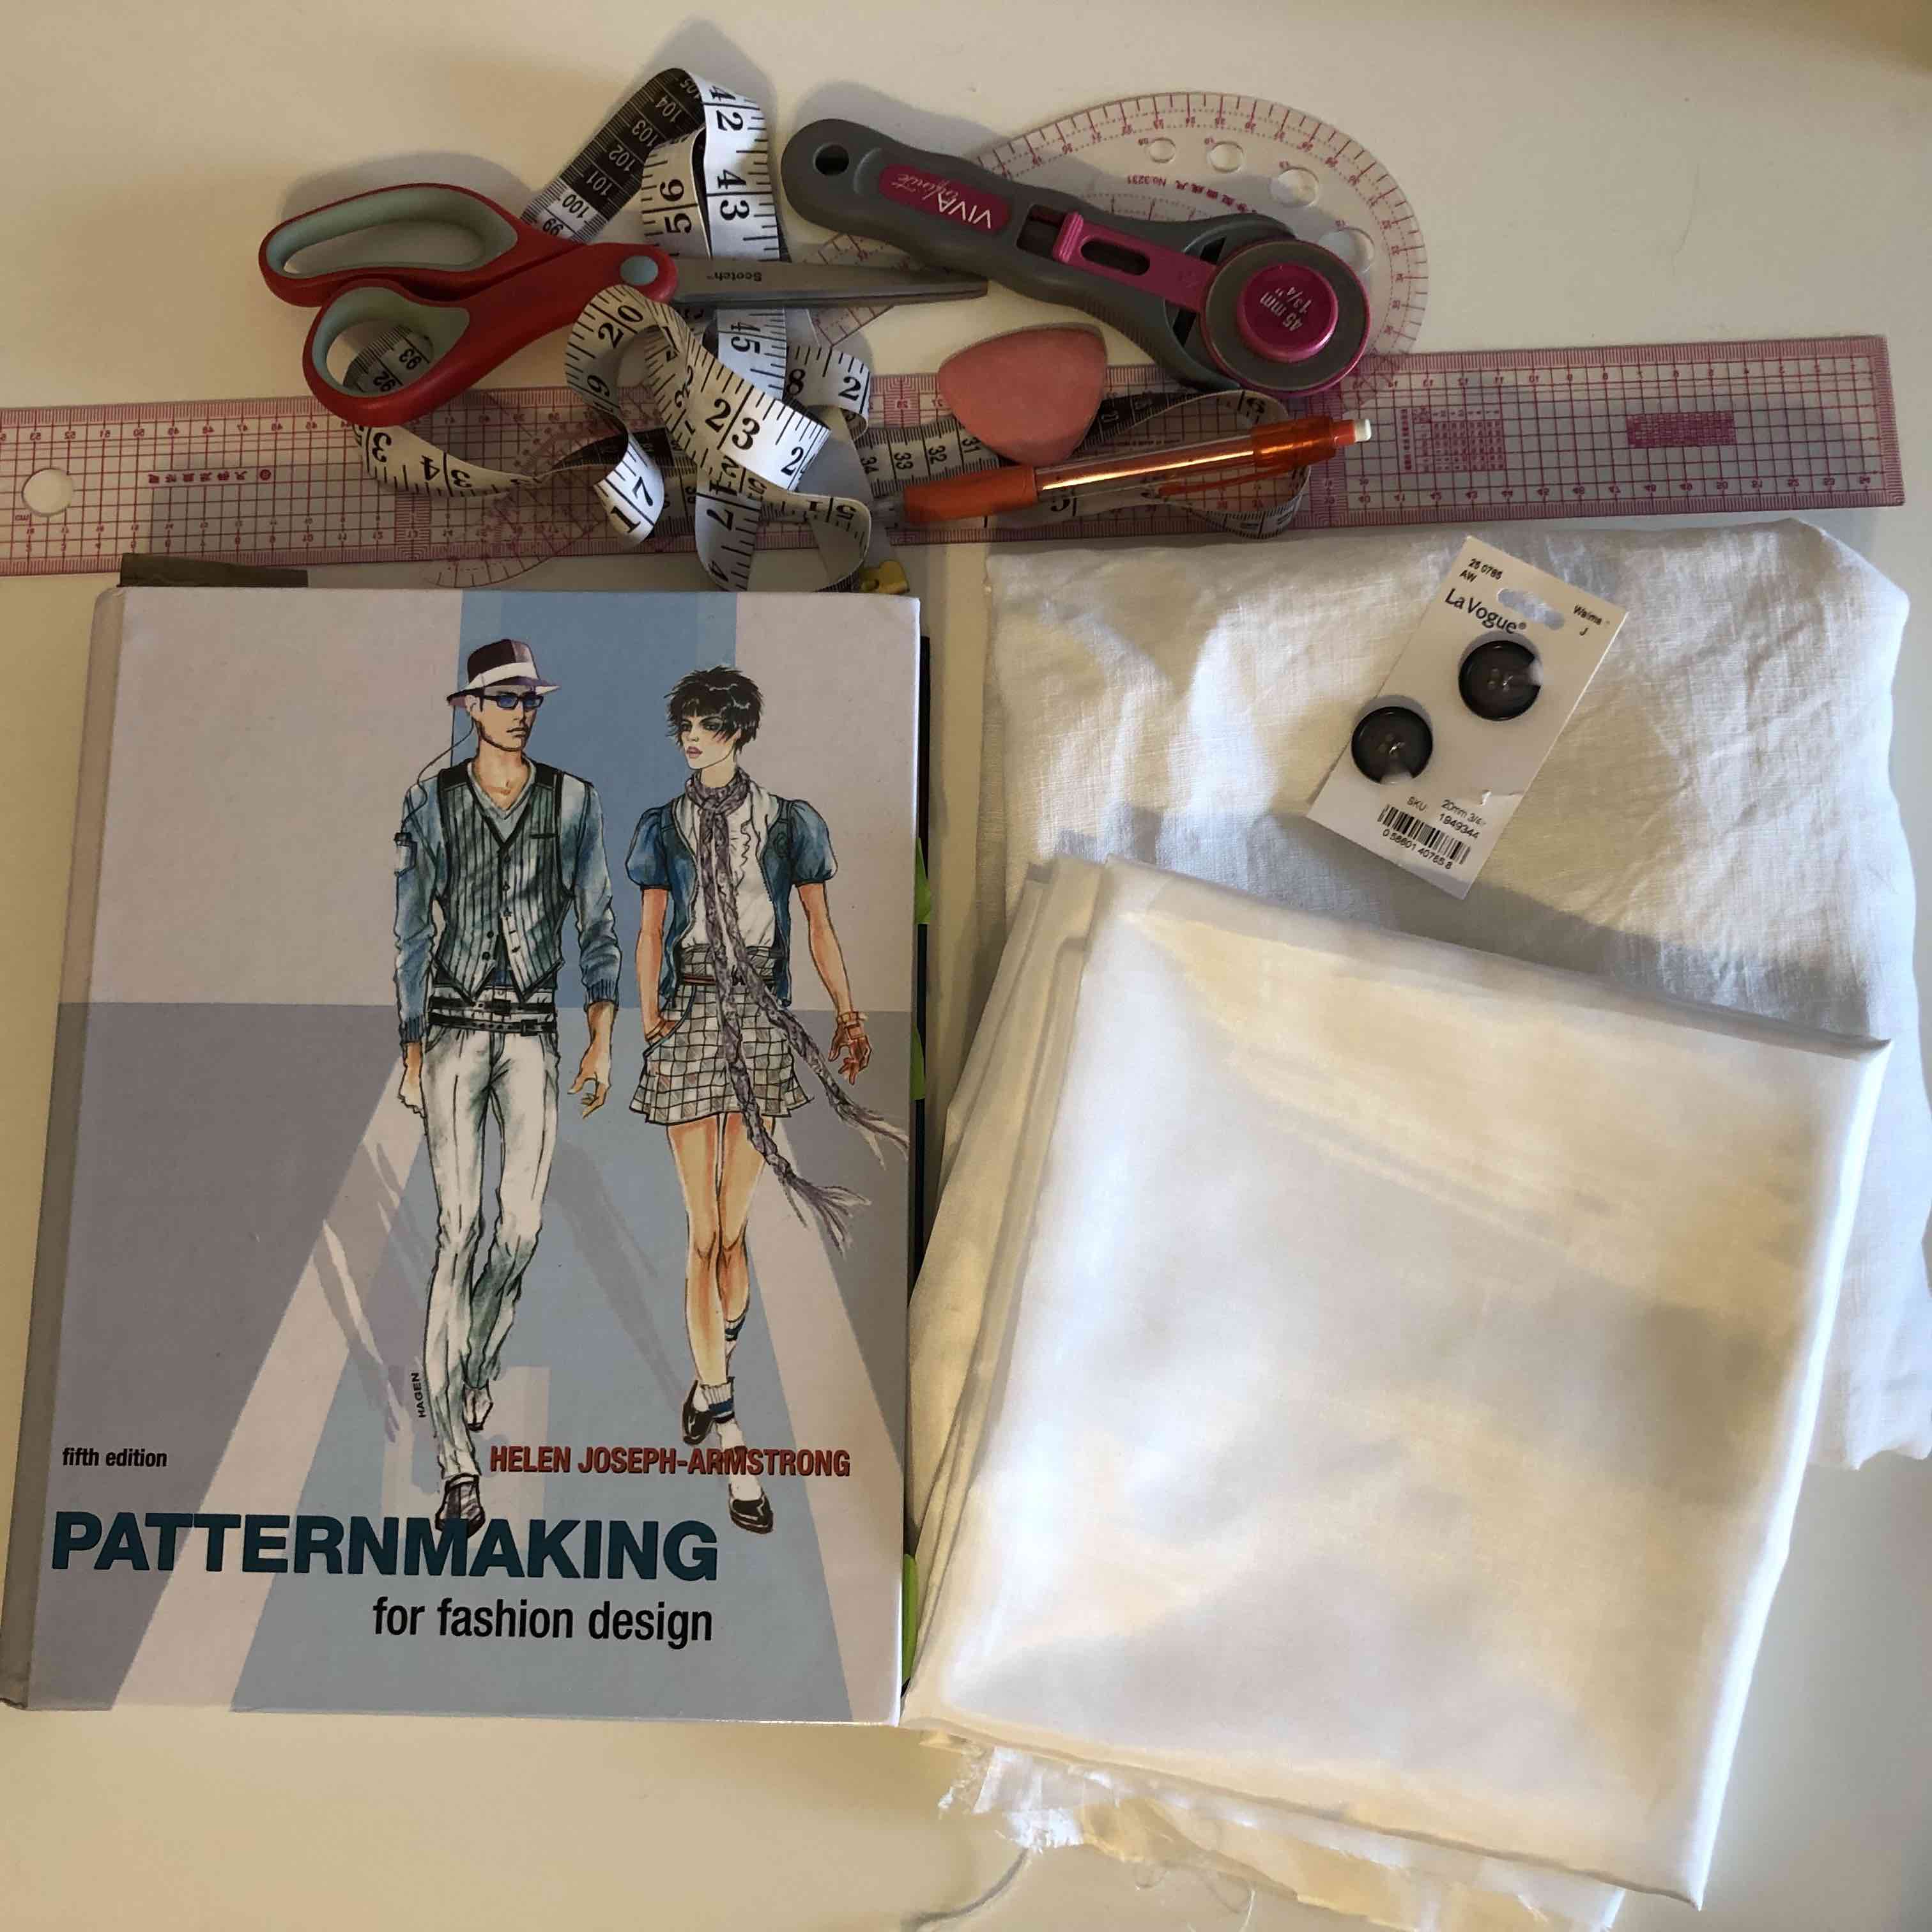
- I utilized 1 yard of white natural woven linen and 1/2 yard of white polyester silk lining, both sourced from Fabric Wholesale Direct. The 20mm grey and white buttons were purchased from Walmart.
- The tools employed for this project include white polyester thread, a Brother sewing machine, pins, scissors, a rotary cutter, measuring tape, a straight ruler, and a curved ruler.
Assembly Process
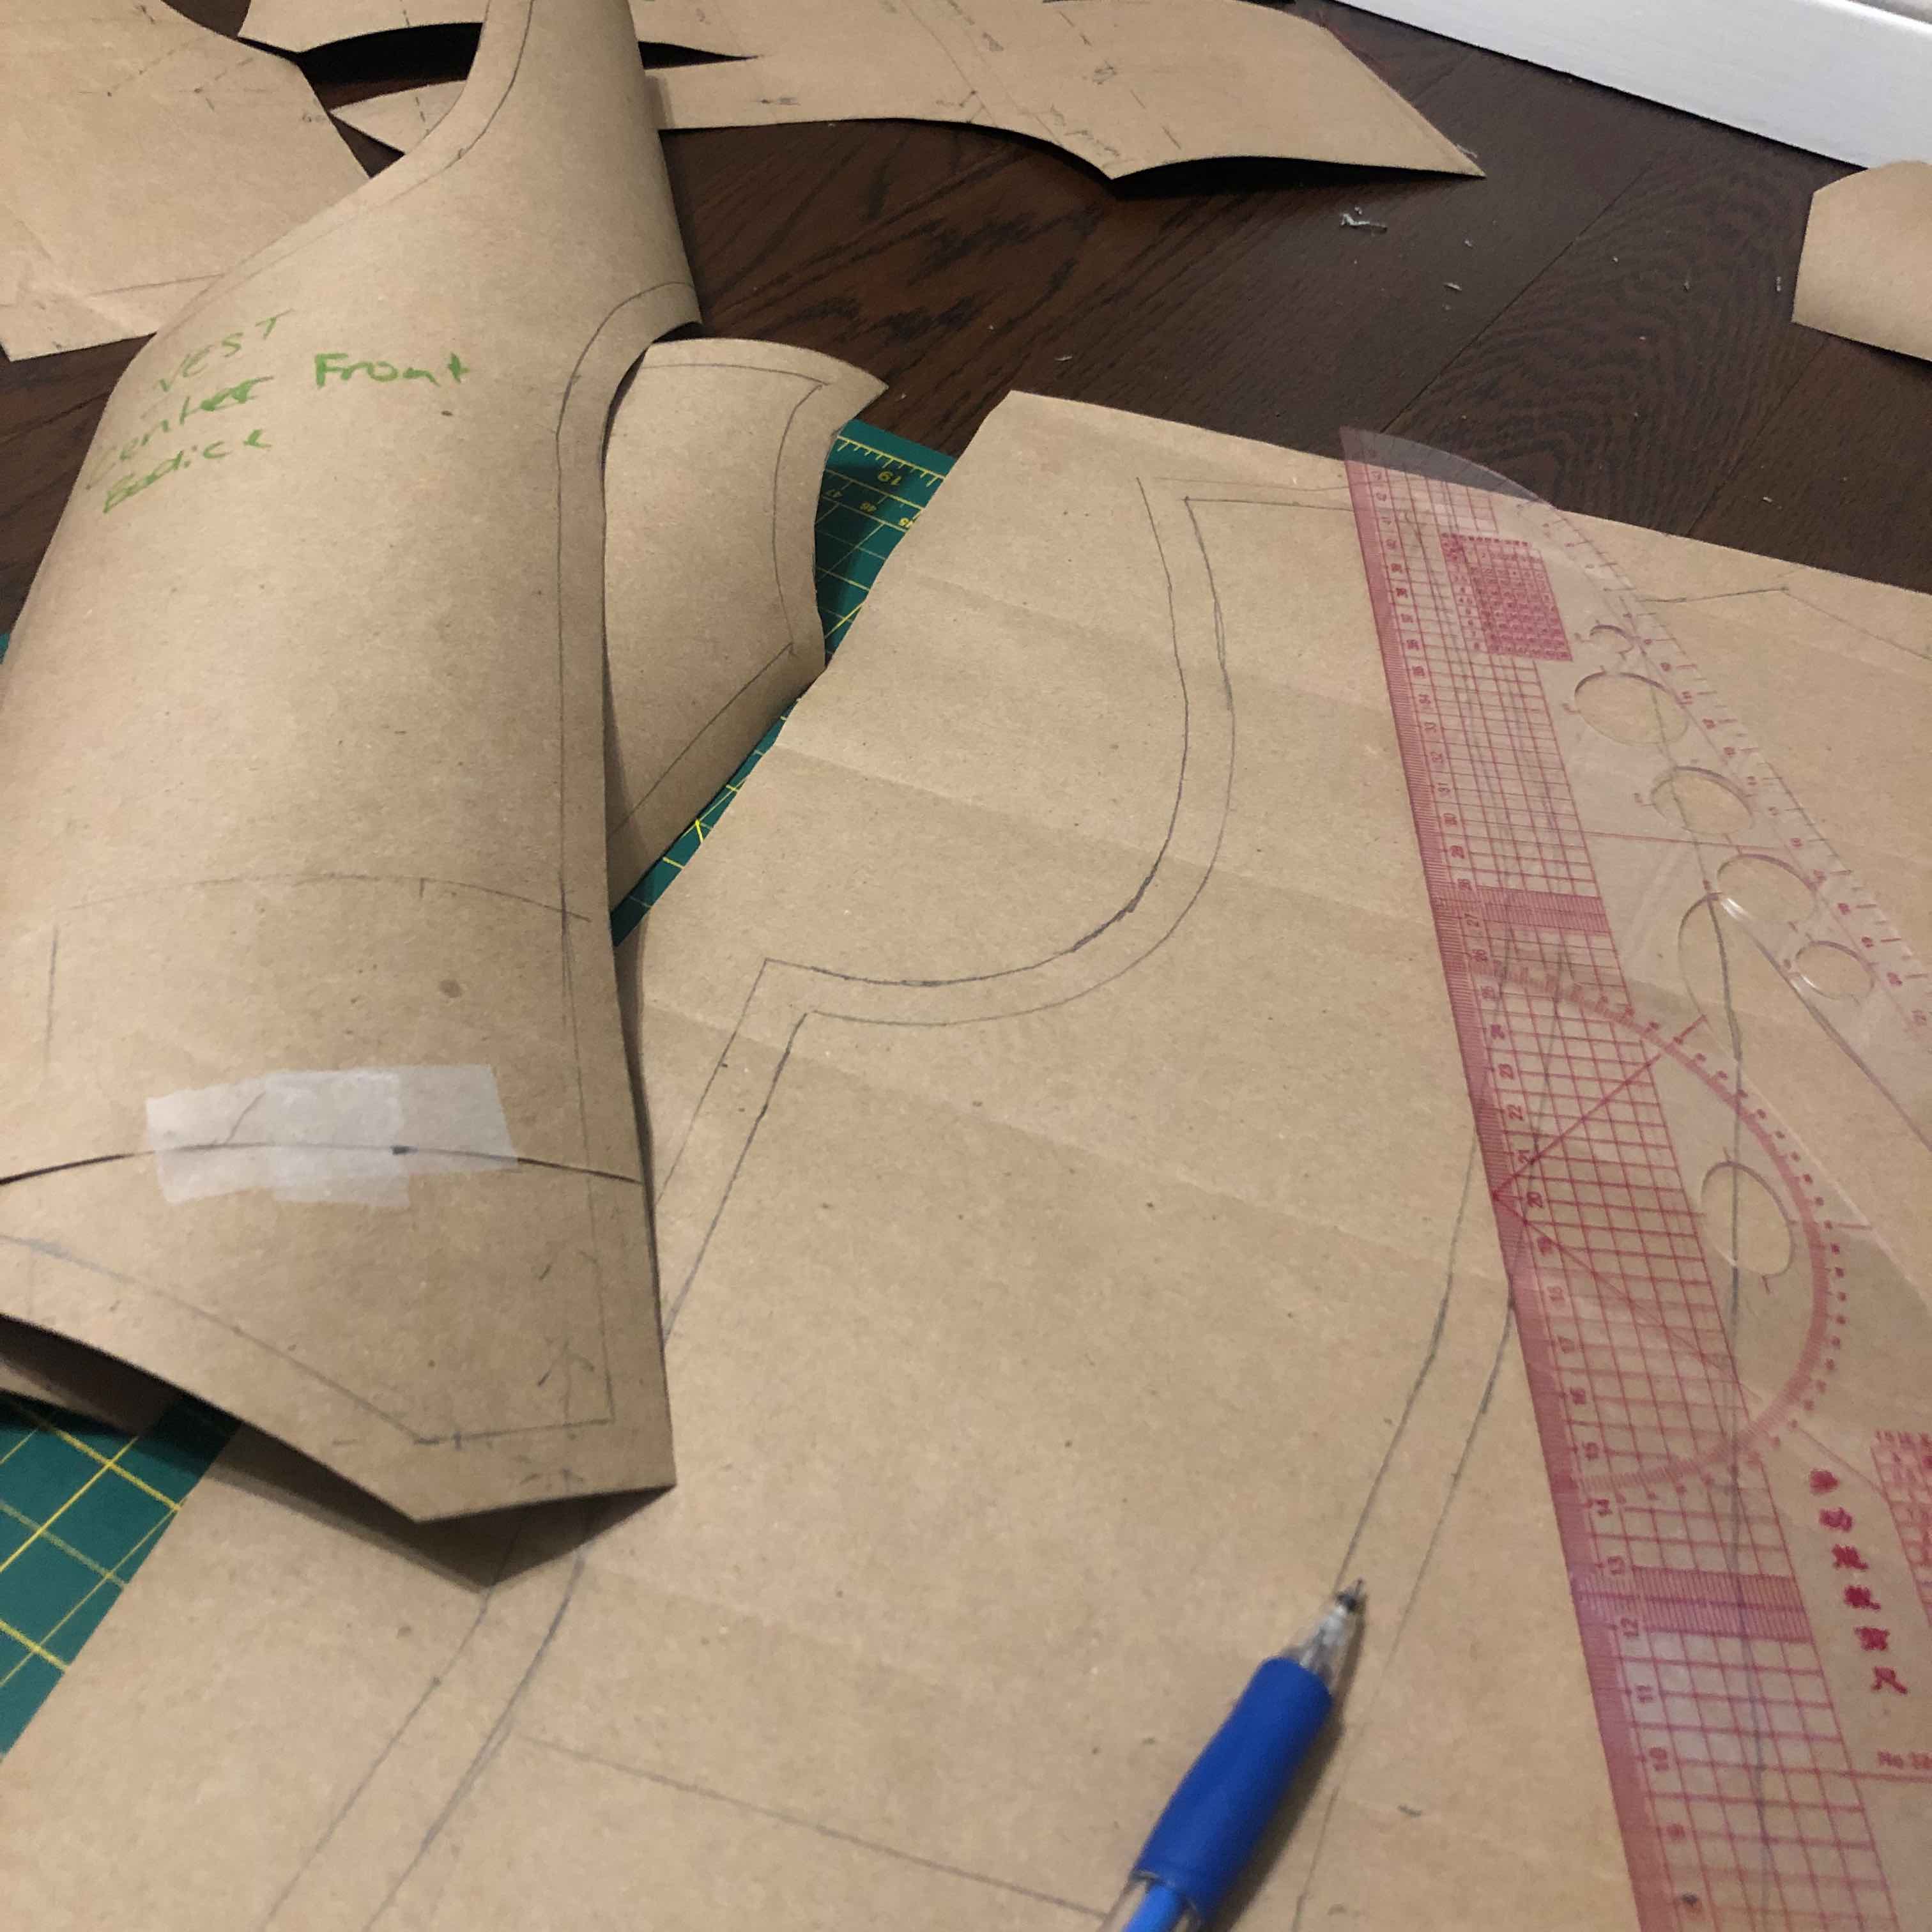
- I devised the paper pattern using design principles from Helen Joseph-Armstrong's 'Pattern-making for Fashion Design' textbook.
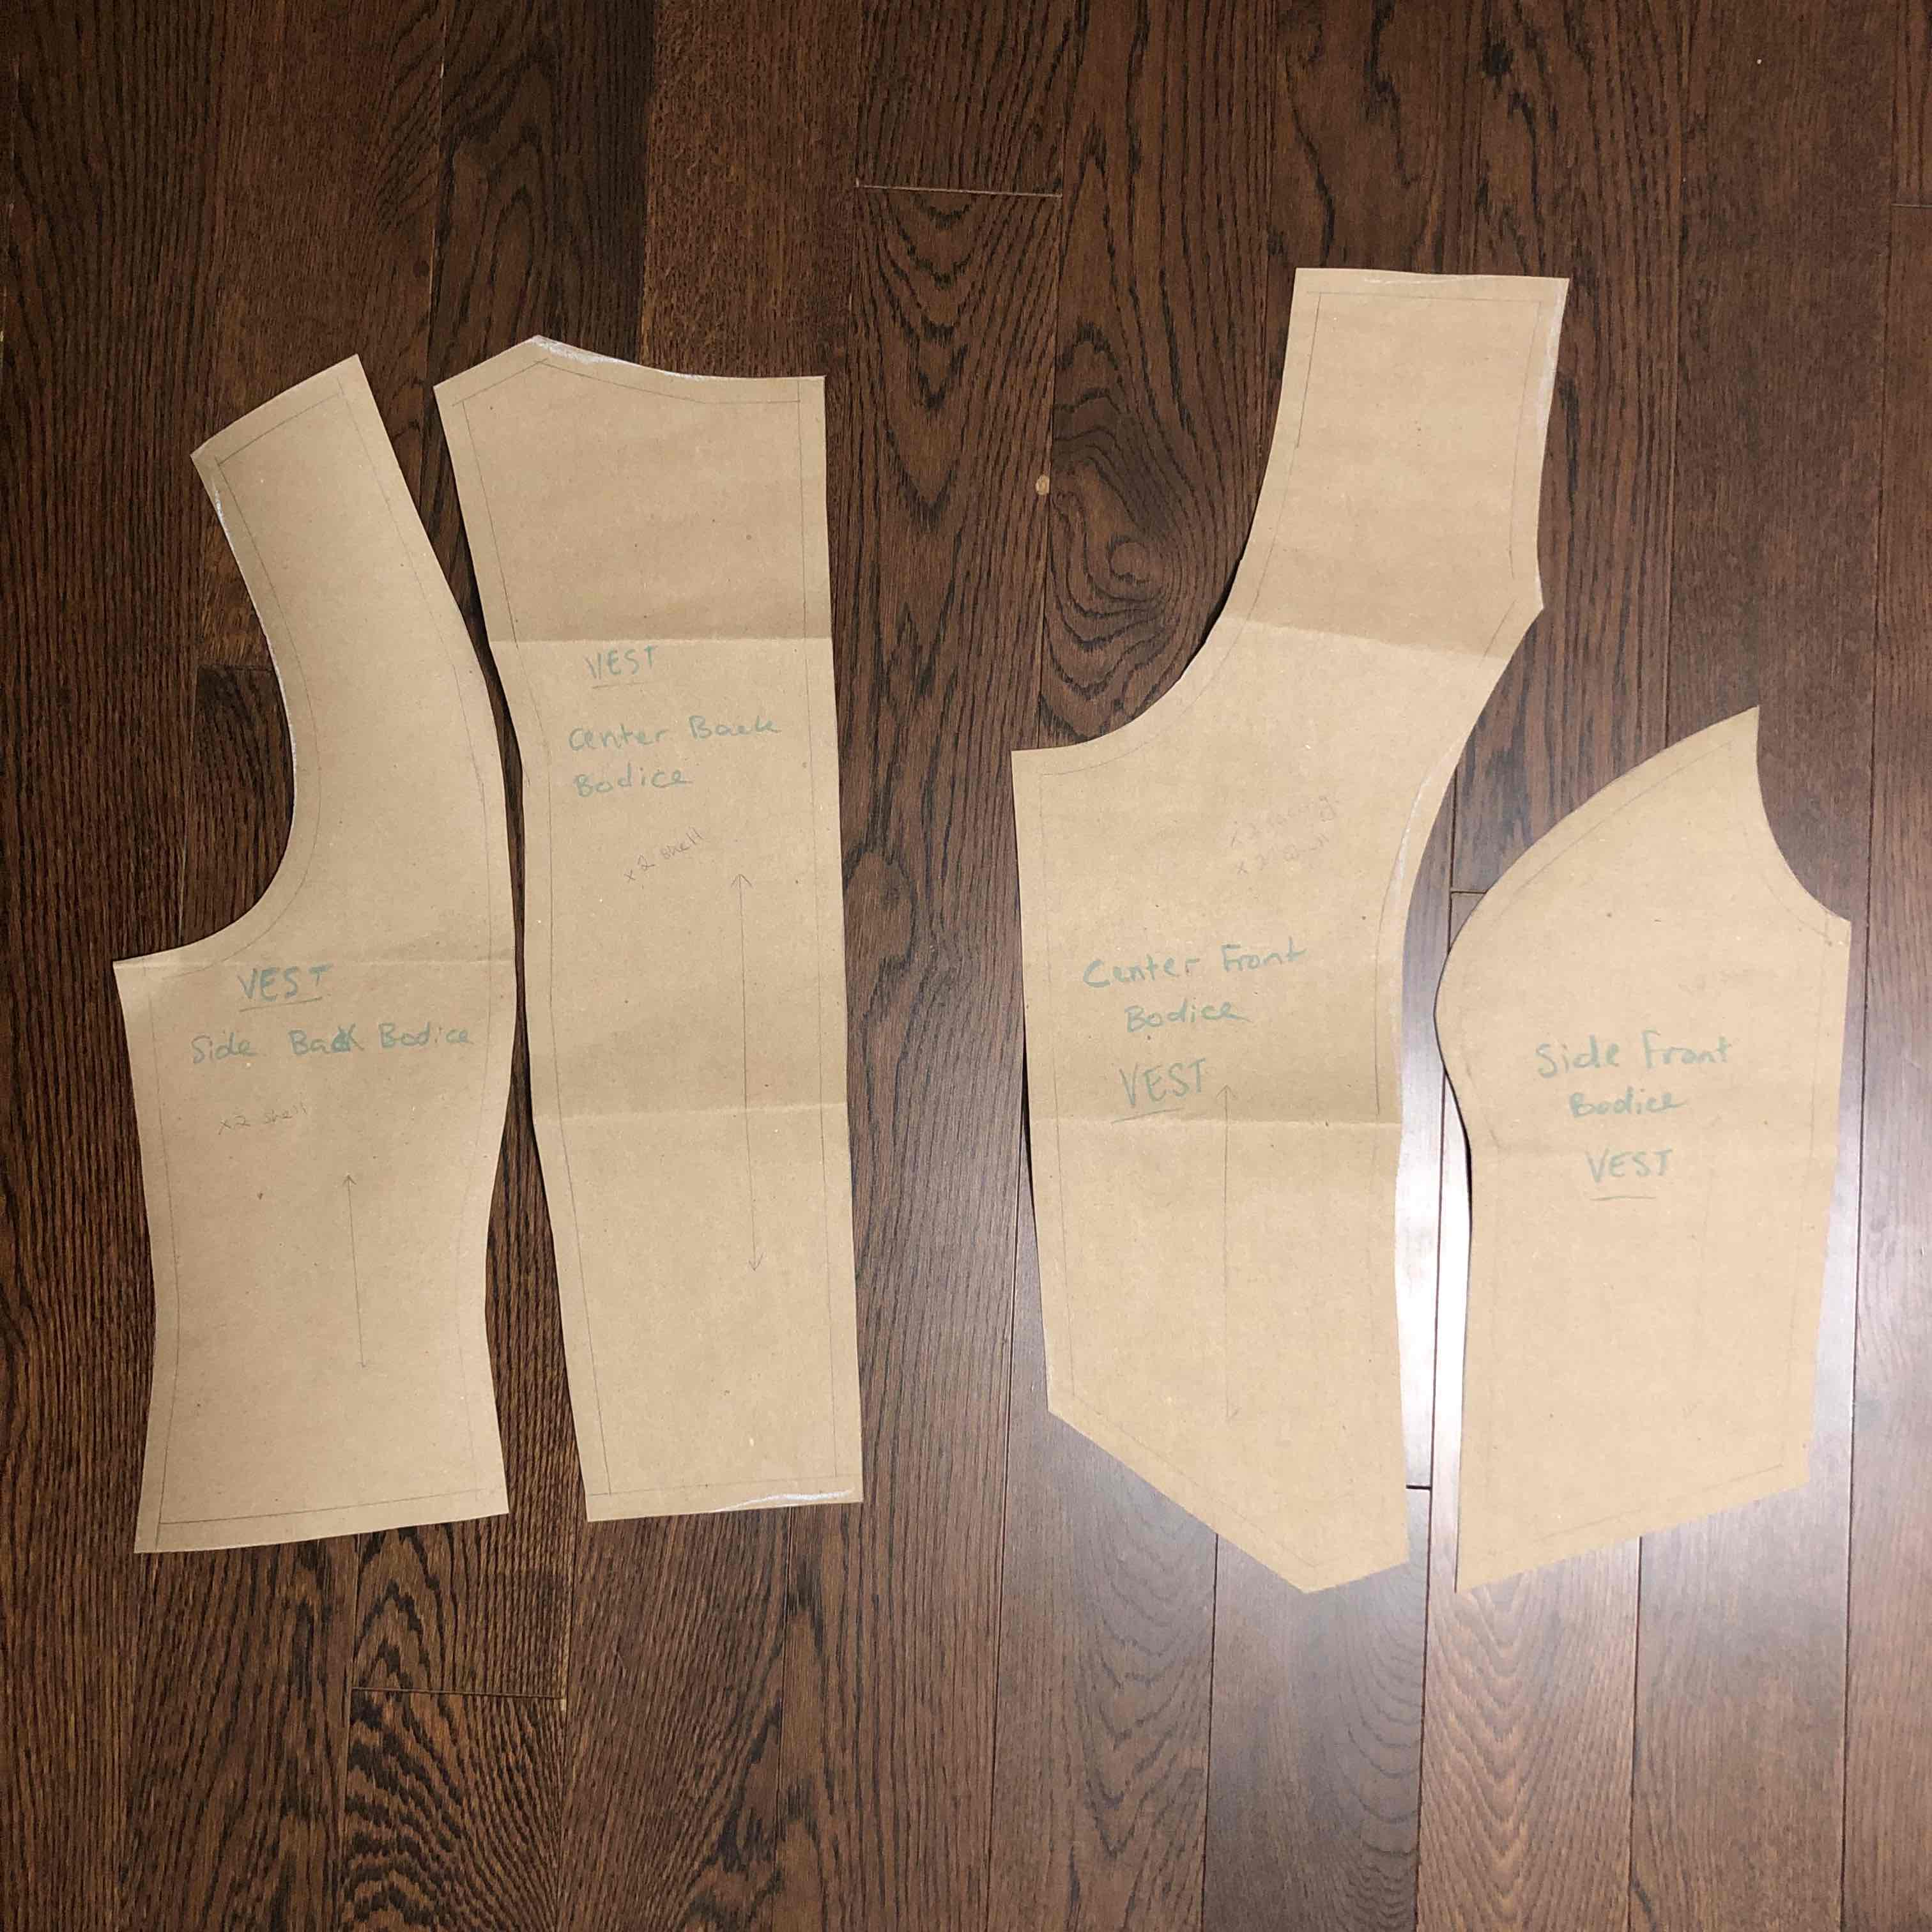
- Initially, I traced my personalized basic bodice block and modified it by lowering the neckline and incorporating princess seams on both front and back bodice pieces.
- Subsequently, I cut these pieces along the styled lines, resulting in four separate pattern pieces
- Extending the center front allowed for overlap to accommodate button placement, and I detailed the bottom points of the front piece.
- Proceeding to cut all pieces from the two distinct fabrics, I began assembly by crafting the outer shell using the linen fabric. Then, I constructed the lining and facing pieces, forming the garment's interior.
- The outer shell and lining were joined together with the right sides facing, carefully stitching along the edges, leaving one edge unstitched. Upon reversal, this technique produced a clean finish. I then closed the remaining open edge with a stitched seam.
- Following guidance from PatternScouts' tutorial on vest assembly, I concluded by using the sewing machine to create buttonholes and hand-sewing the four buttons.
Inspiration/Reference Photo

- This is the photo I referenced while designing the paper pattern pieces.
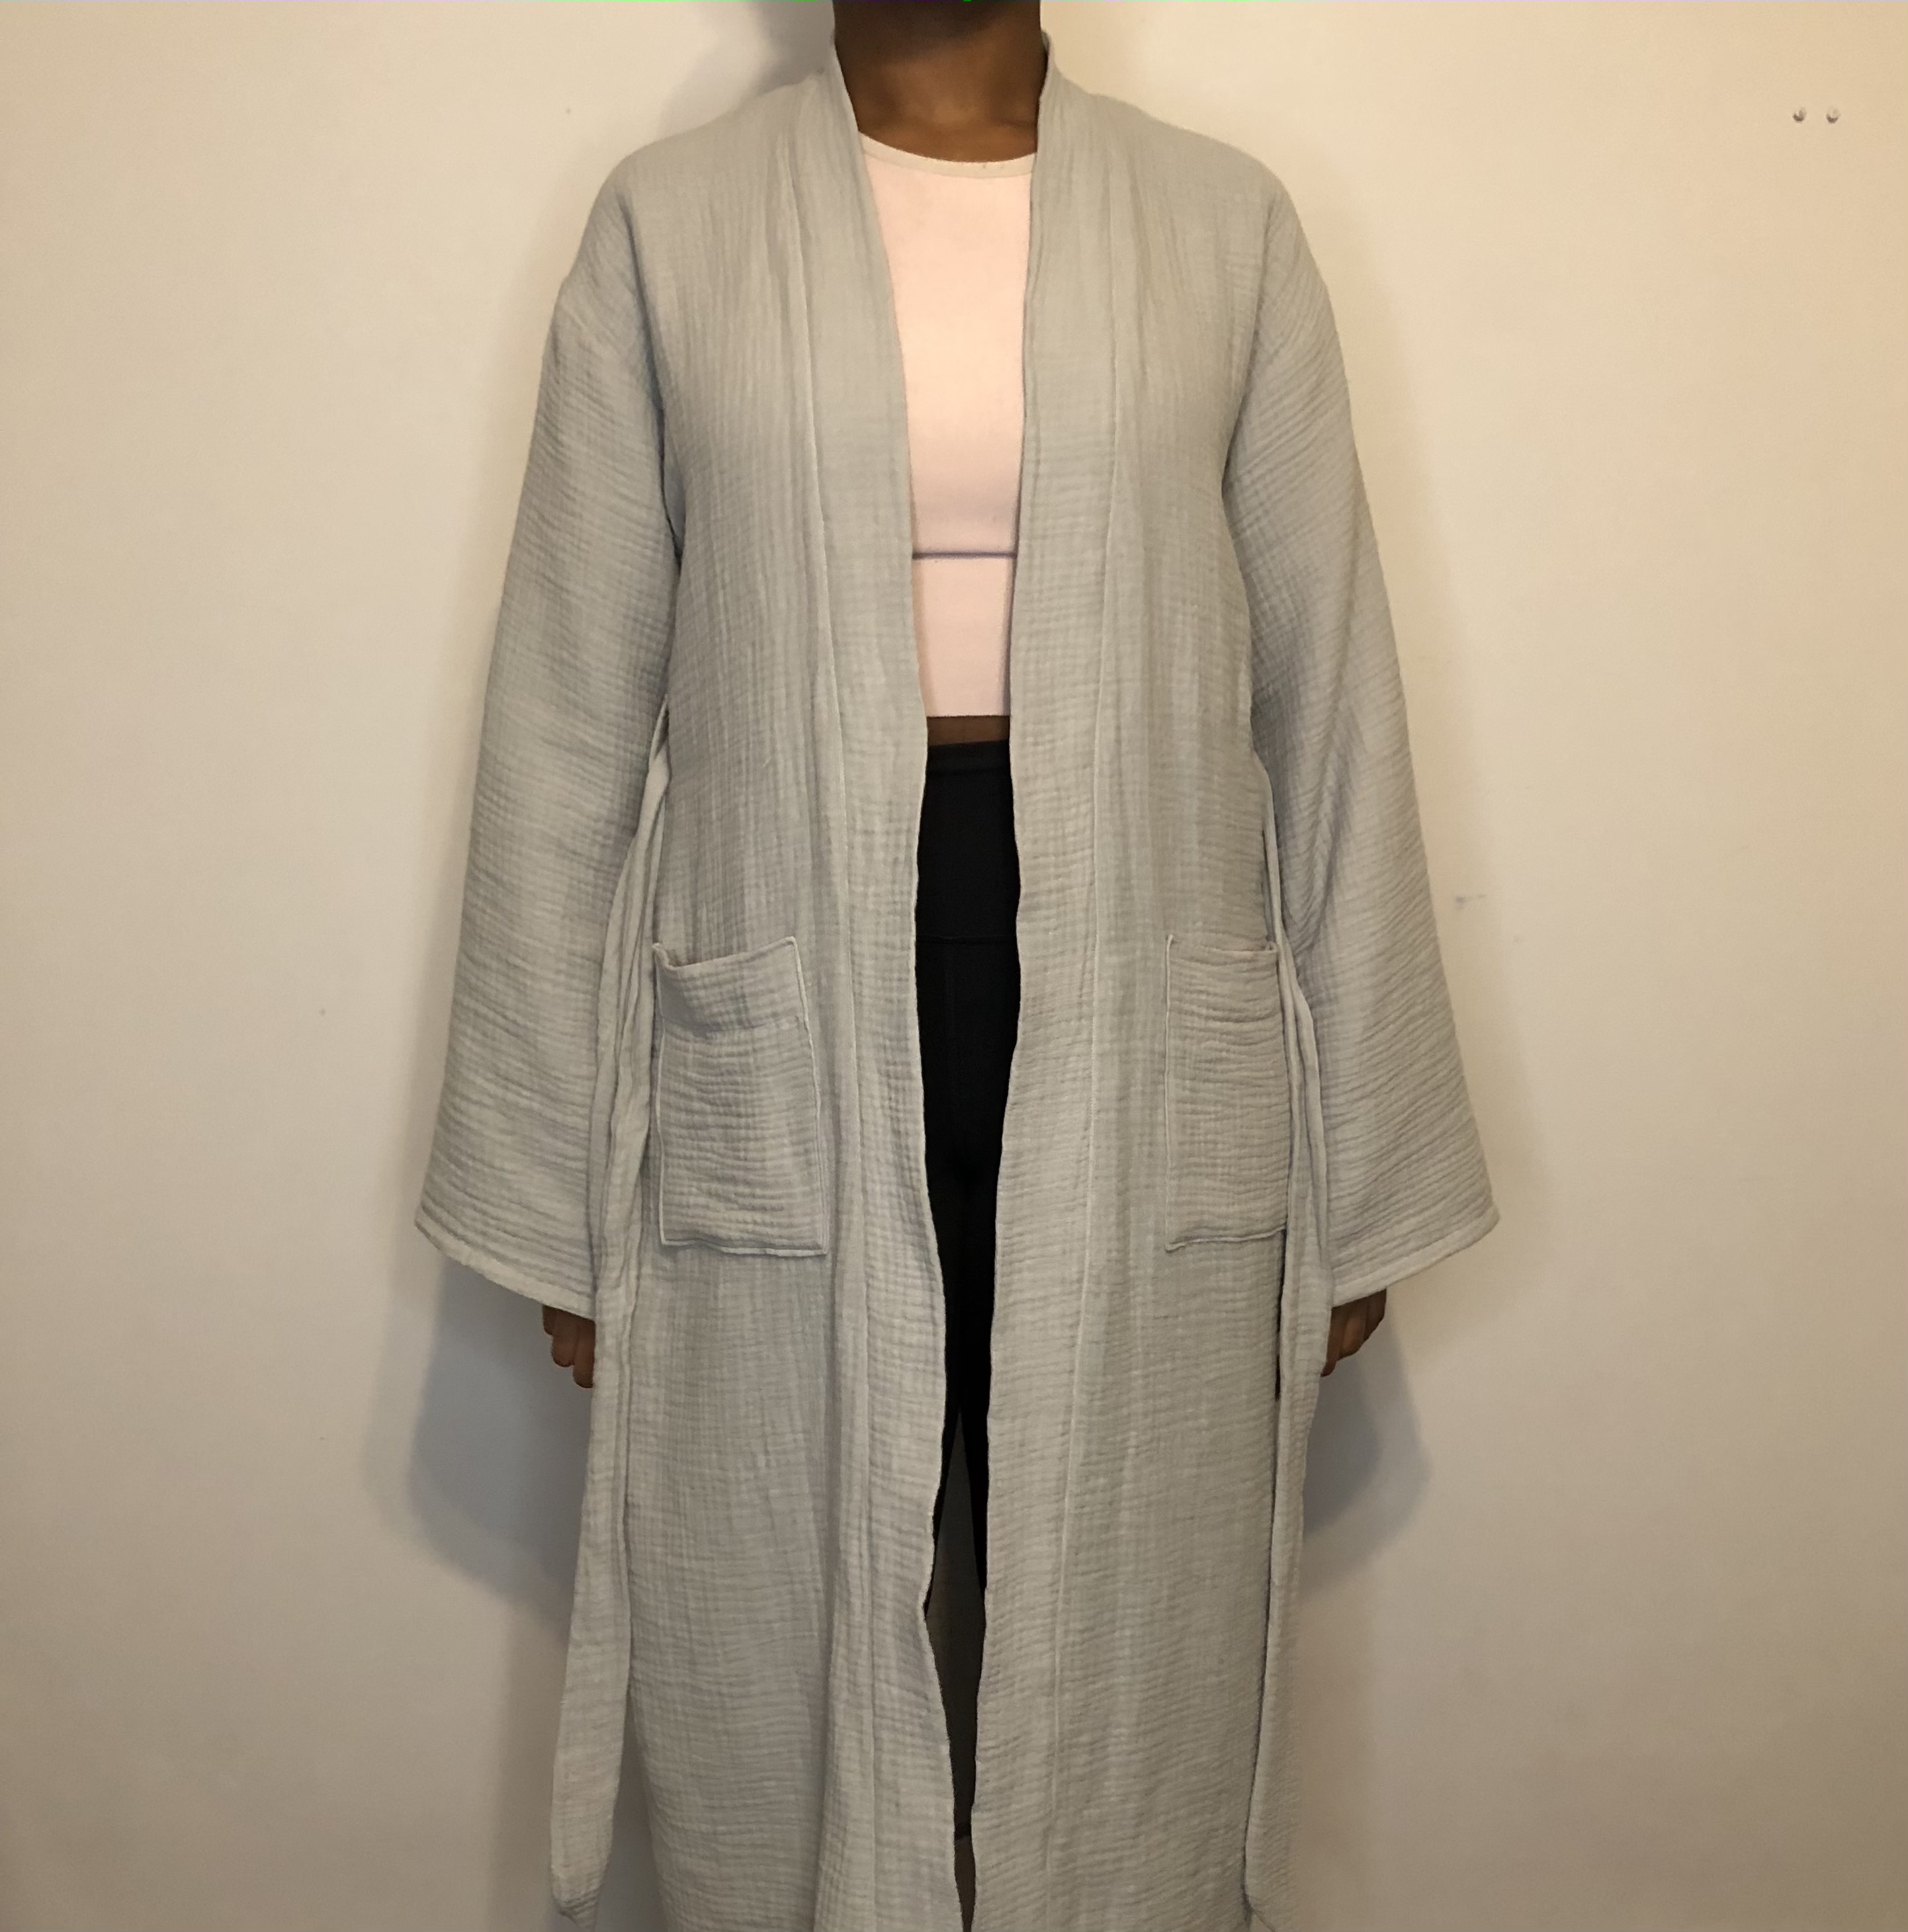
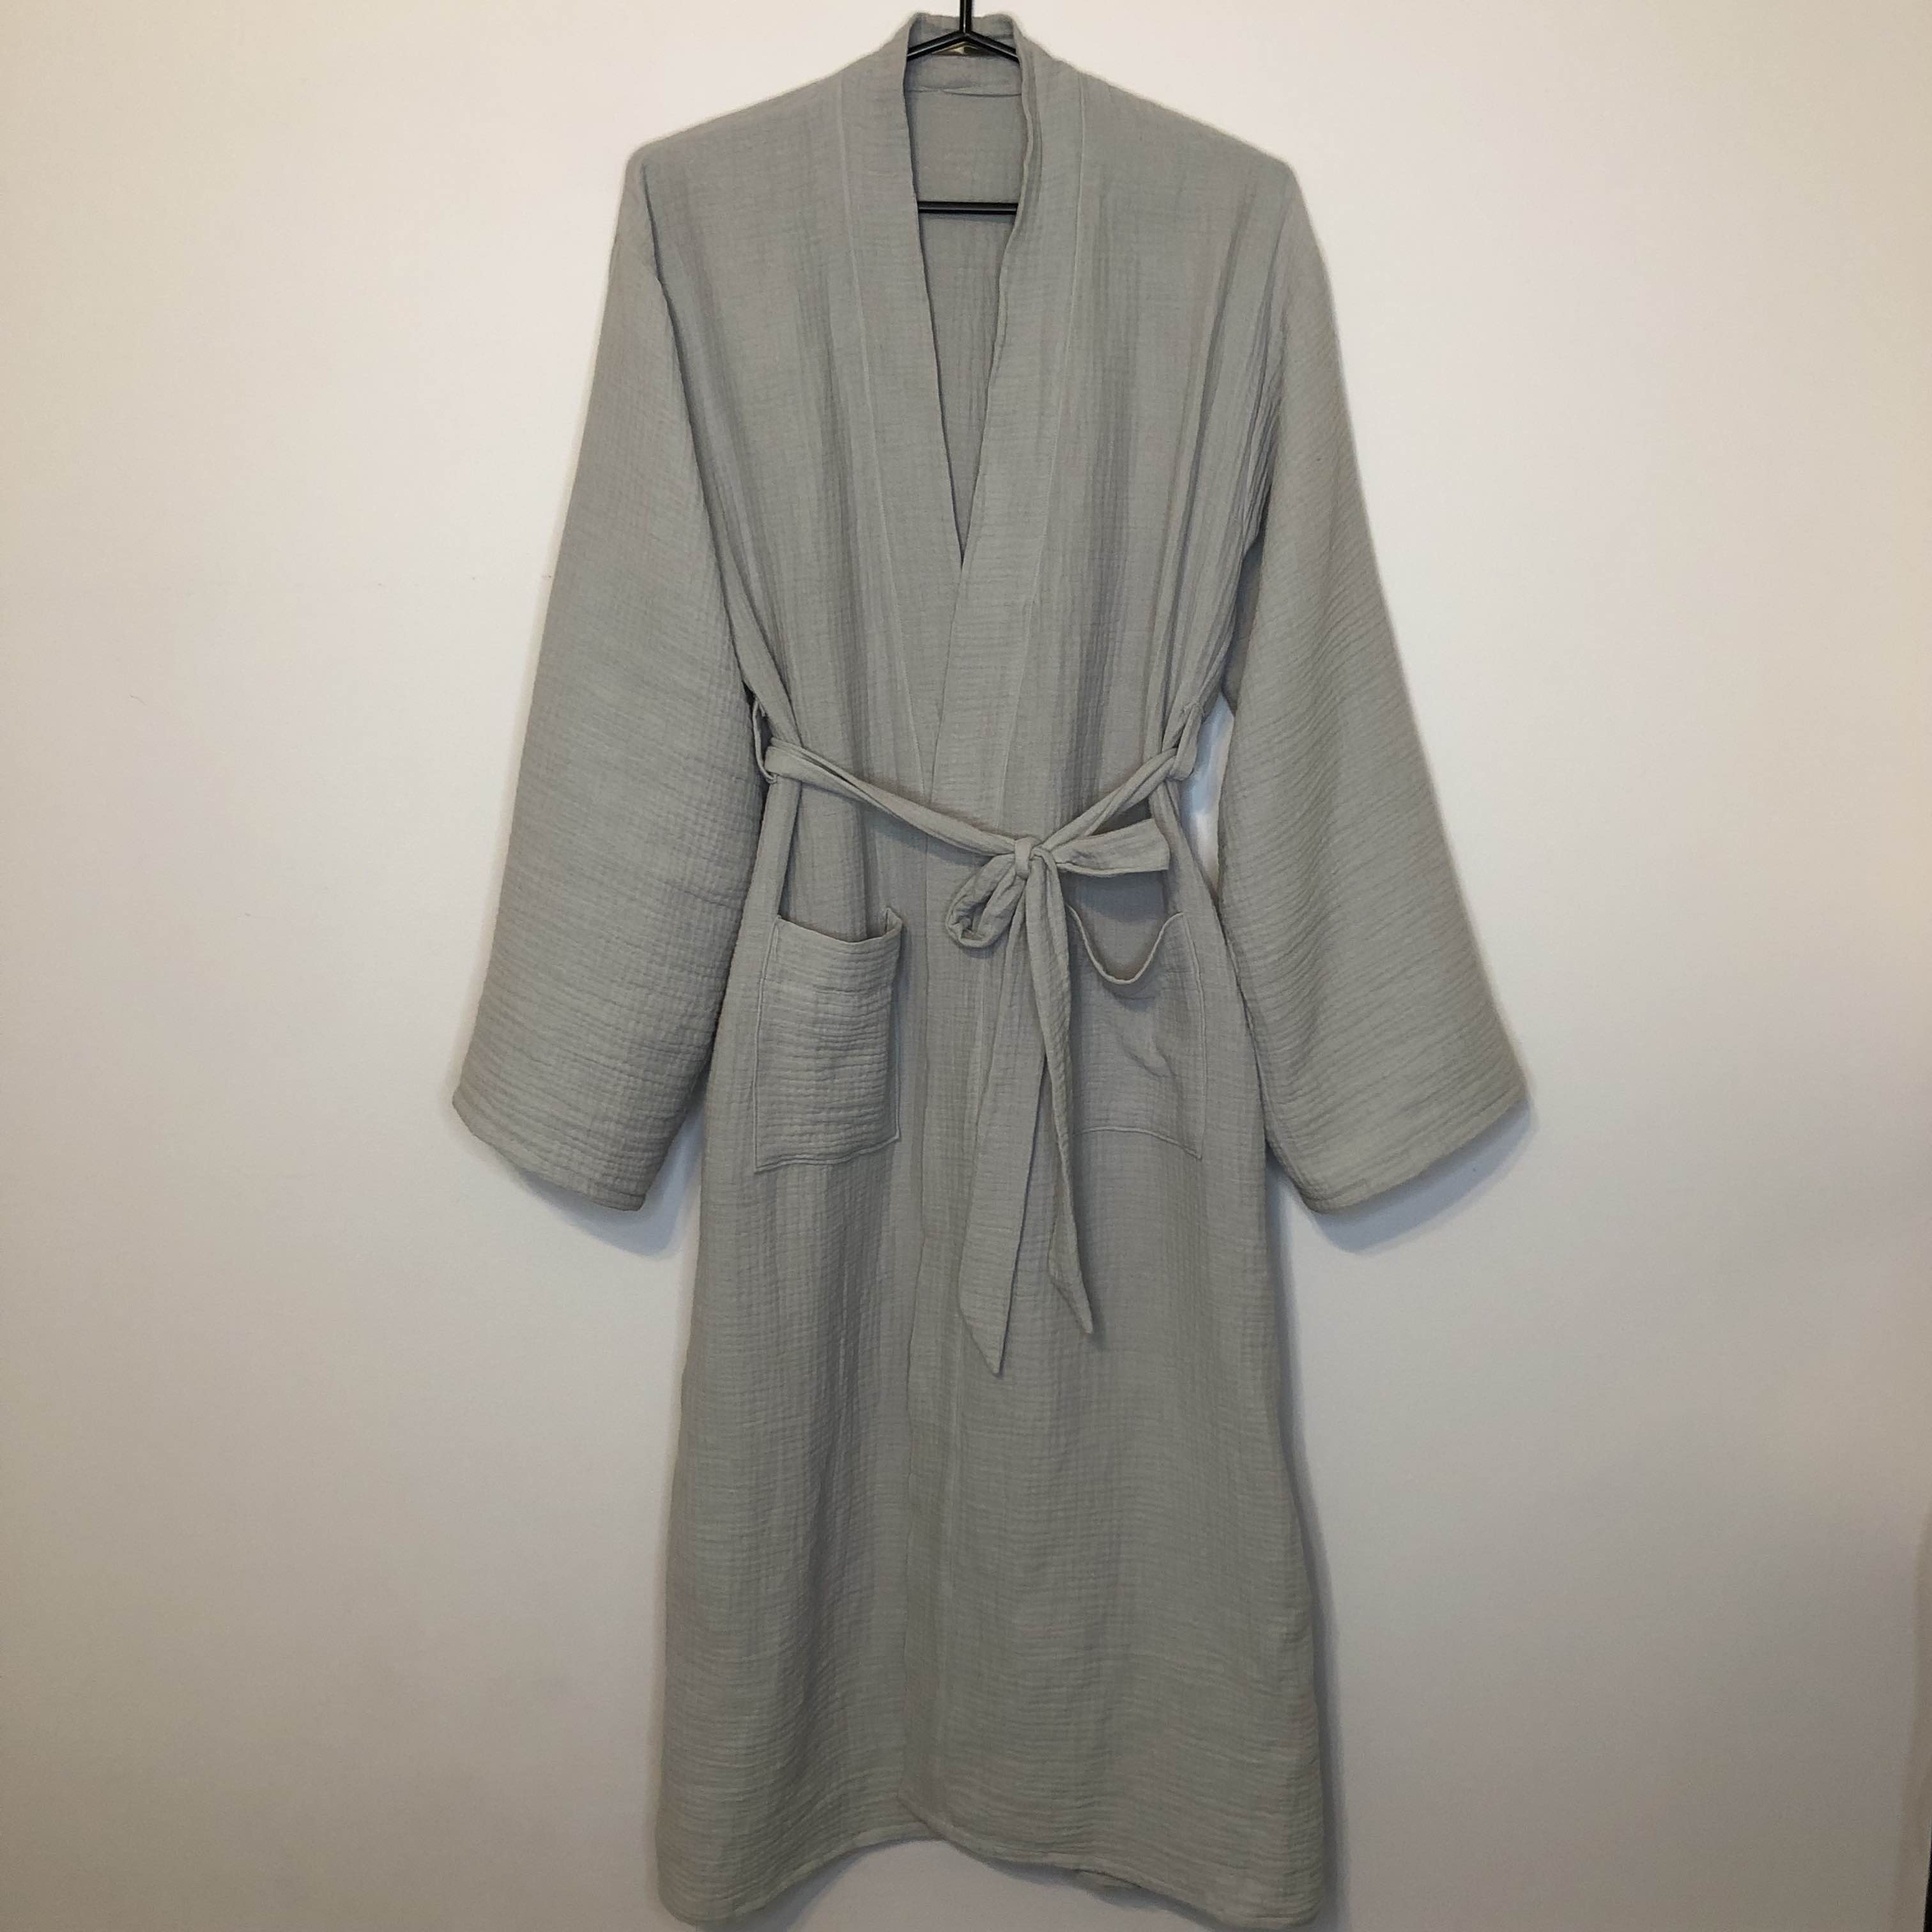
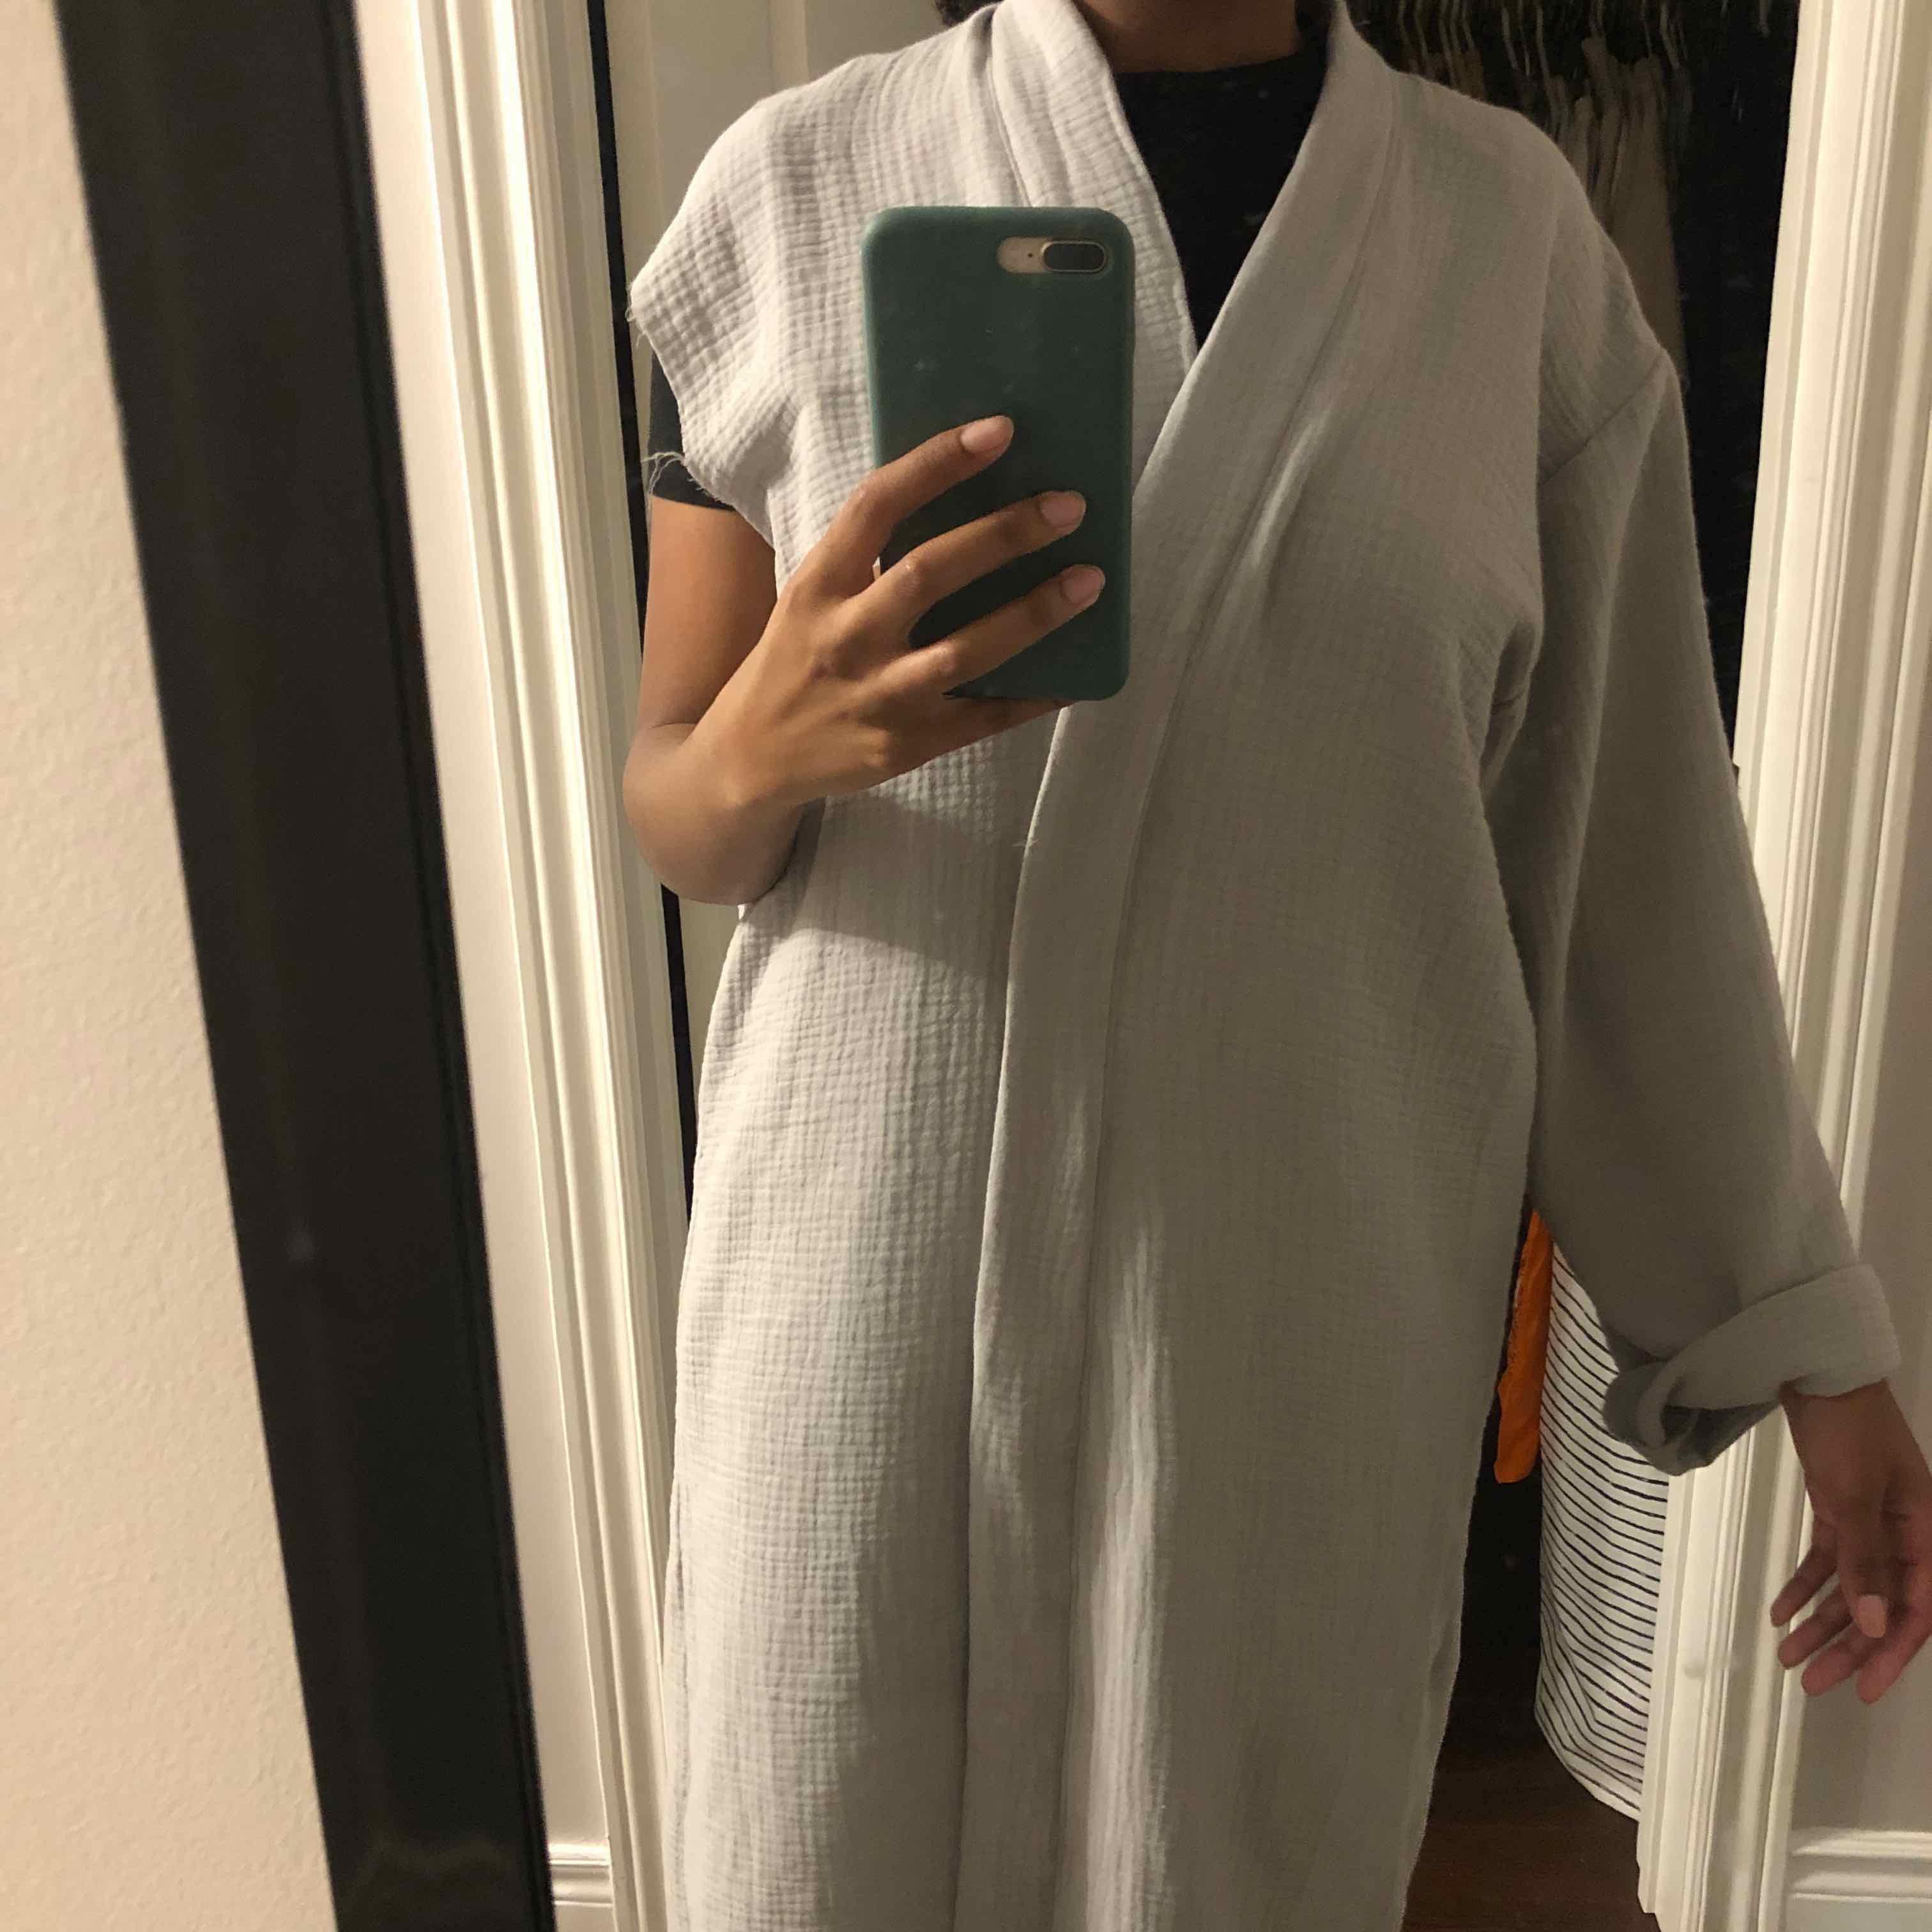
Grey Robe
A long robe featuring extended sleeves, crafted from double cotton gauze. The robe includes two pockets and a waist strap for secure fastening.
- Took me four days to complete
- Completed on July 16, 2023
Materials and Tools
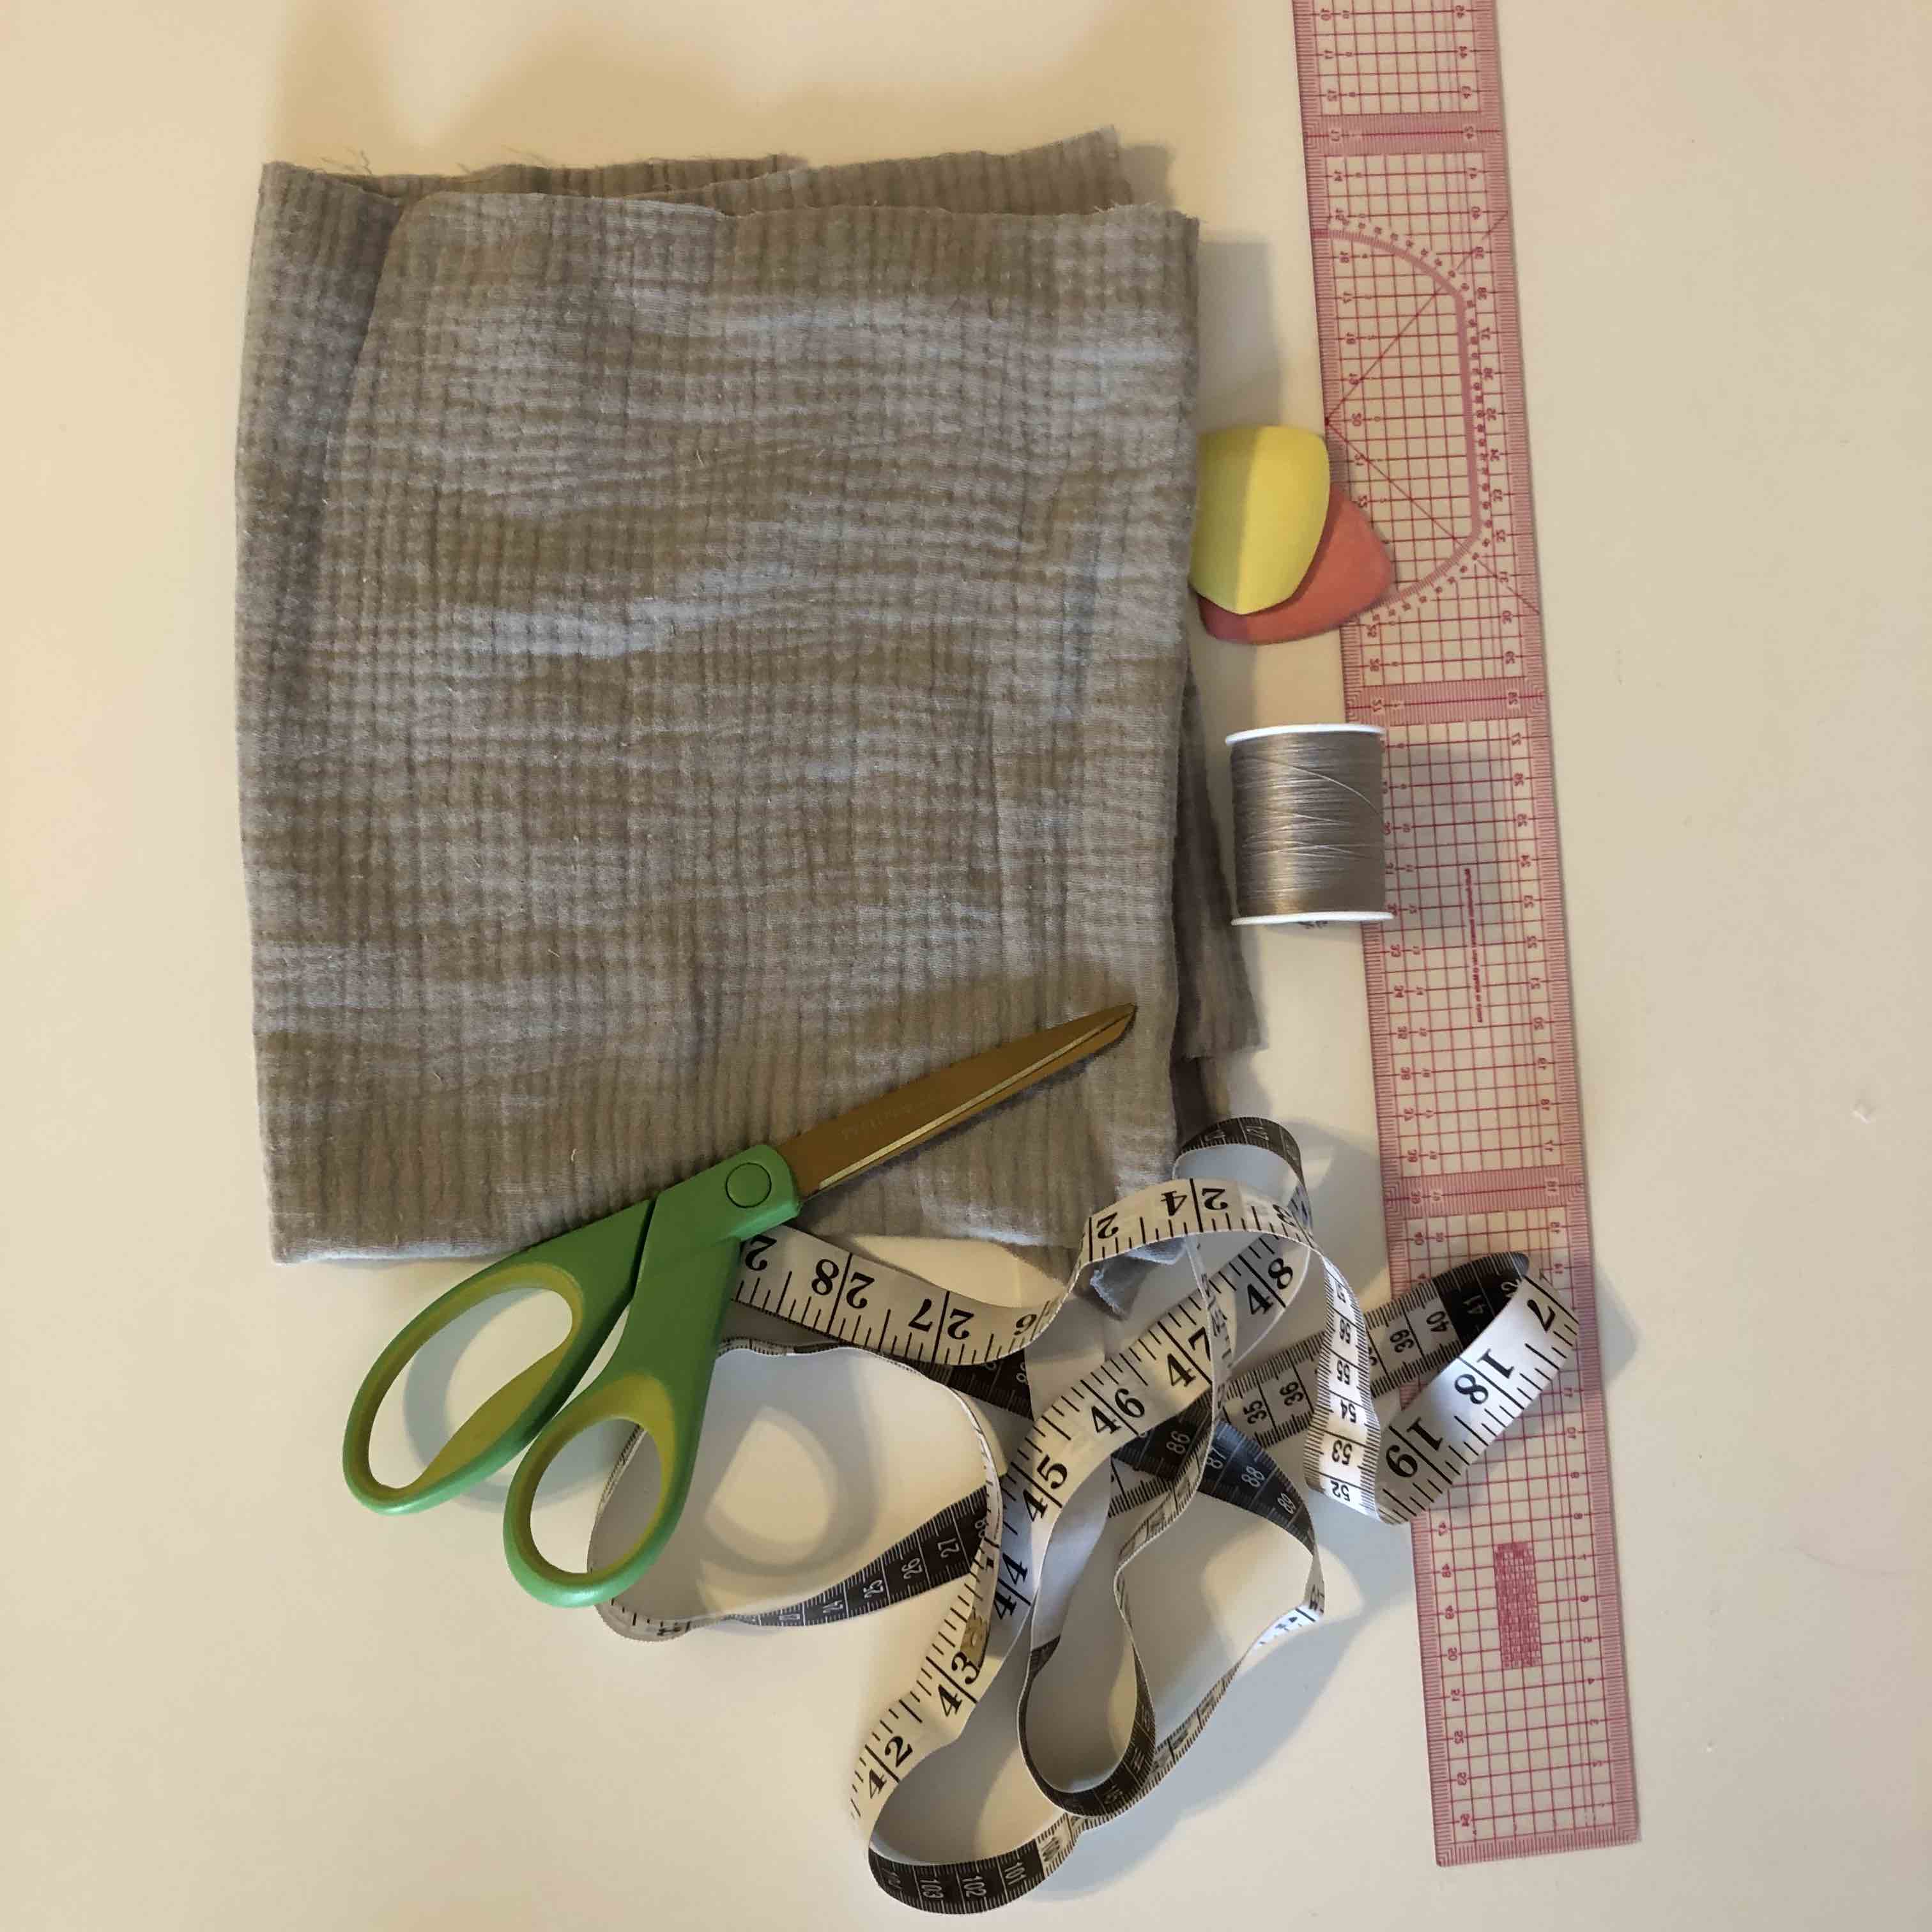
- I utilized 3 yards of grey double cotton gauze sourced from Fabric Wholesale Direct.
- The tools employed for this project included grey polyester thread, a Brother sewing machine, pins, a ruler, tailor’s chalk, and scissors.
Assembly Process
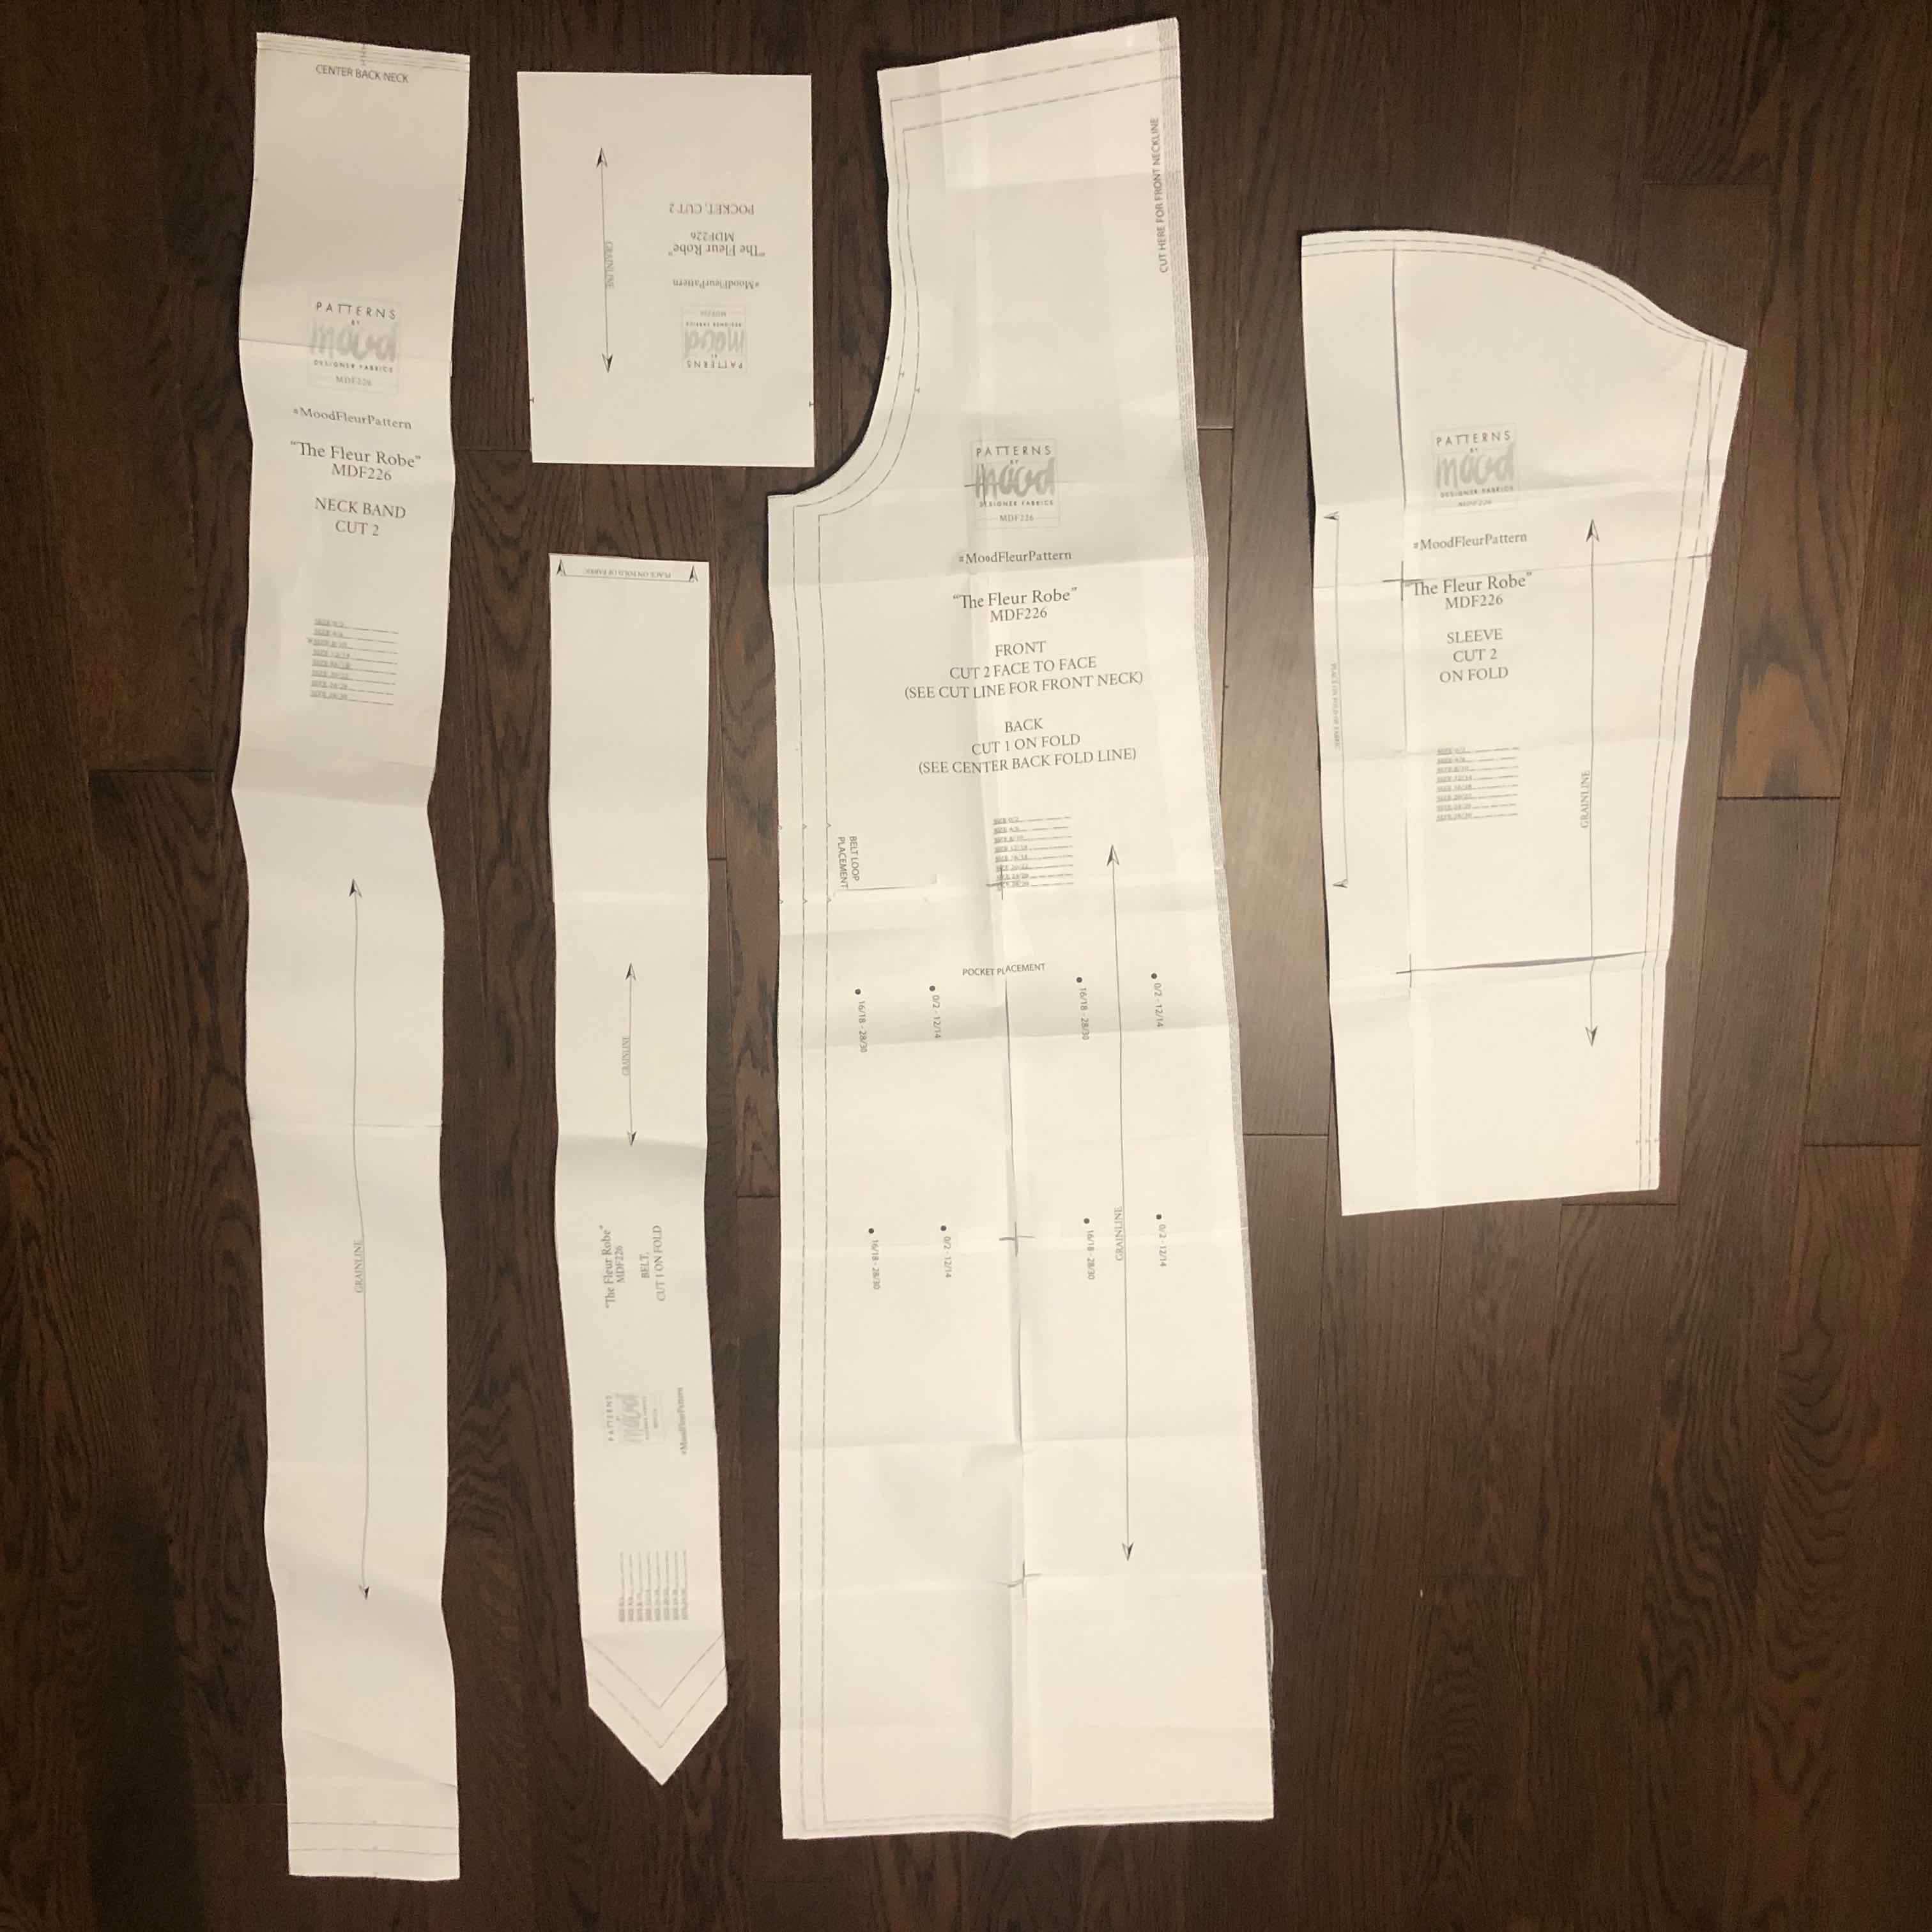
- I obtained the pattern from Mood Fabrics' blog, then printed, taped, and cut out the paper pieces accordingly.
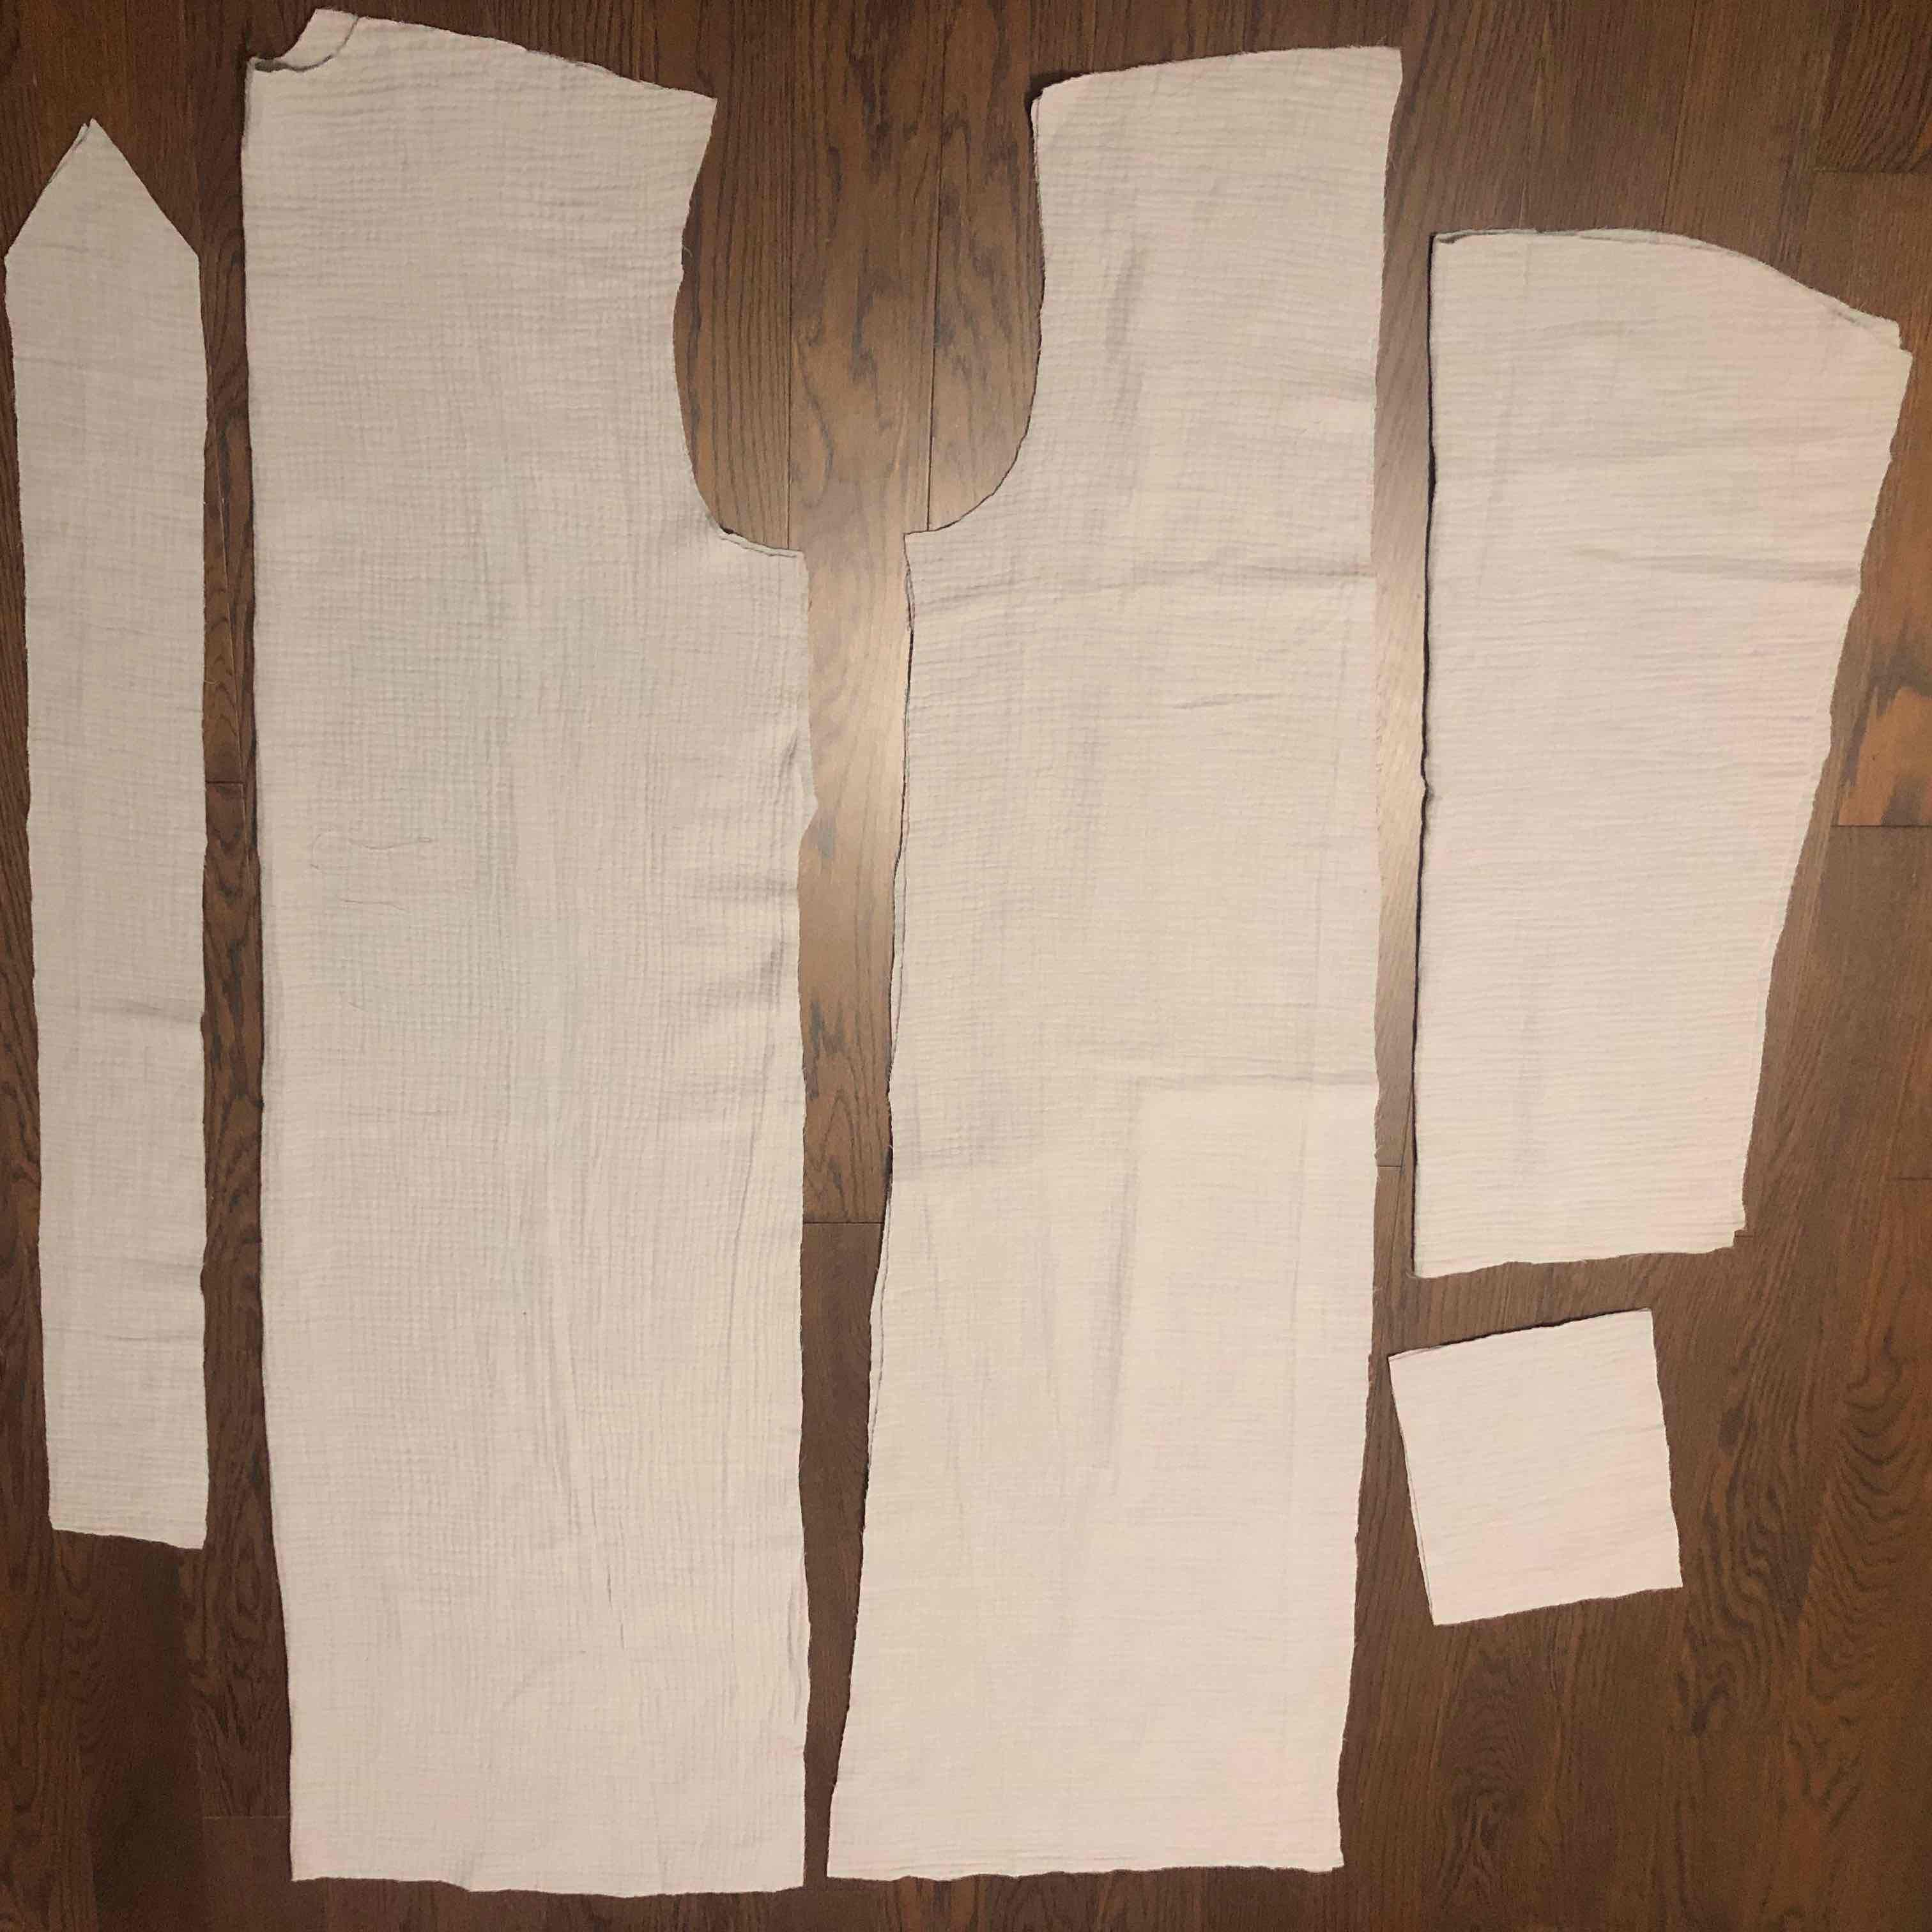
- I cut out all the fabric pieces using the pattern.
- Following the detailed instructions provided on the blog. I assembled the robe by first joining the front panels at the shoulders and side seams.
- Then I created the neck binding by sewing together the two pieces, attaching it along the neckline and center front of the robe.
- After closing the sleeves, I attached them to the front and back panels.
- To attach the pockets, I folded the top edge of the pockets, sewed, and pressed them. Then I pinned and edge-stitched the pockets onto the robe.
- The final steps were to fold and sew the belt together, sew and attach the belt loops, and then hem the bottom and the sleeves of the robe.
Inspiration/Reference Photo
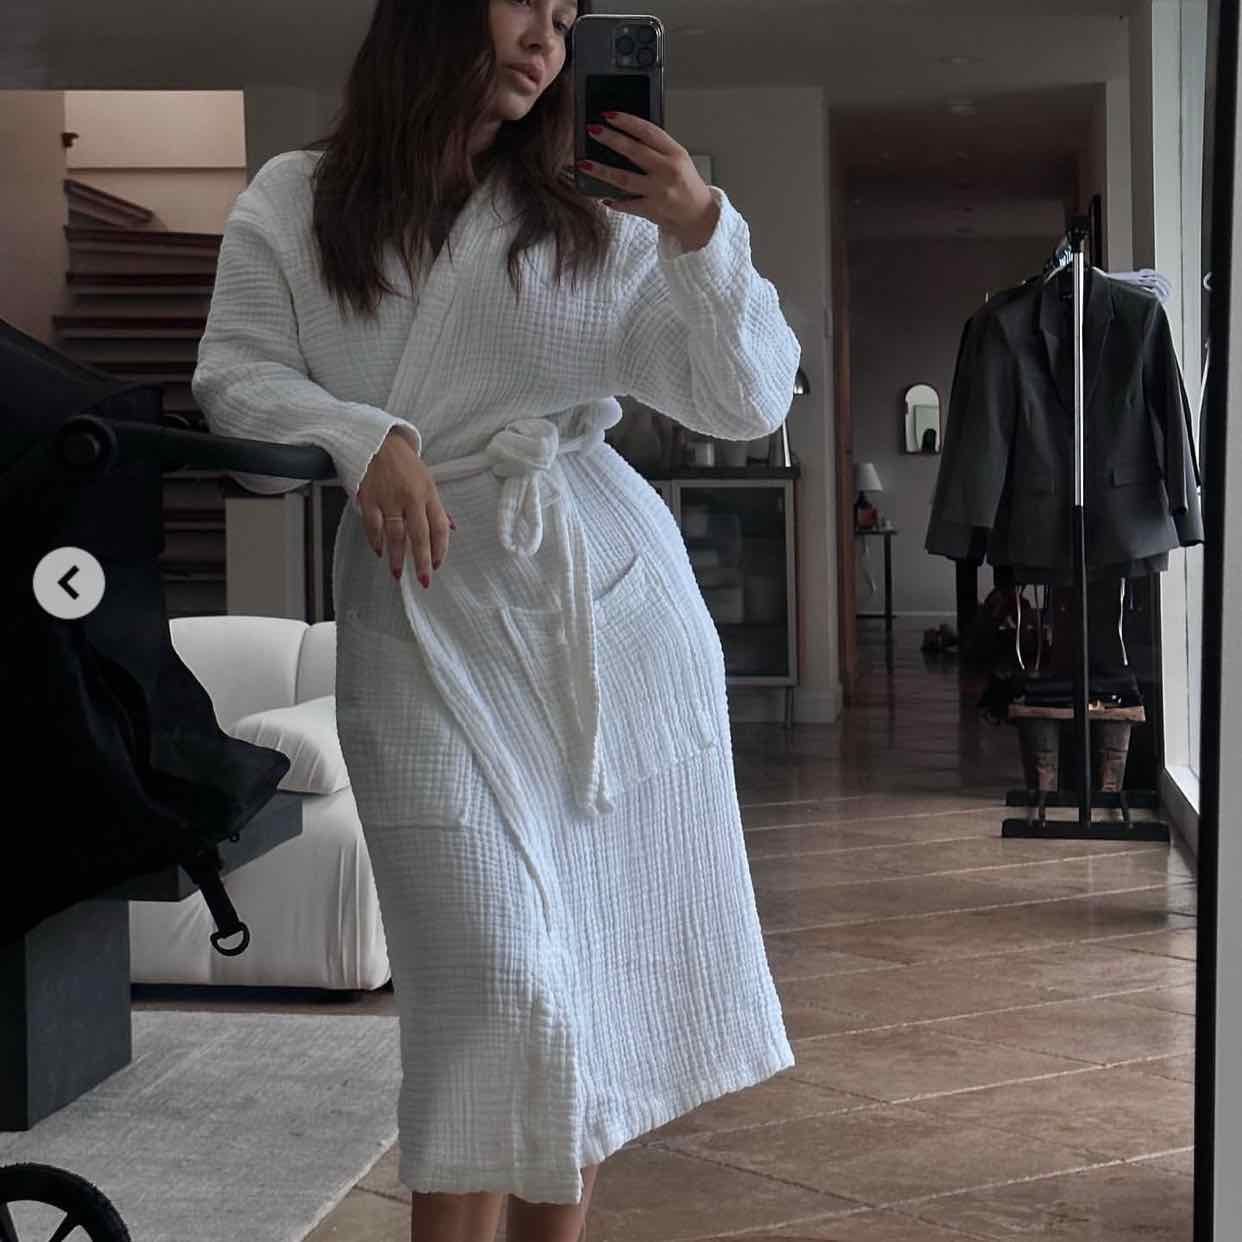
- This is the photo I used as inspiration for the robe.
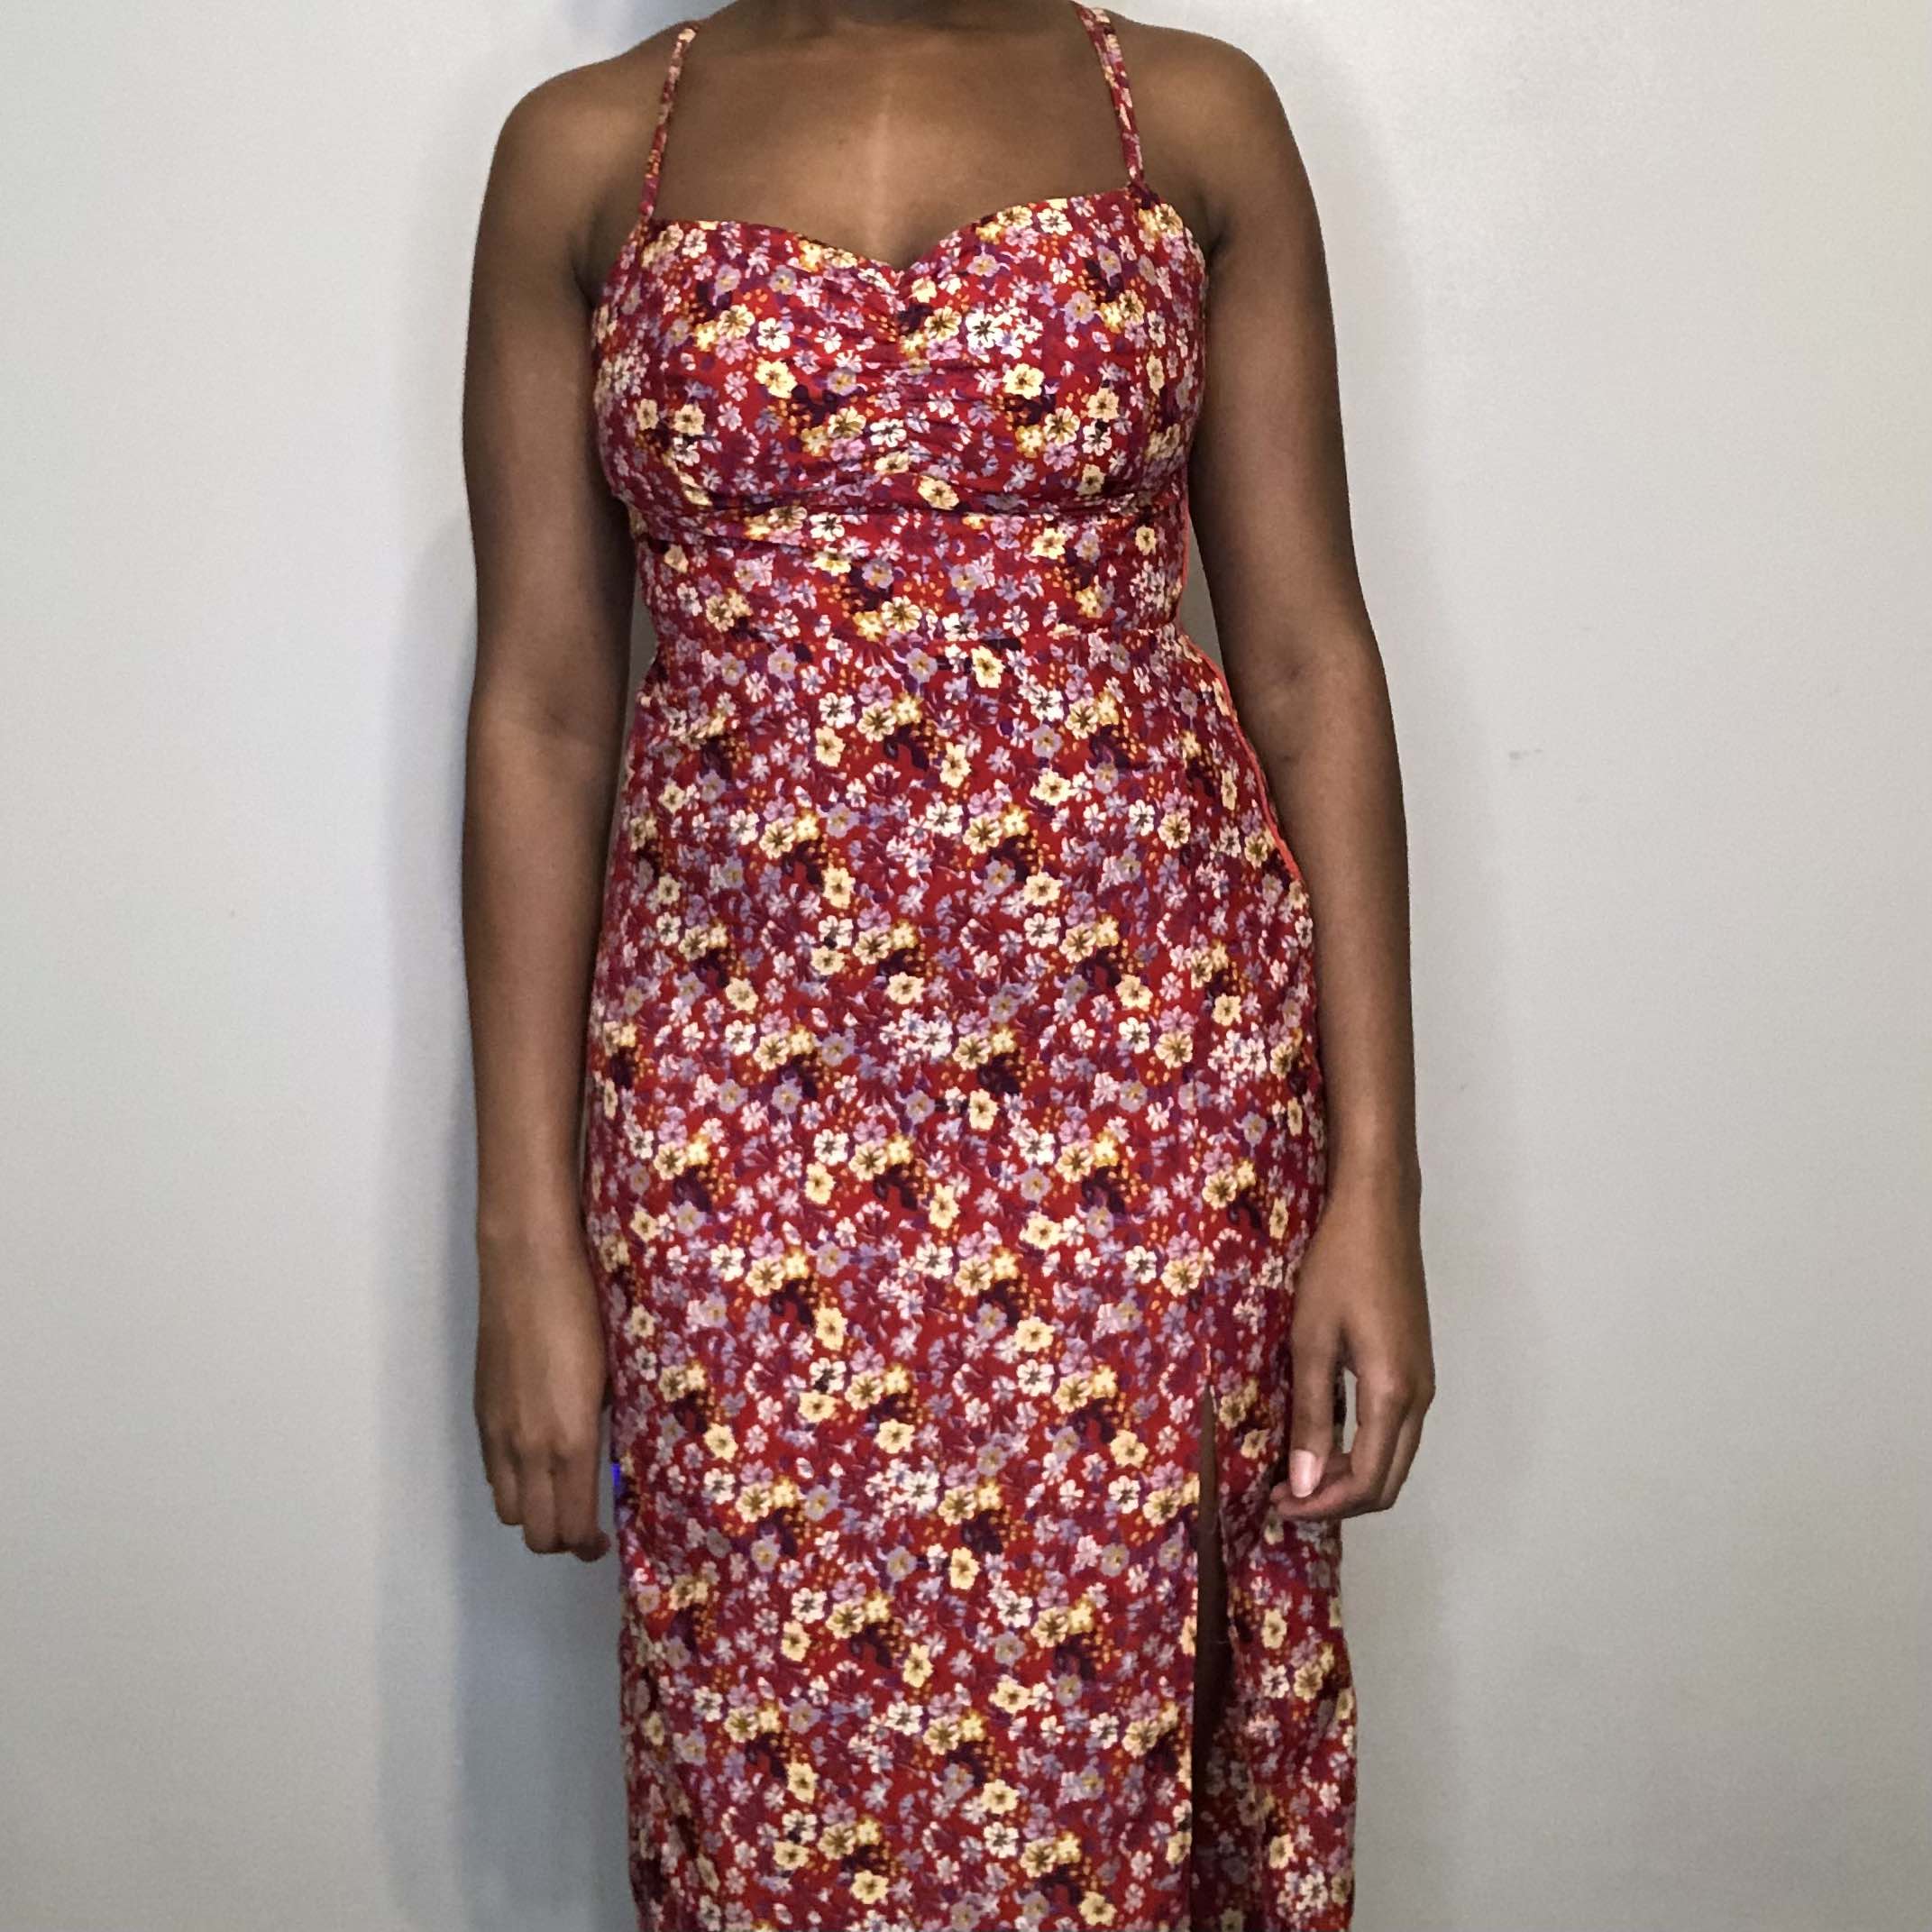
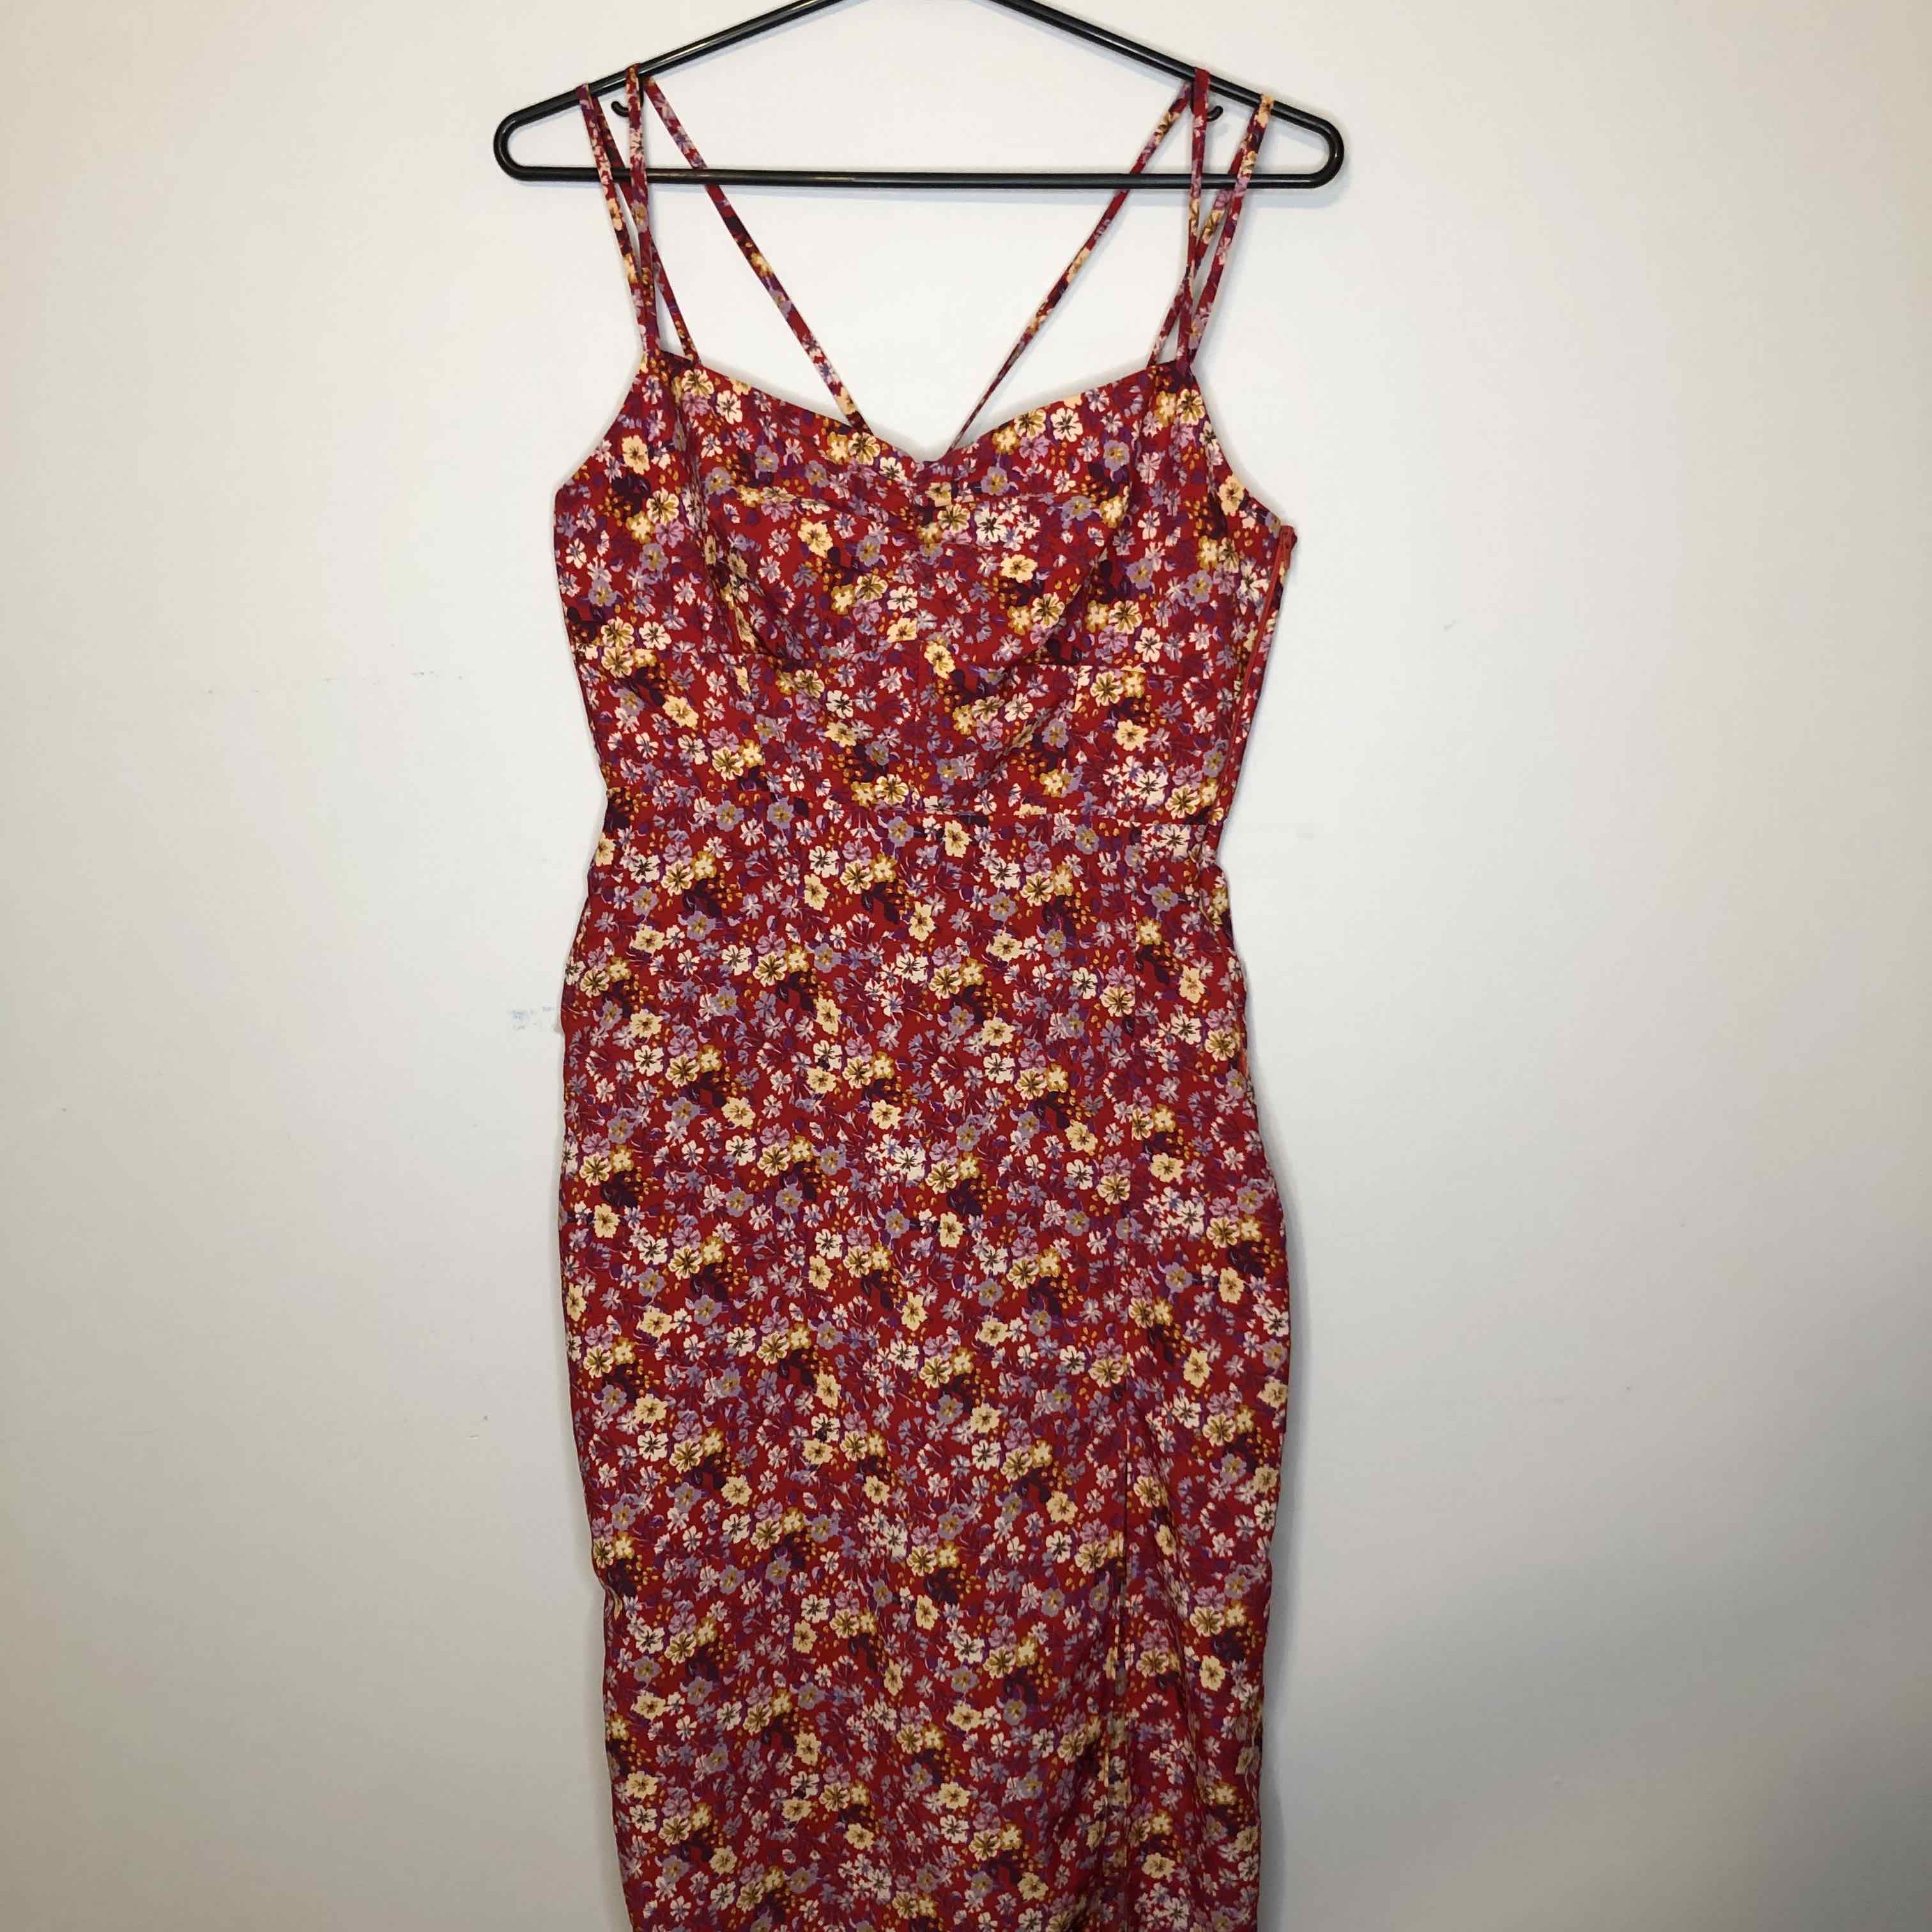
Red Sundres
This dress features a fitted bodice paired elegantly with a straight skirt, crafted from vibrant red iris crepe fabric. Adorned with delicate spaghetti straps and fastened with a zipper along the side for a seamless finish.
- Took me four days to complete
- Completed on June 8, 2023
Materials and Tools
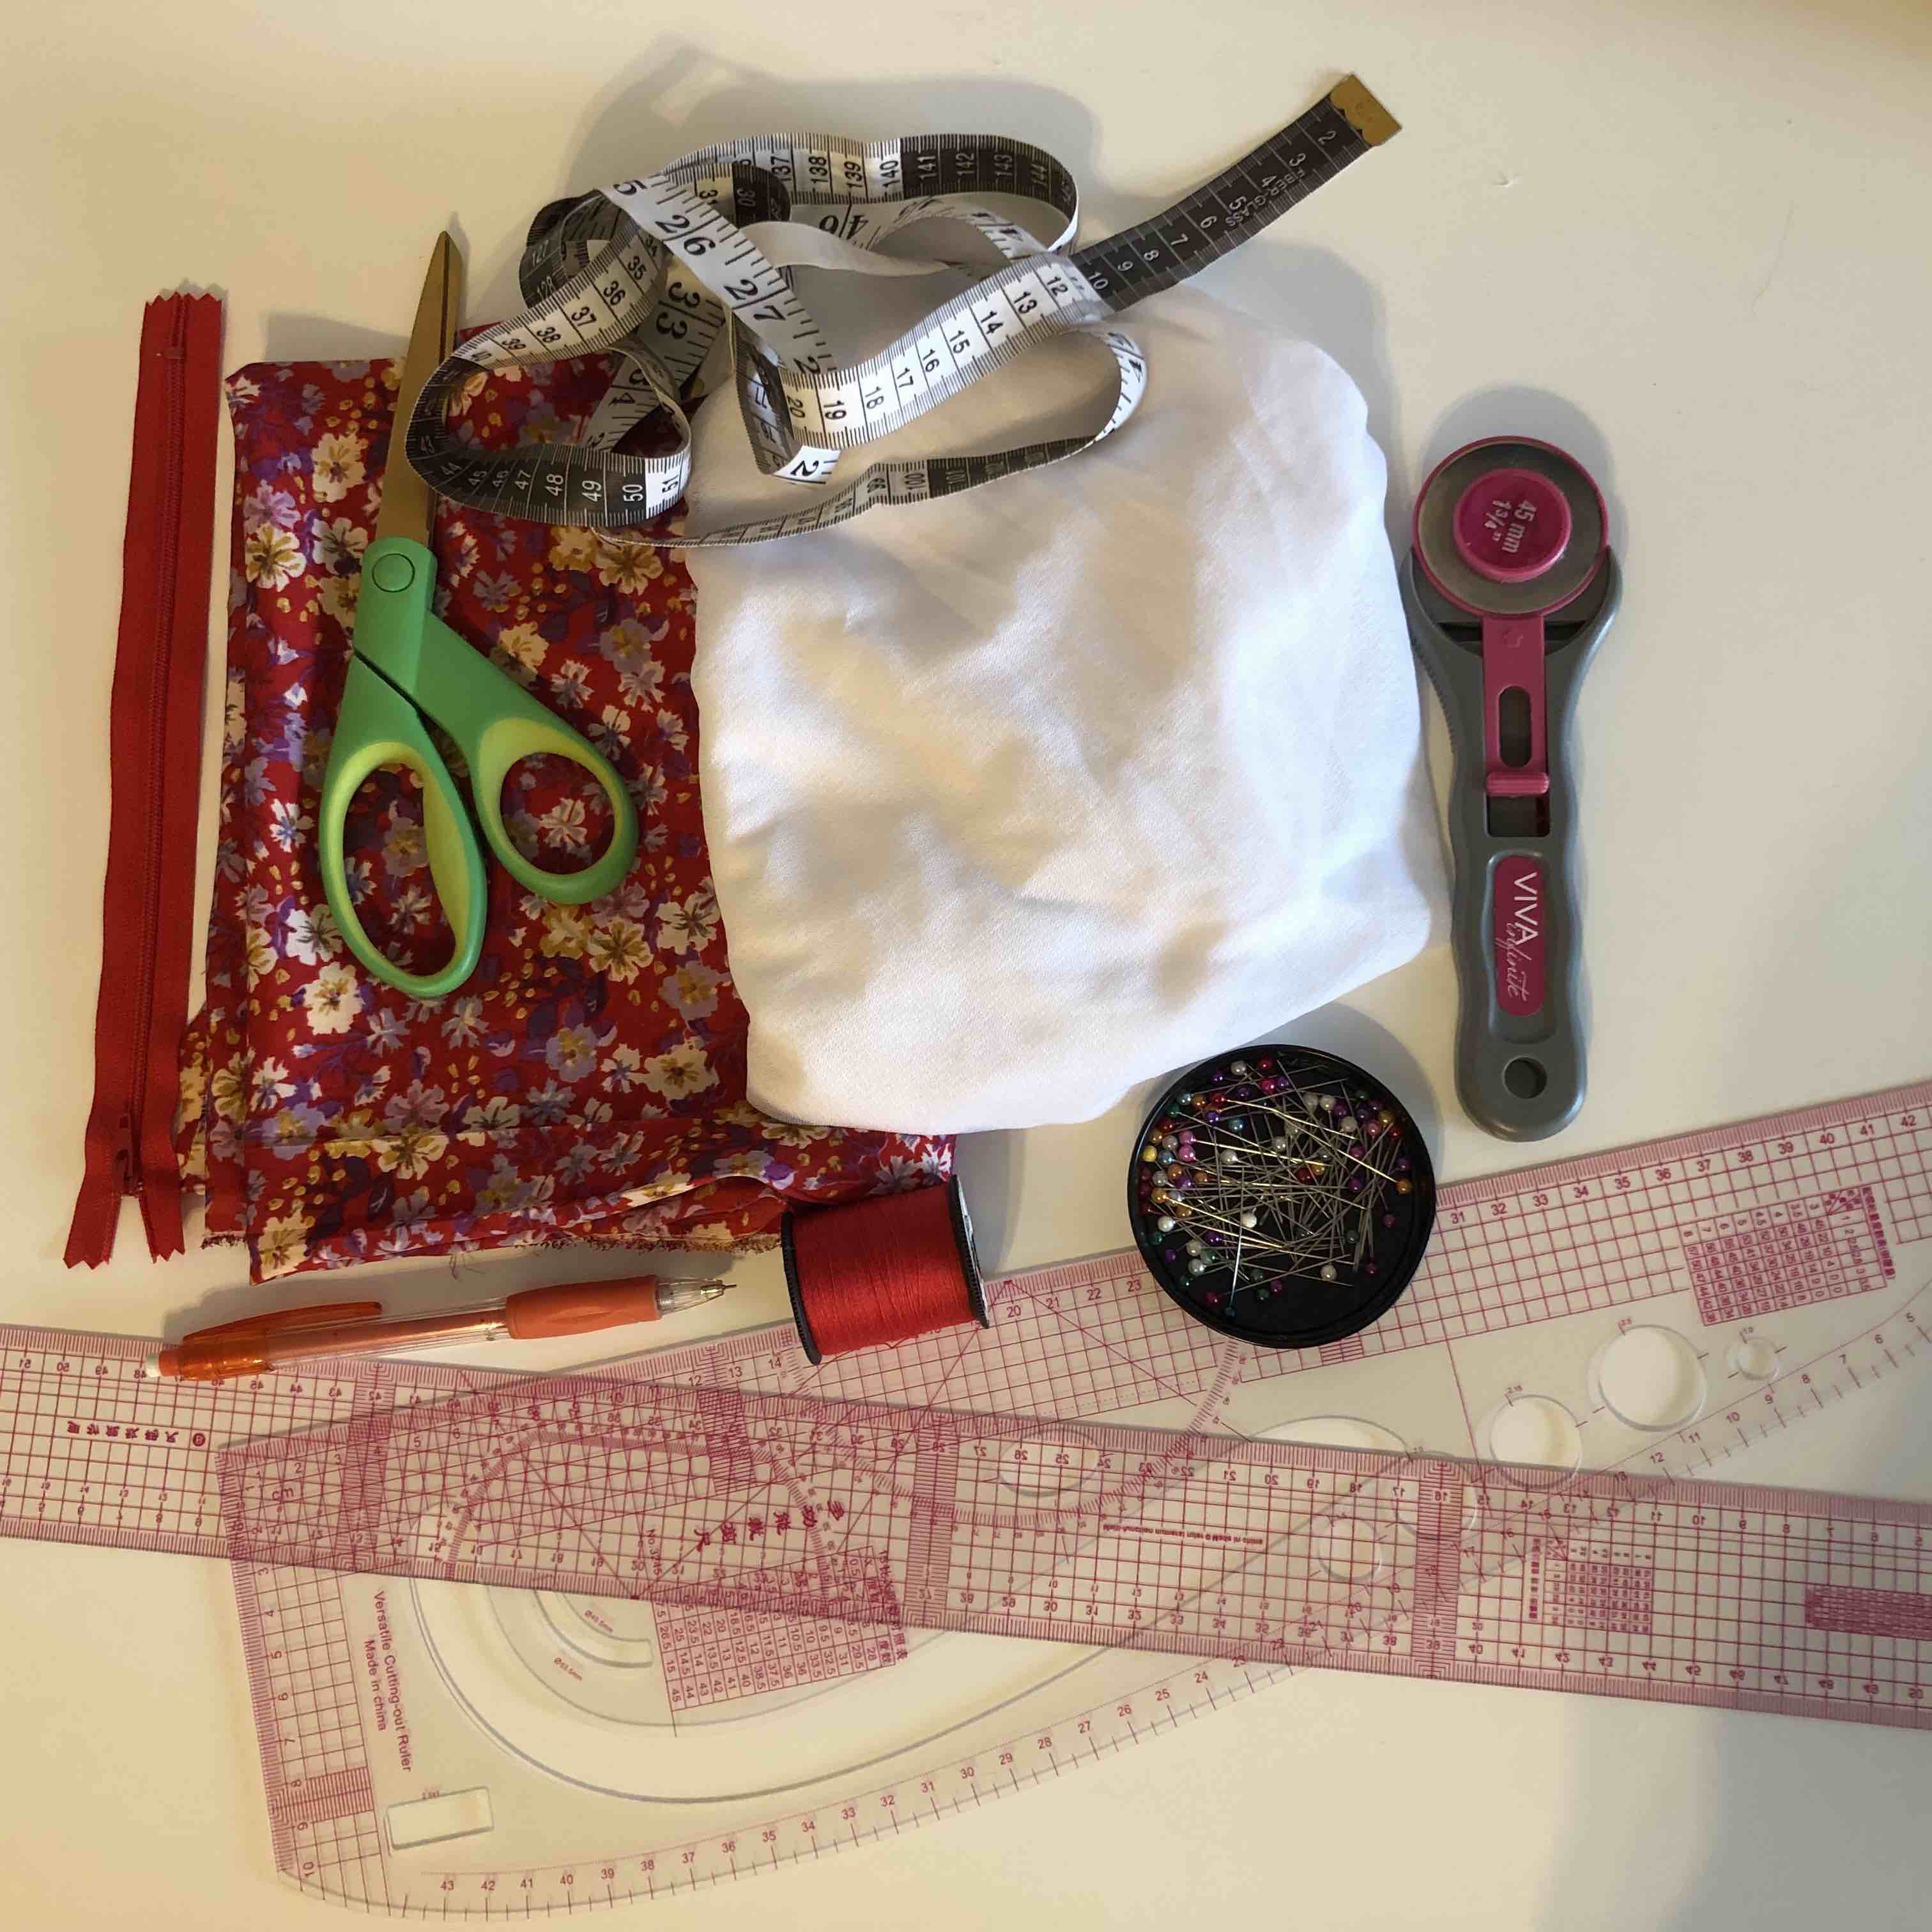
- I utilized 2 yards of red iris crepe de Chine print from Fashion Wholesale Direct, along with white fusible interfacing.
- The tools employed for this project included red polyester thread, a Brother sewing machine, pins, scissors, a rotary cutter, measuring tape, a straight ruler, and a curved ruler.
Assembly Process
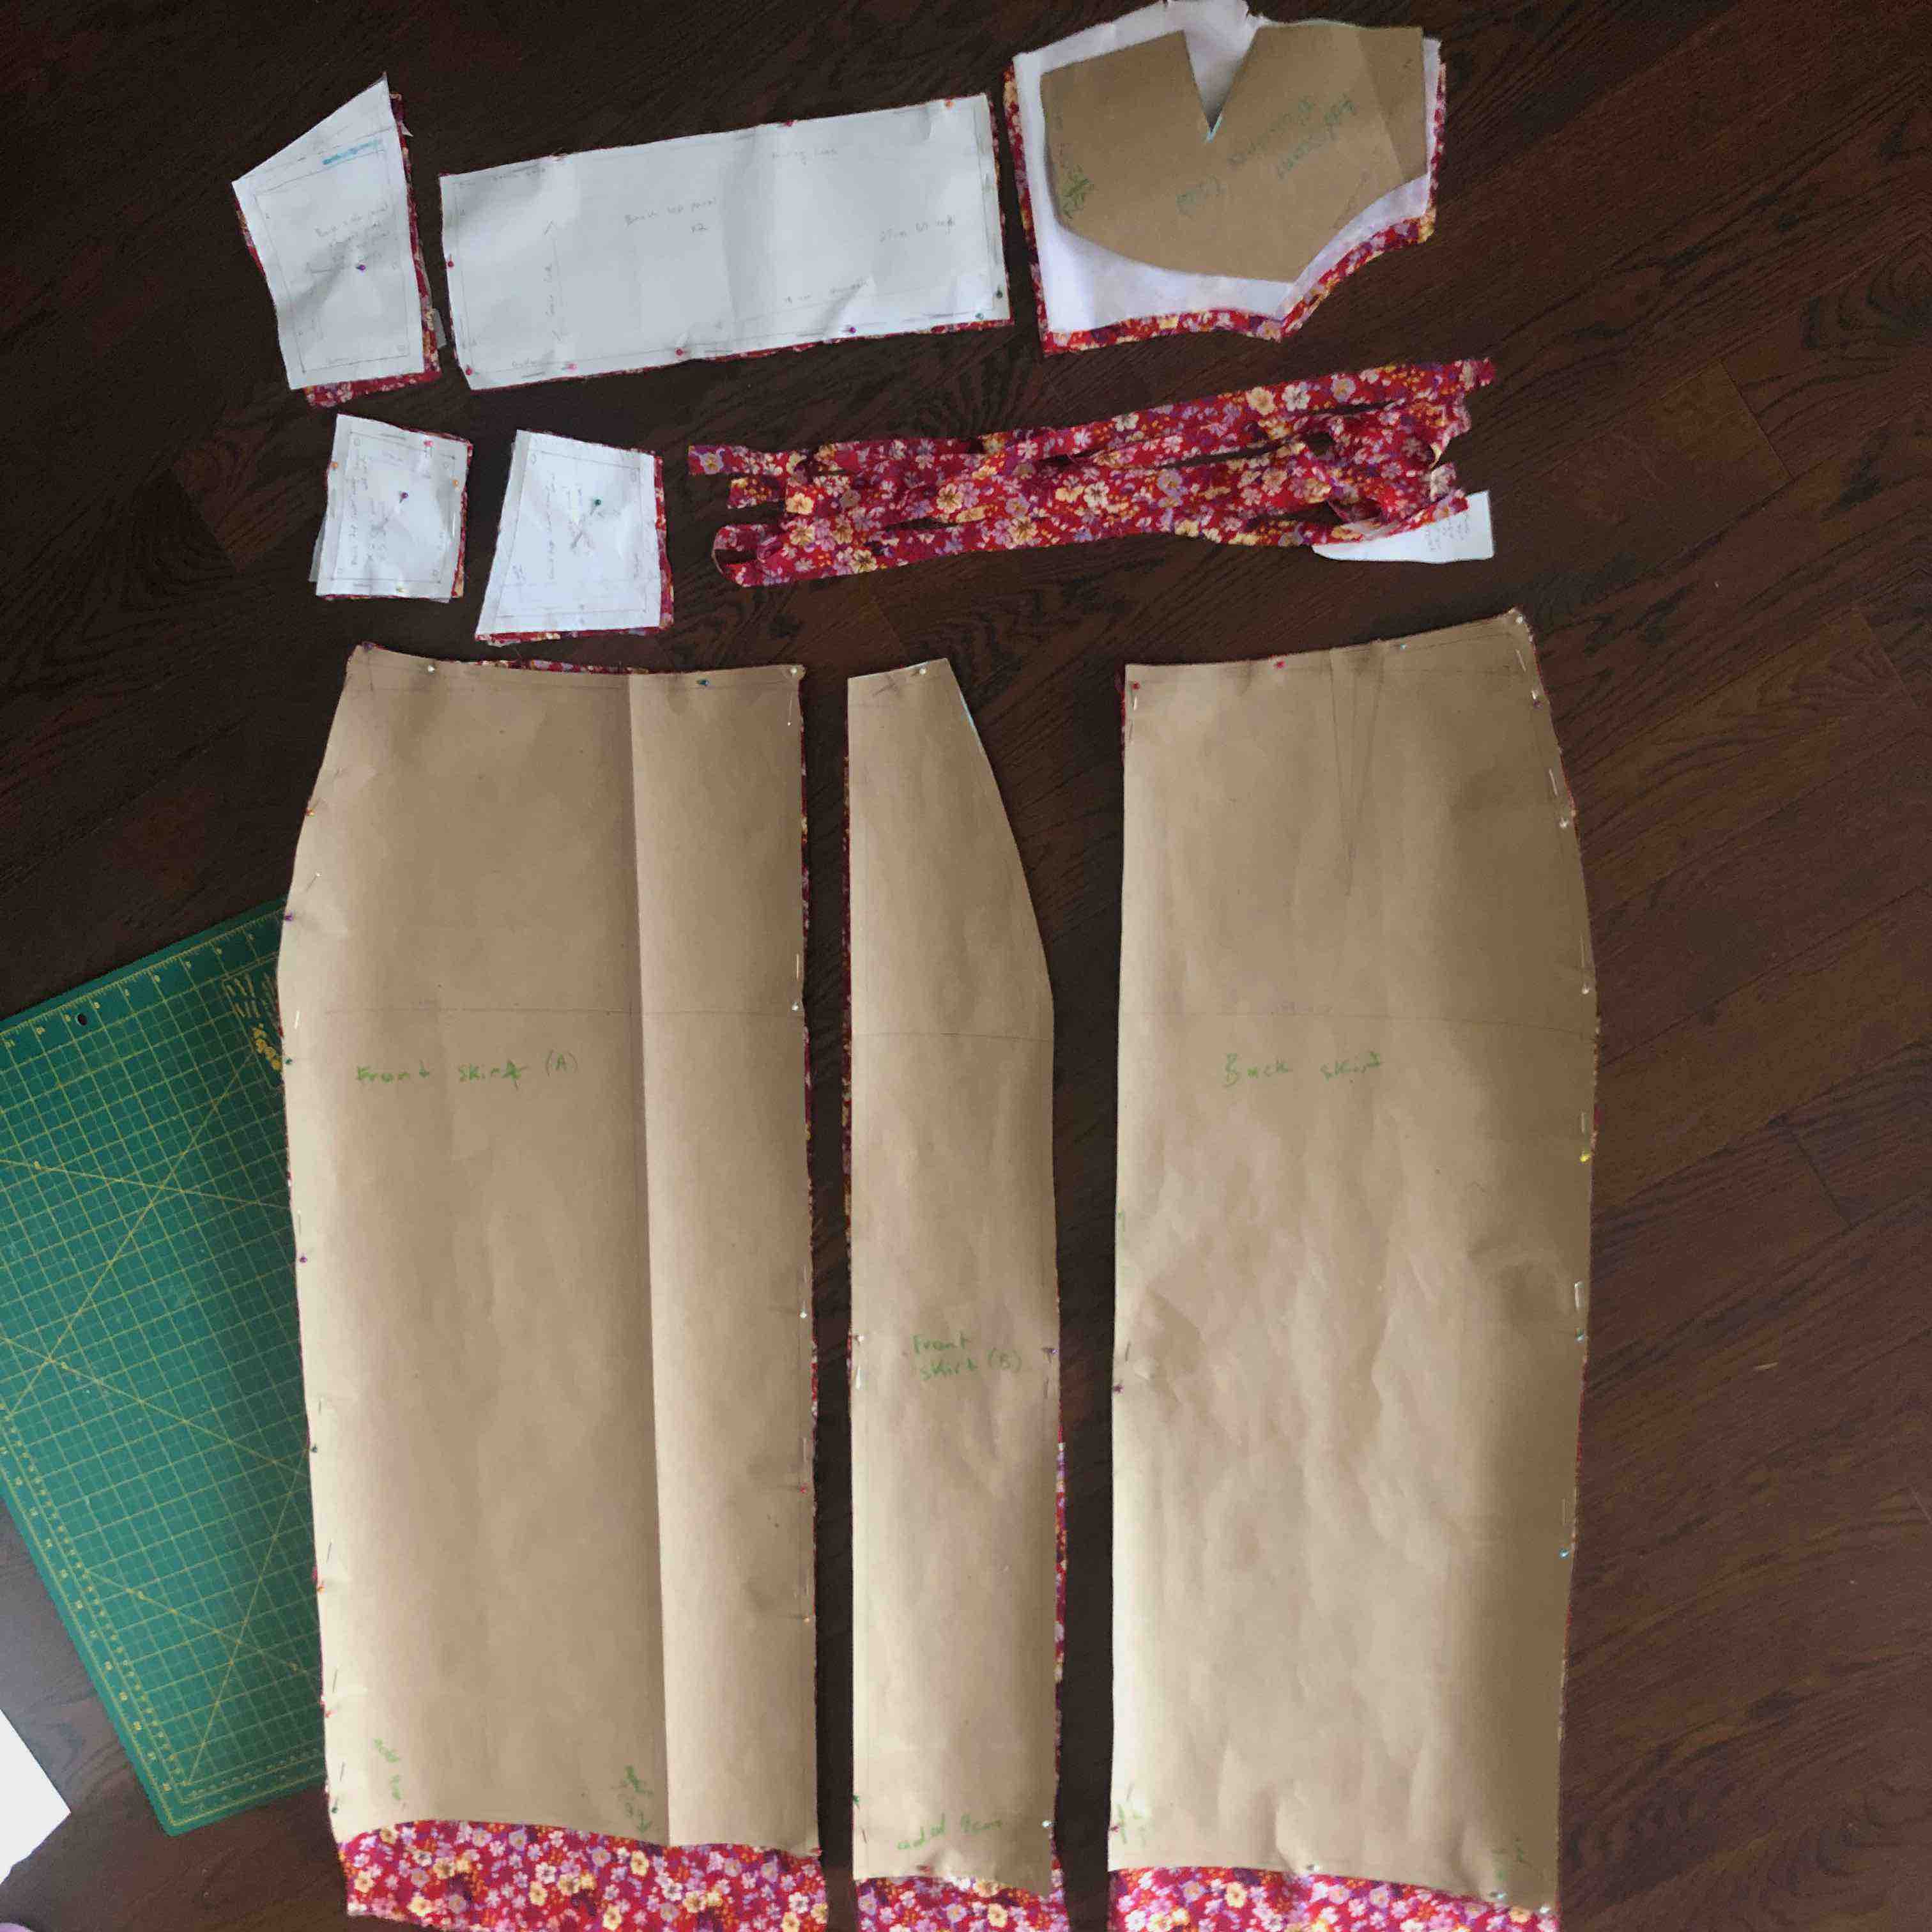
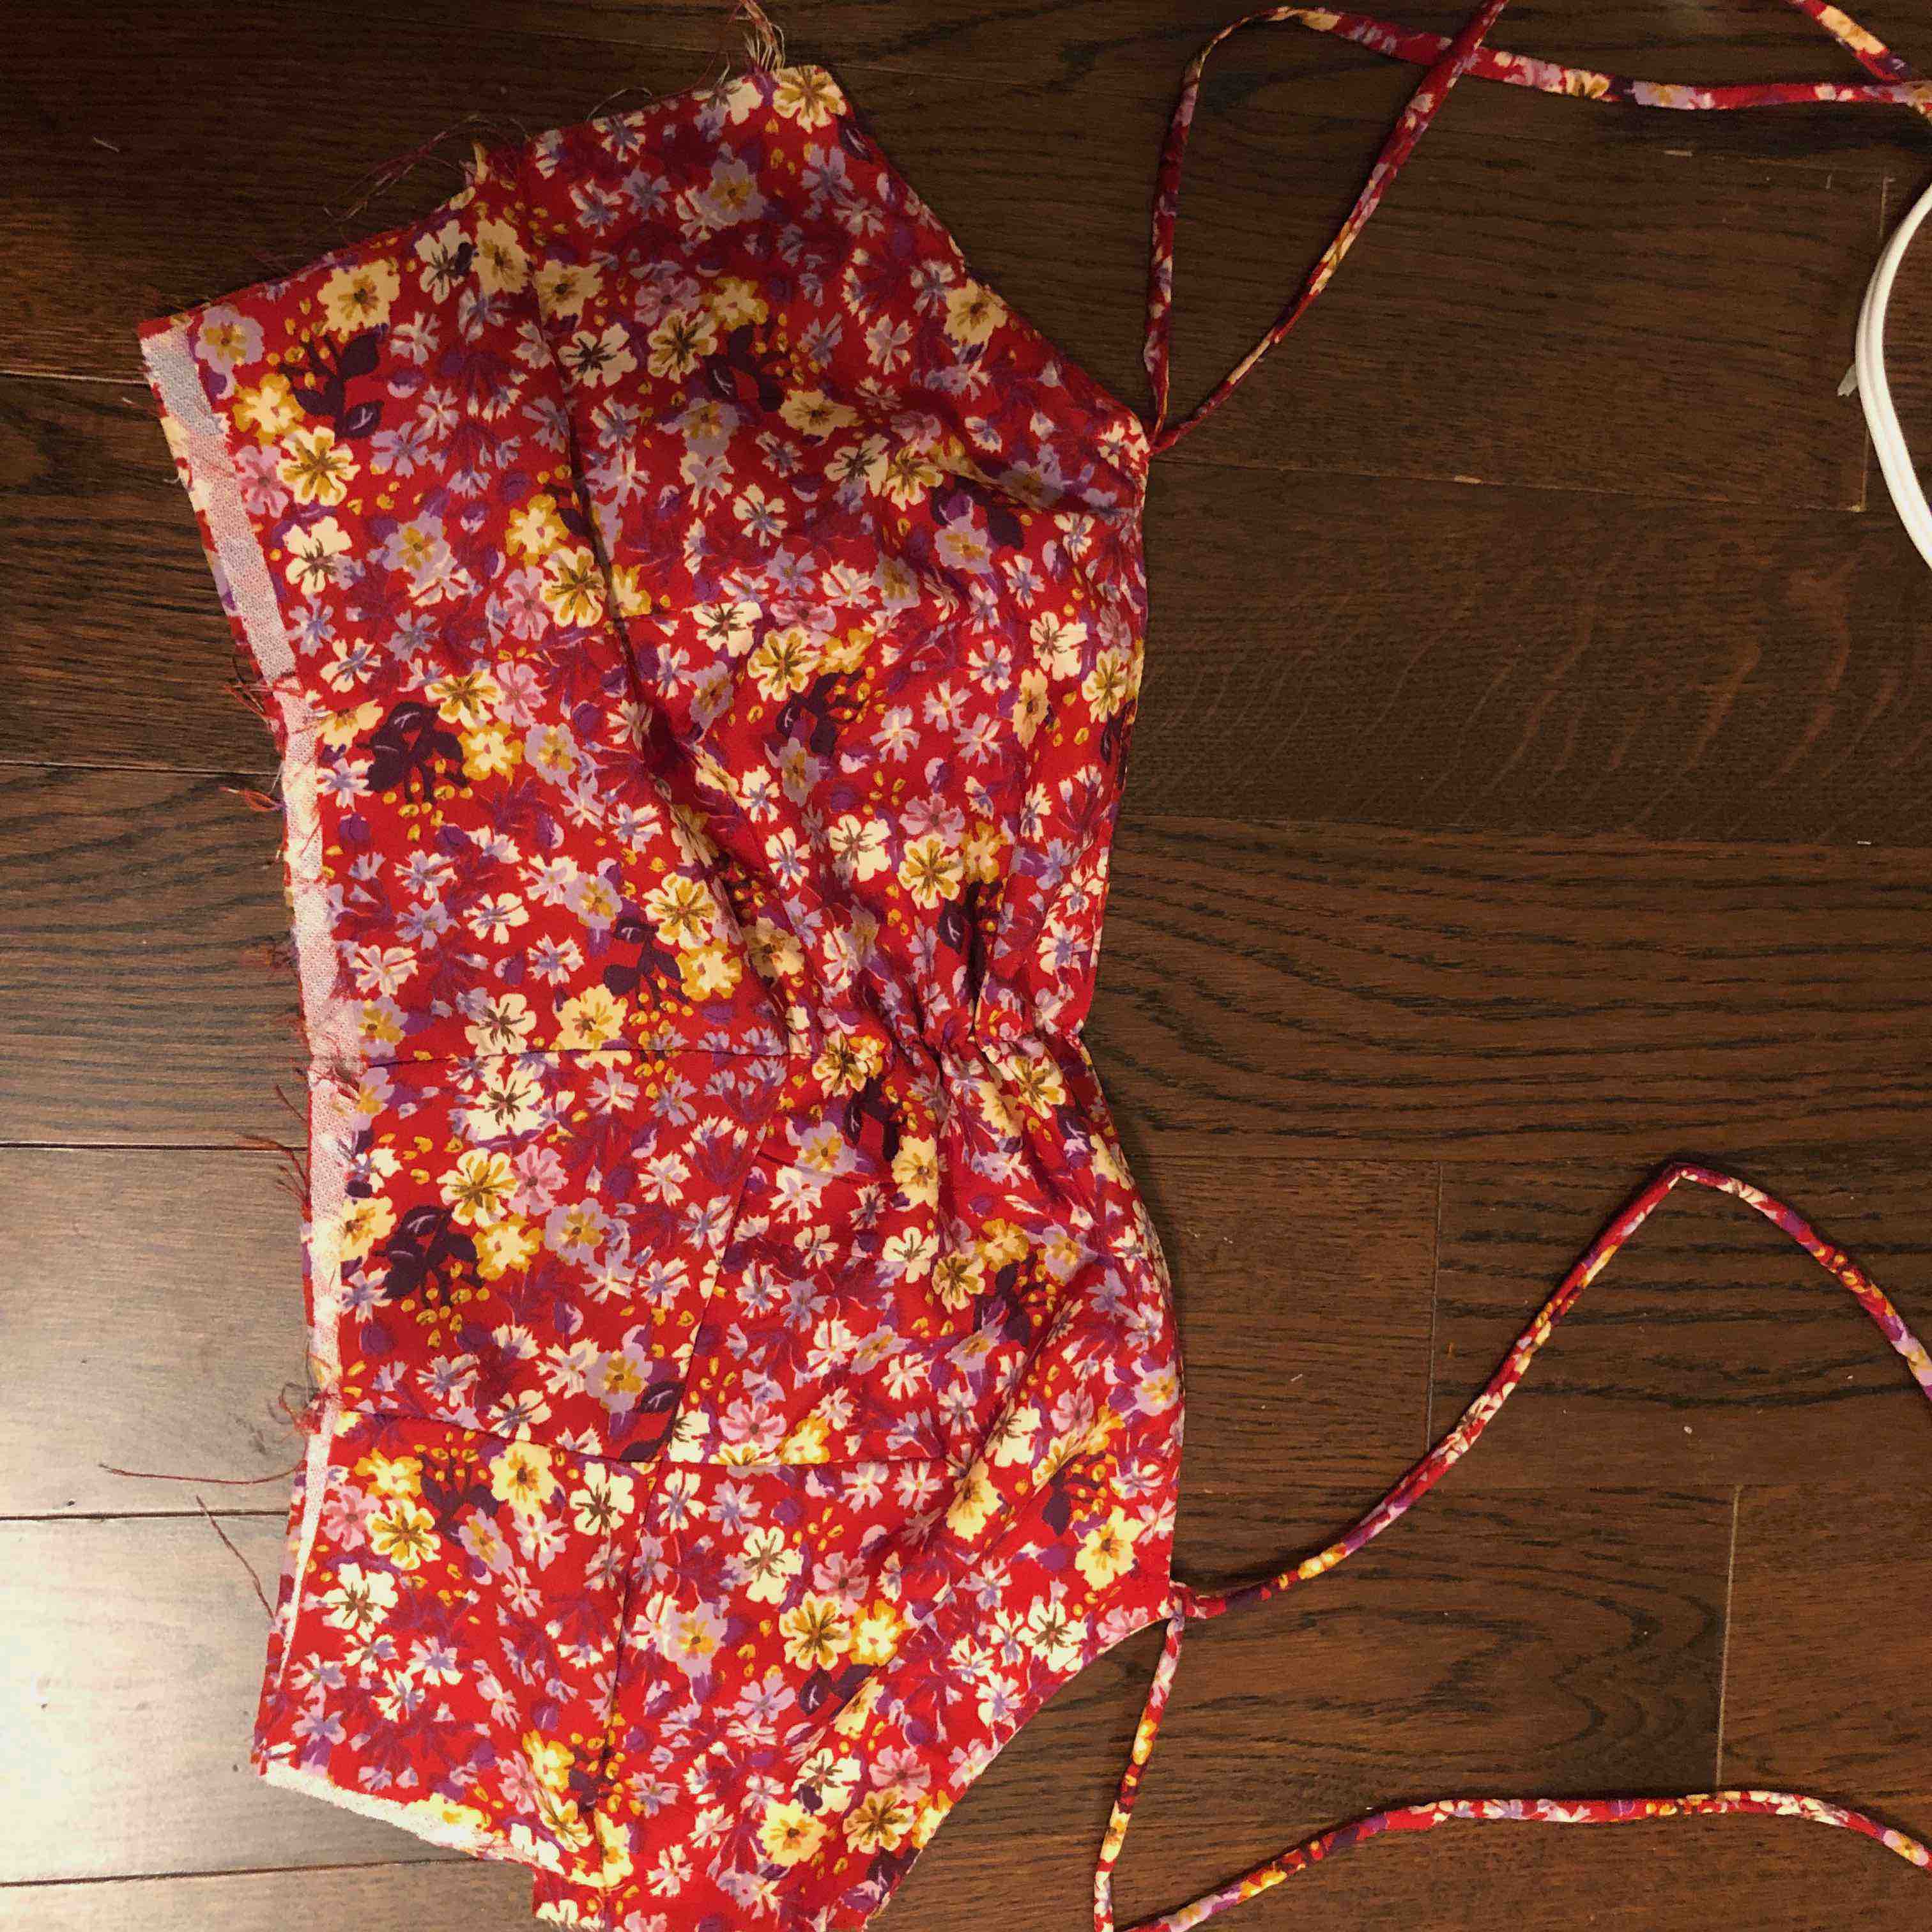
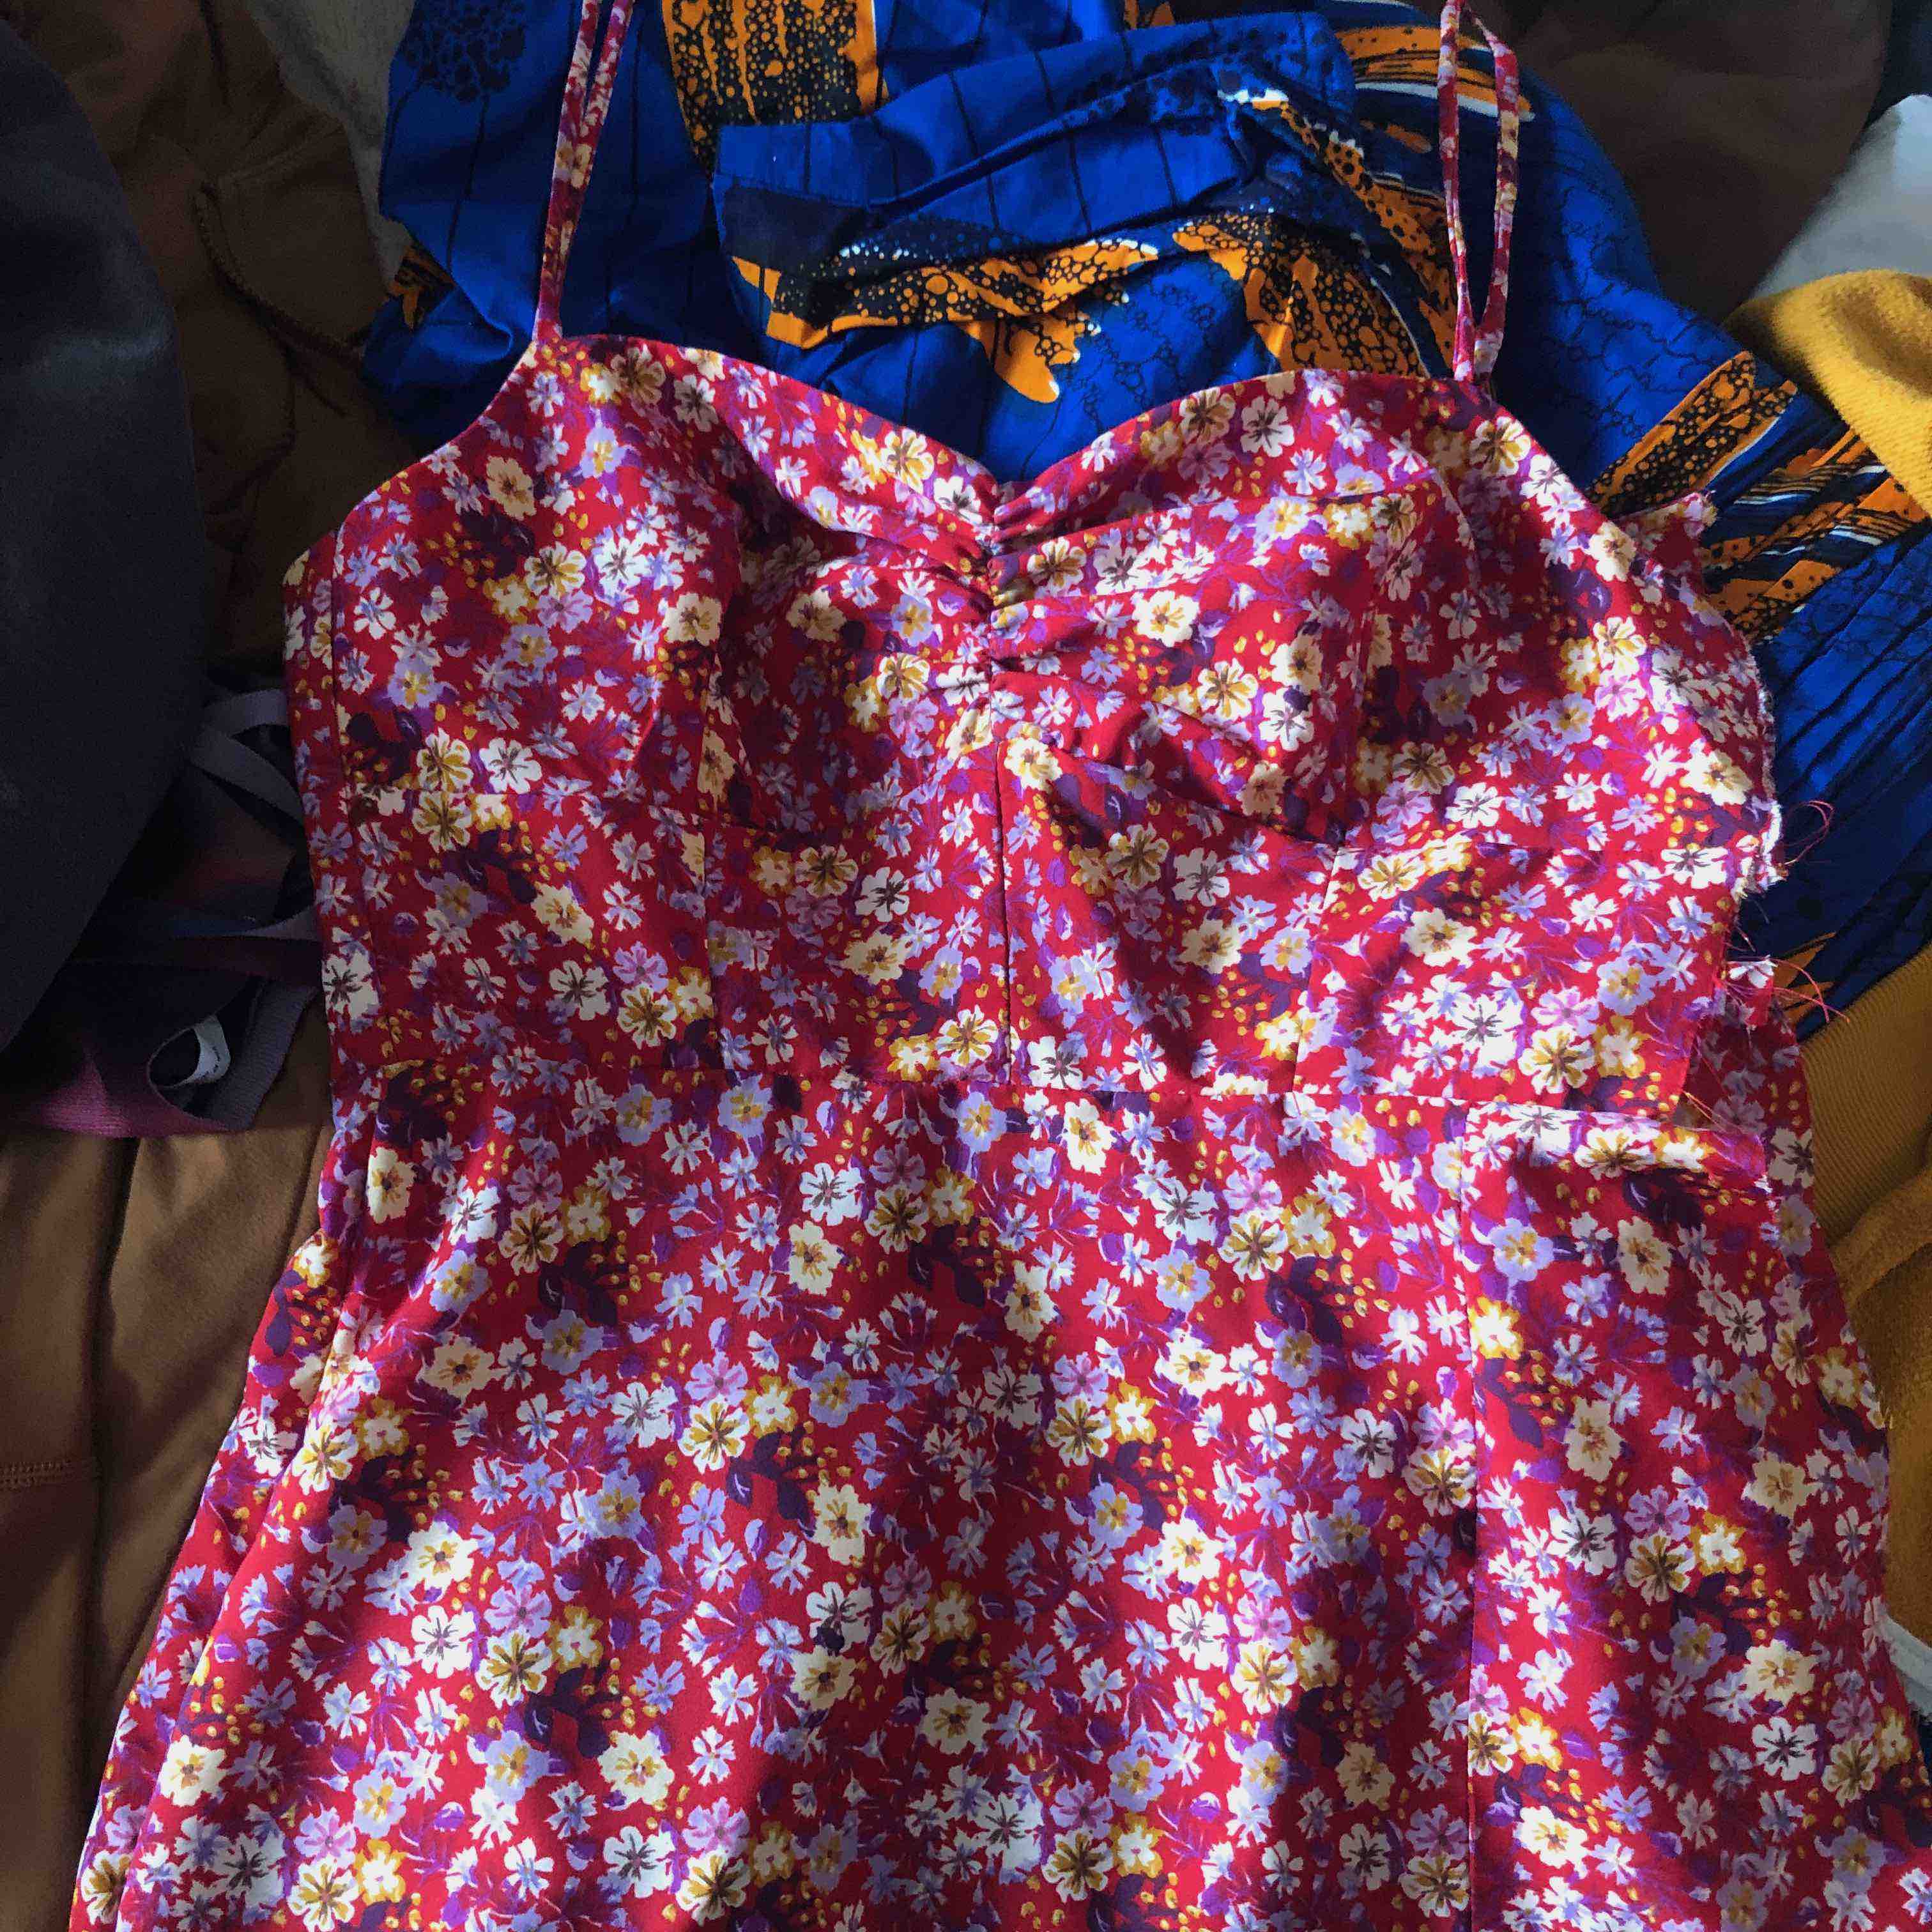
- I developed the paper pattern by adapting a dress I purchased from Zara, refining the bodice pieces for an improved fit.
- Additionally, I referenced Helen Joseph-Armstrong's 'Pattern-making for Fashion Design' to create a pattern for the skirt, while crafting spaghetti straps from 3 cm wide strips.
- After cutting out all the fabric pieces, I began assembly by fusing interfacing to the bodice sections and sewing all the pieces together while also attaching the spaghetti straps.
- Next, I stitched together the skirt pieces and then sewed them to the bodice.
- The final steps involved adding the zipper, securing the straps to the back, and finishing the bottom hem of the dress.
Inspiration/Reference Photo
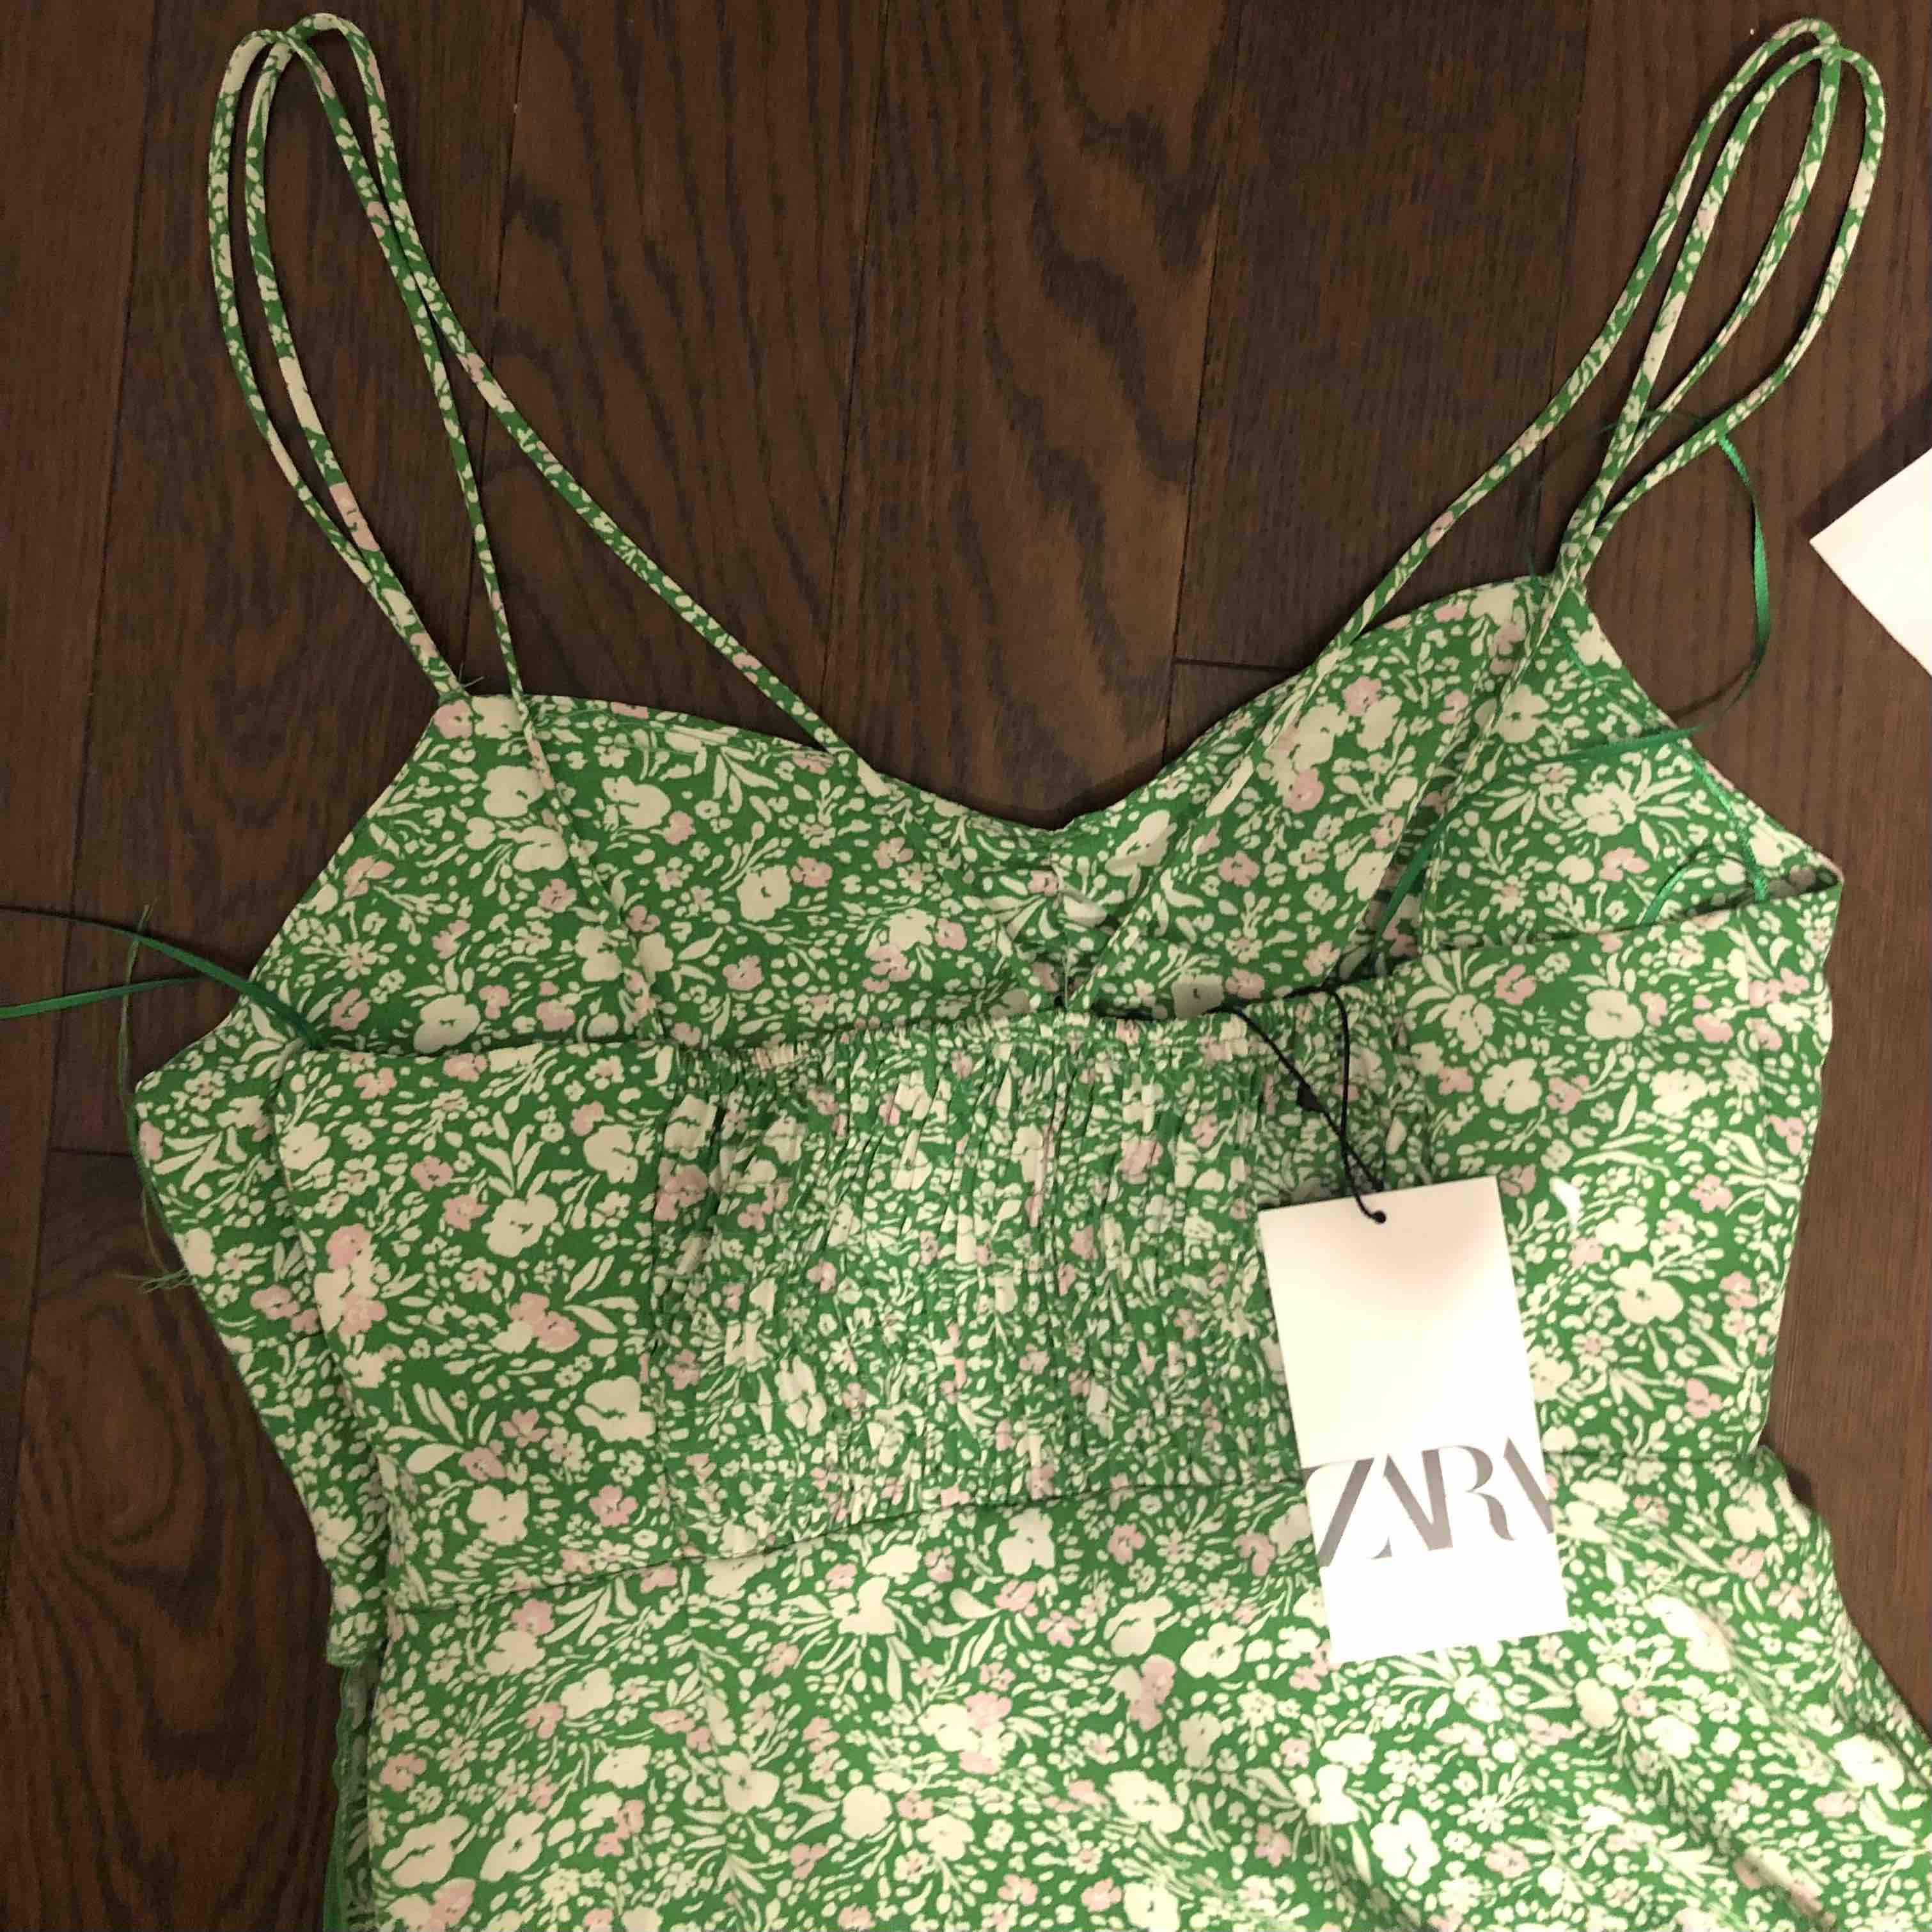
- This was the dress from Zara I was replicating.
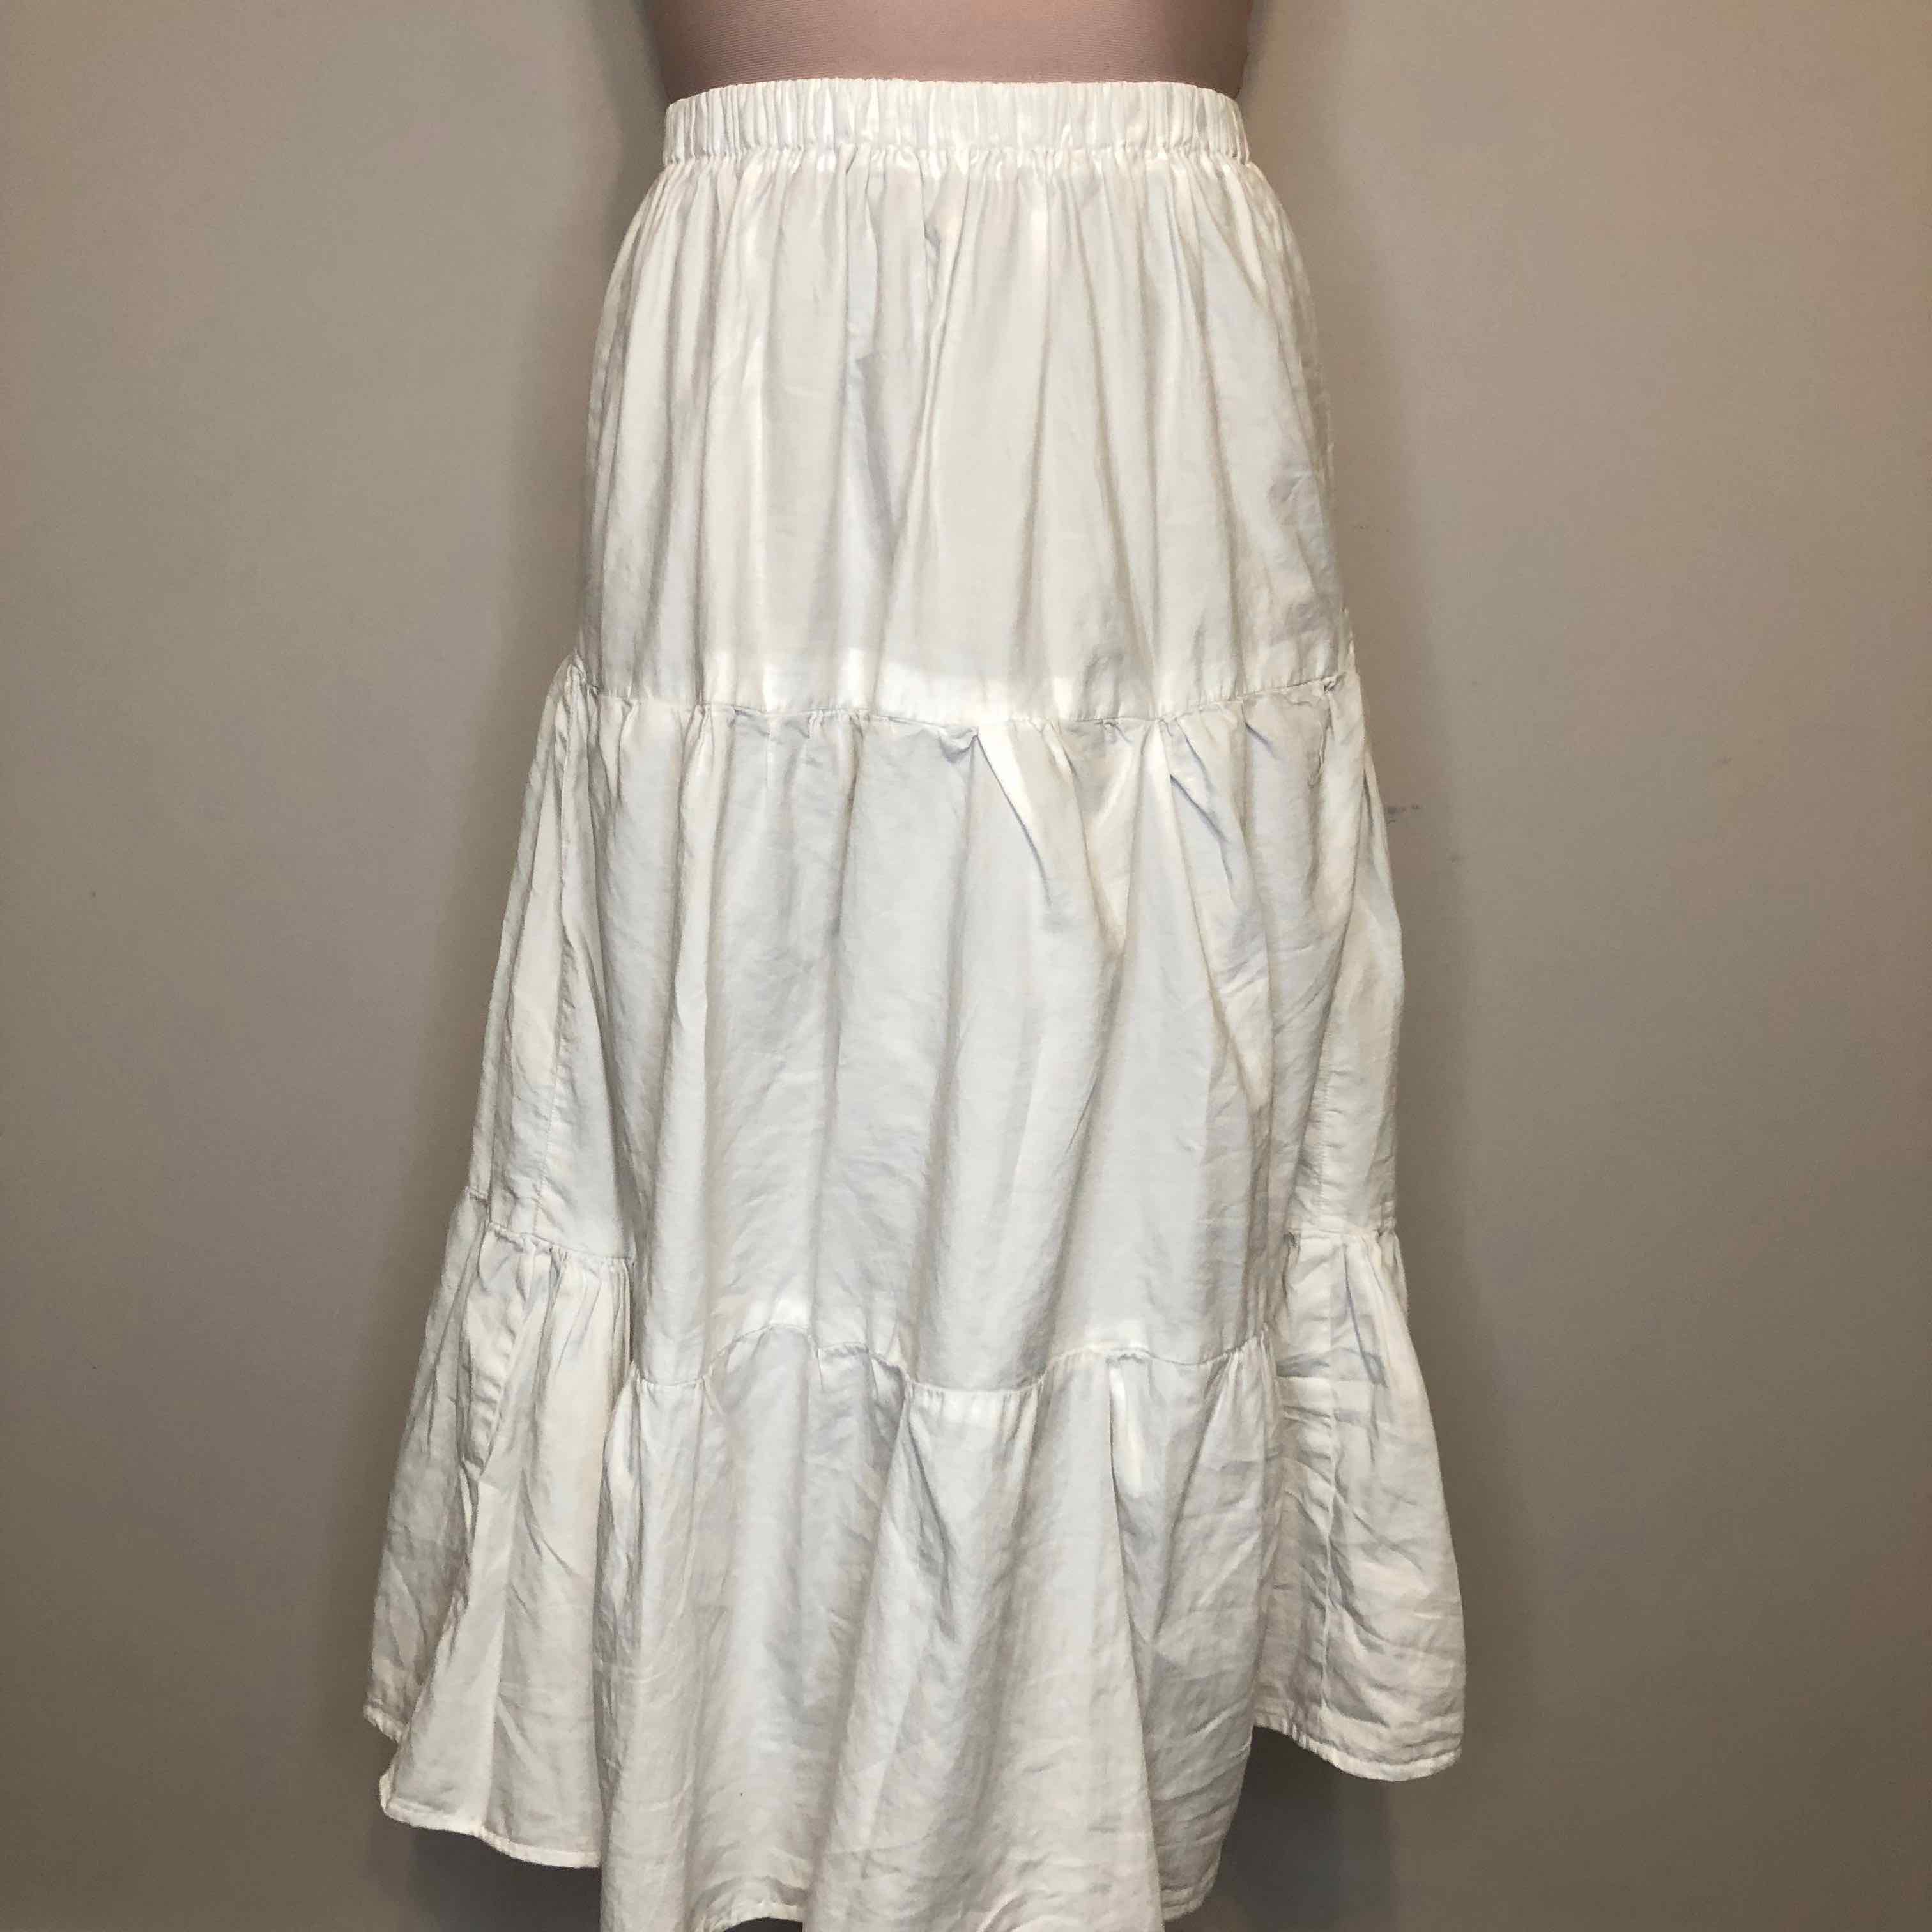
White Tiered Skirt
This long skirt has three tiered layers, crafted from a repurposed white cotton bedsheet fabric. Embracing comfort and style, it features a snug 1-inch elastic waistband for a perfect fit.
- Took me two days to complete
- Completed on October 7, 2022
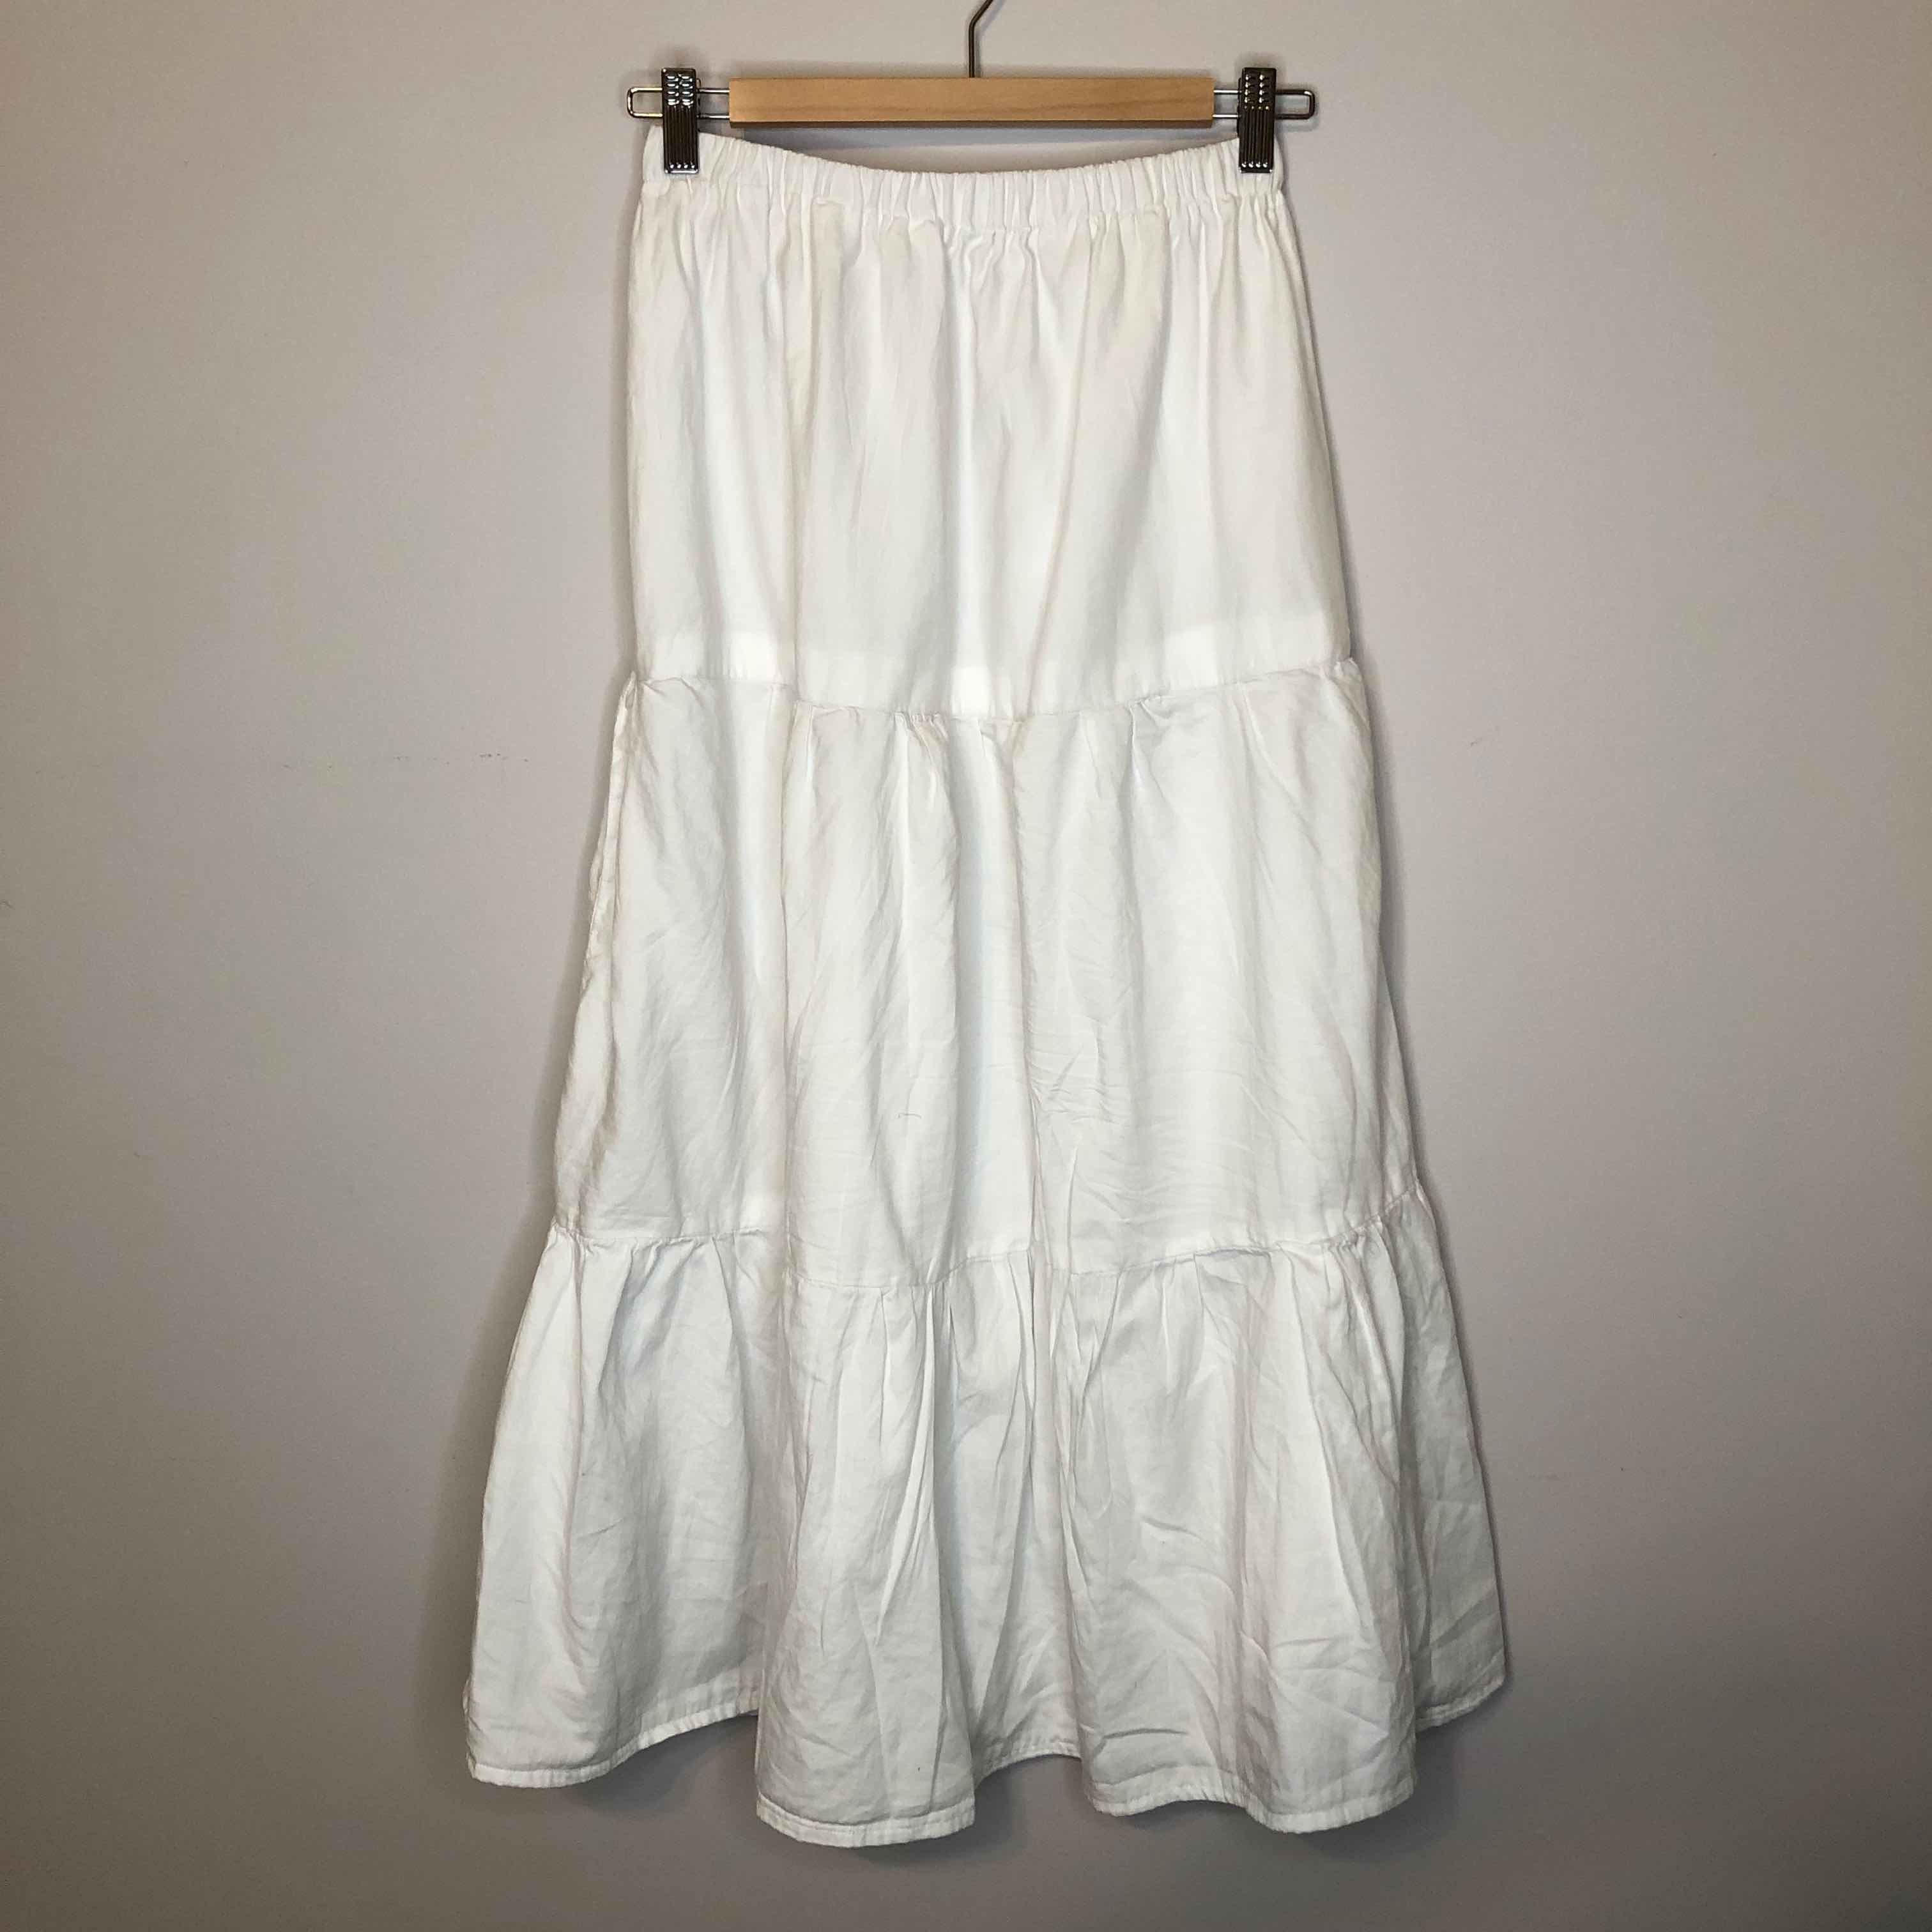
Materials and Tools
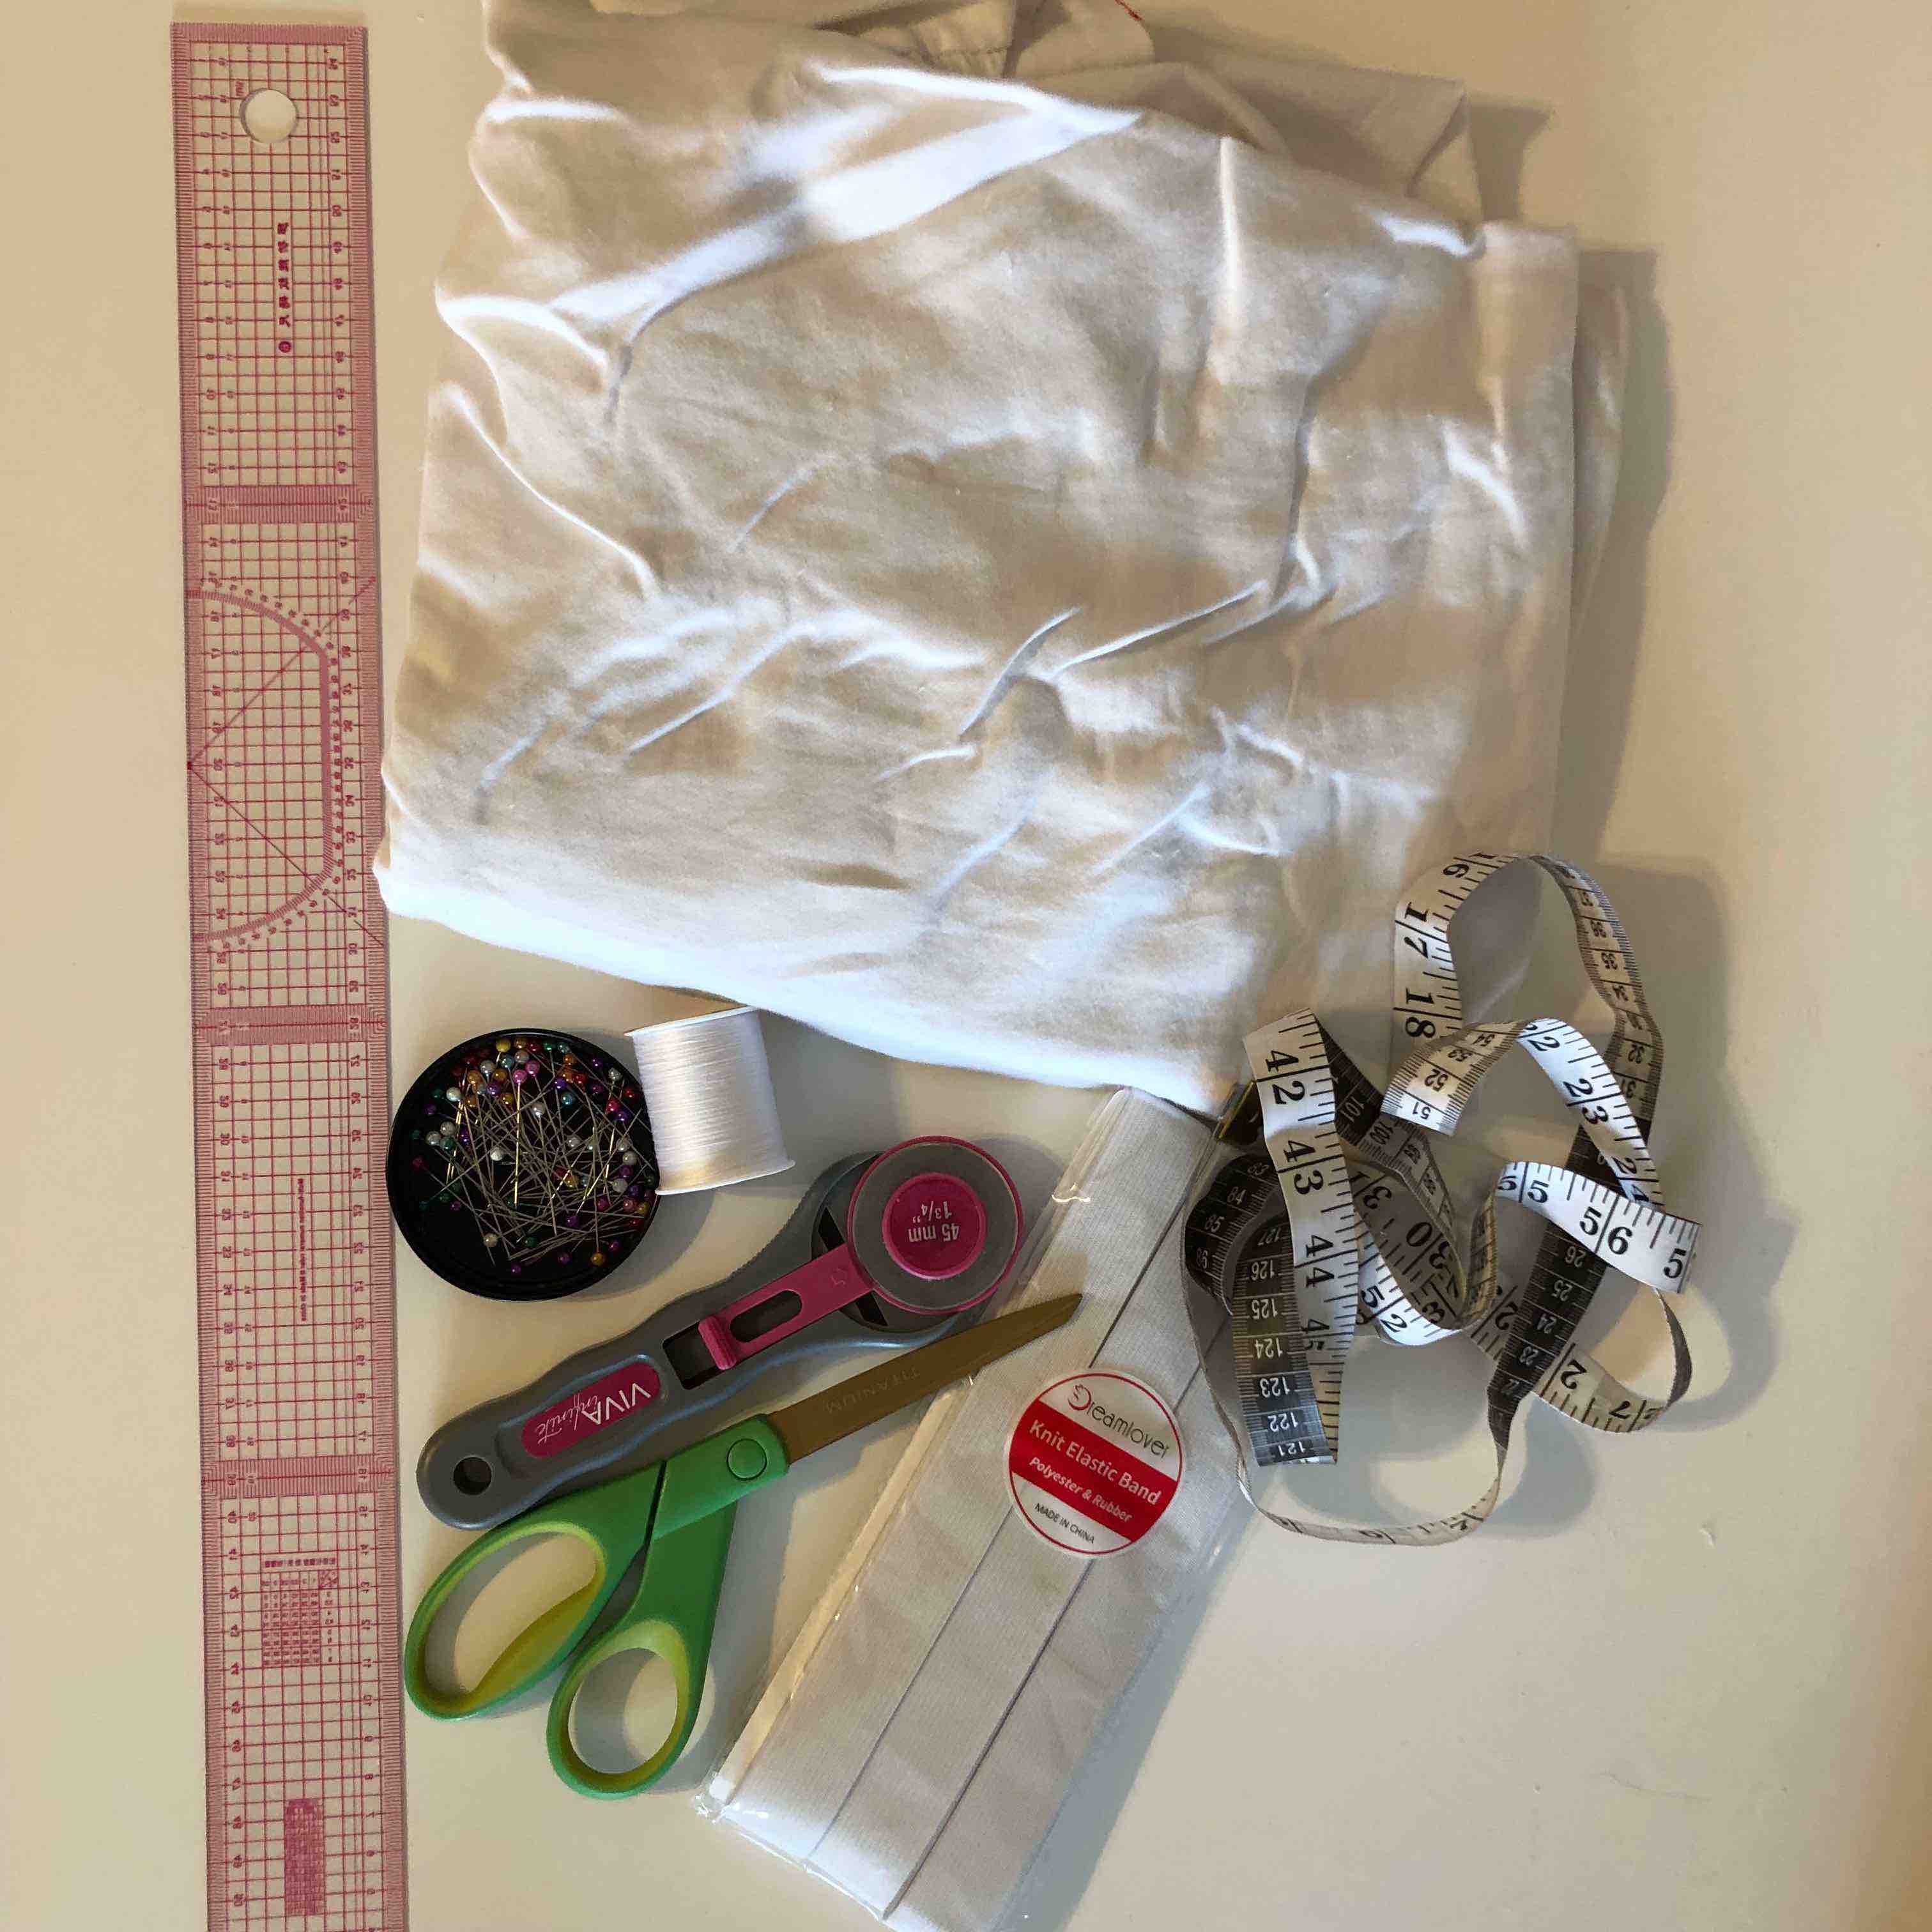
- I used a flat white bedsheet that I already owned.
- The tools I used include white polyester thread, Brother sewing machine, pins, scissors, measuring tape, a straight ruler, and a 1-inch thick elastic band.
Assembly Process
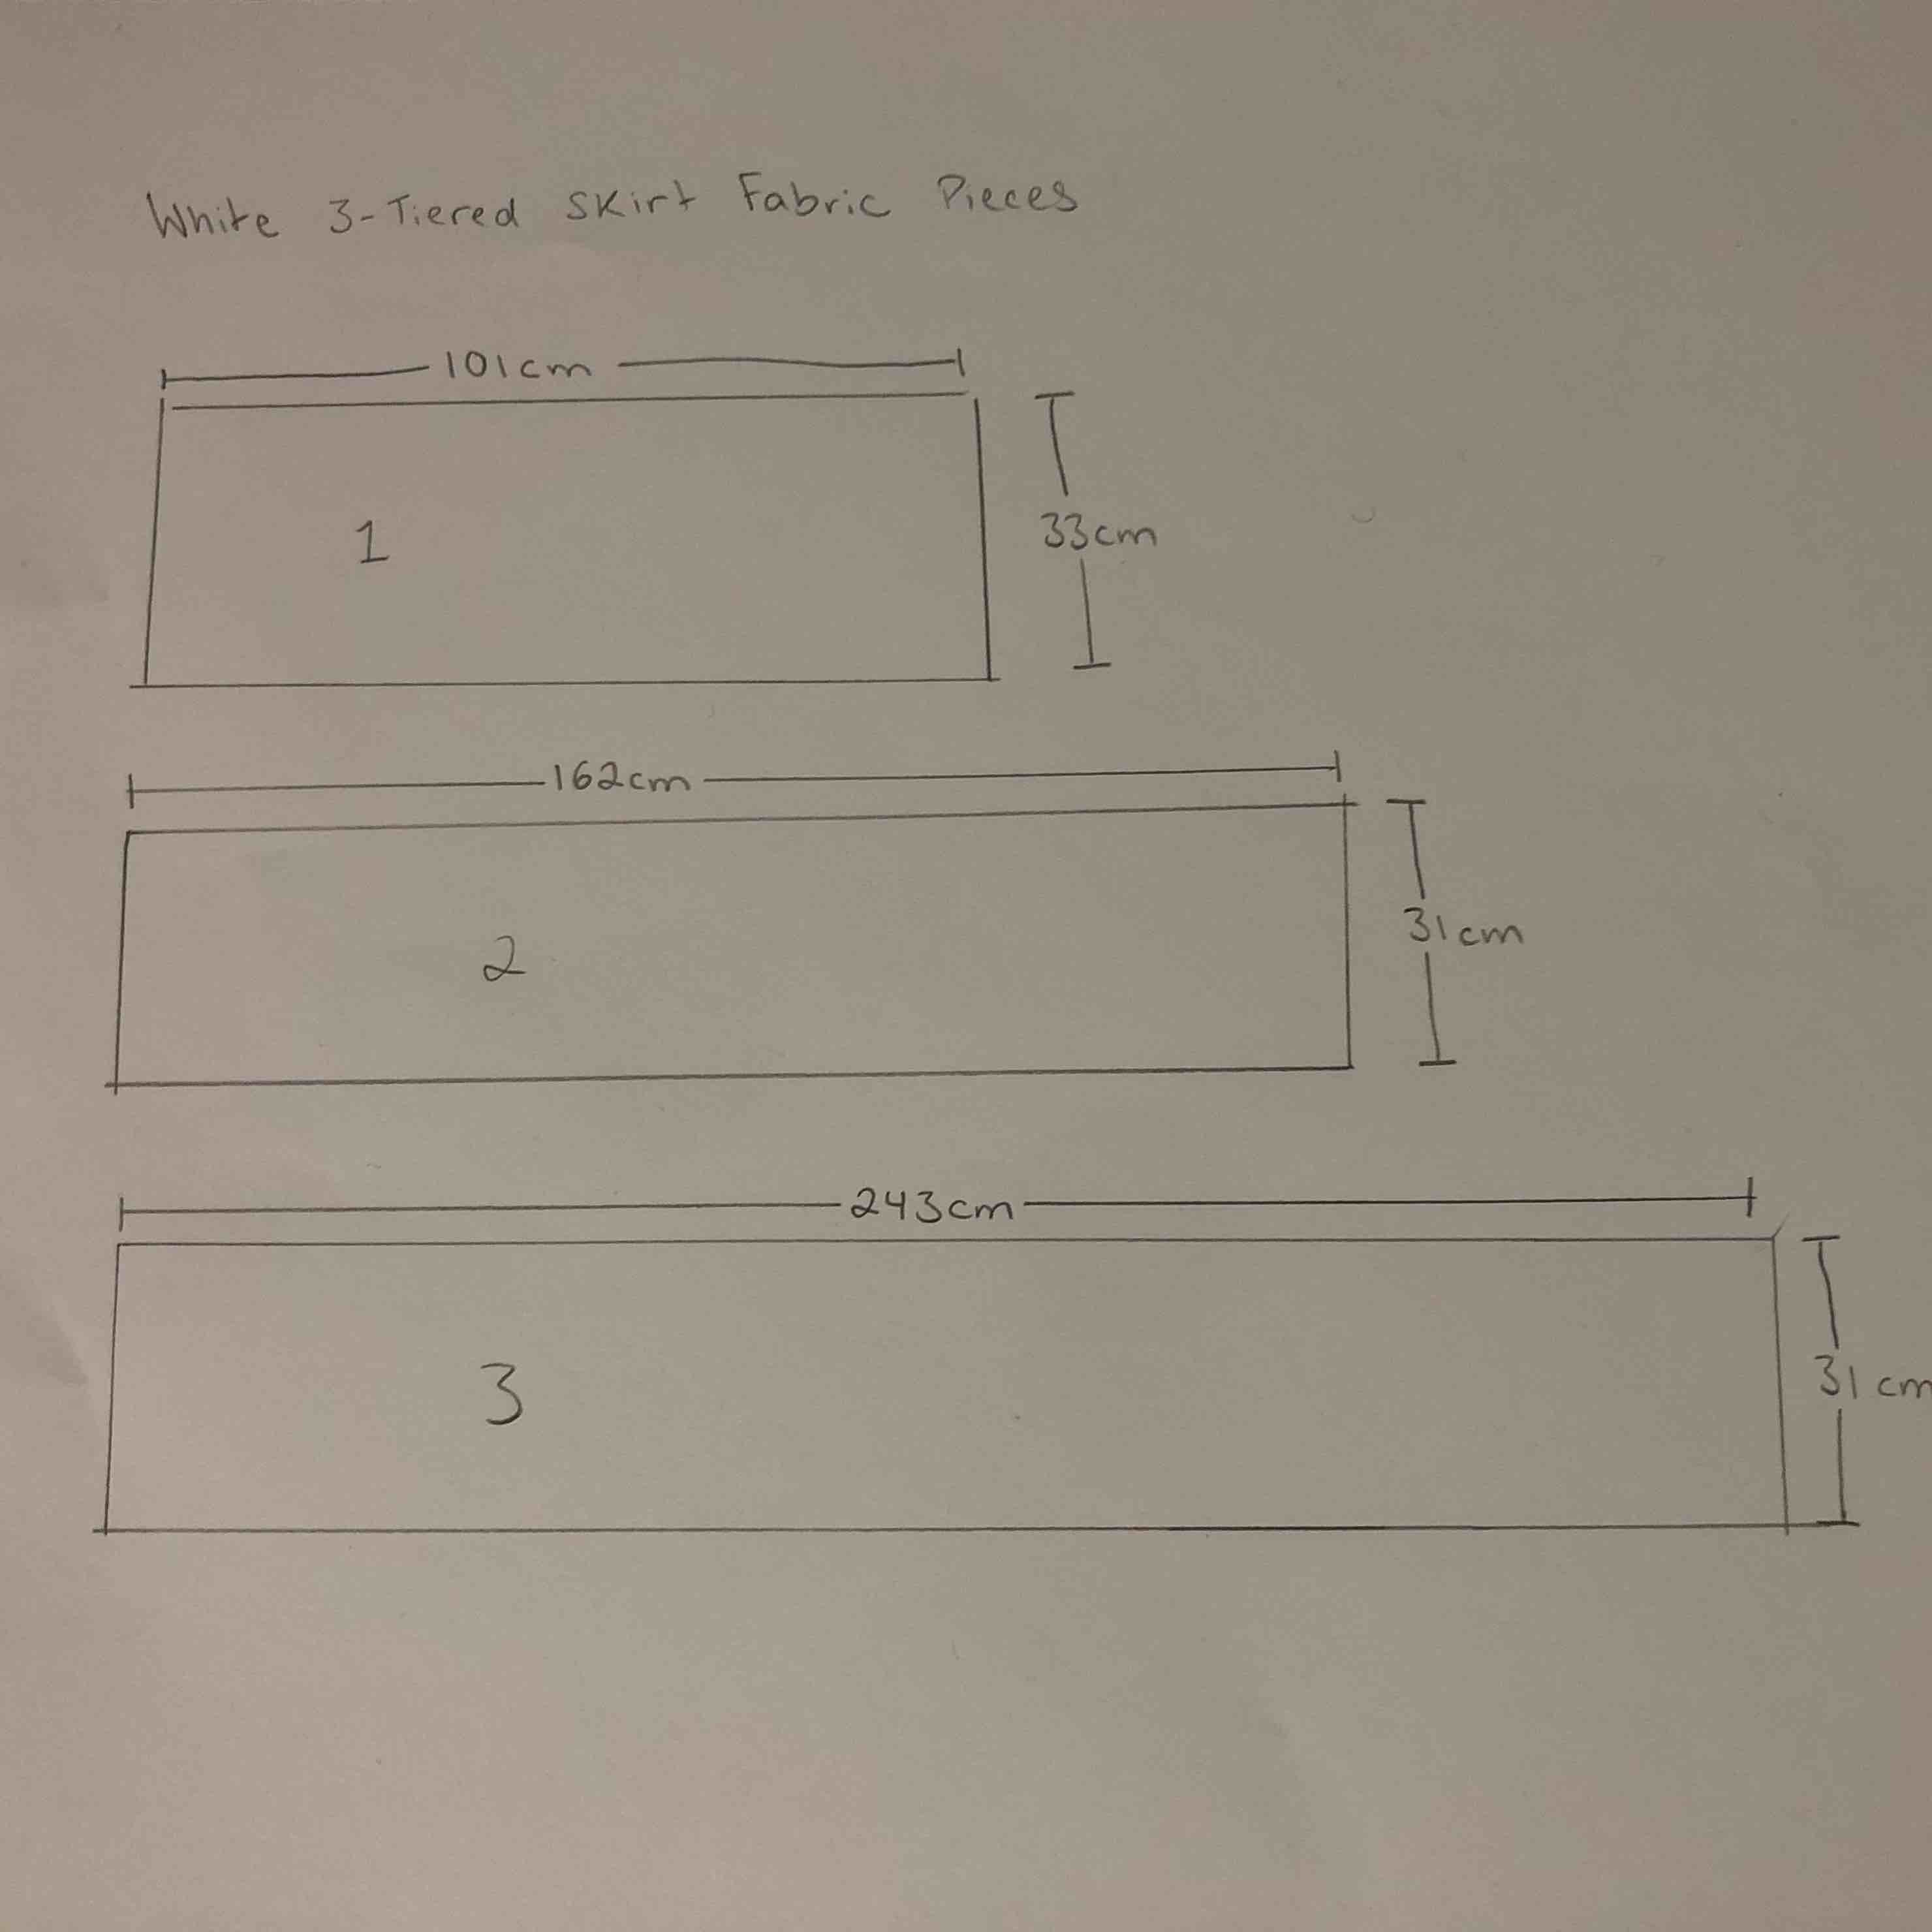
- I divided the skirt into three panels to accommodate its tiered design, ensuring each panel was a third of the desired skirt length.
- The smallest panel's length equalled my waist circumference multiplied by 1.5. The second panel's length was 1.5 times that of the first, and the third panel followed the same pattern.
- To assemble the panels, I gathered the top edge of the larger panels to match the circumference of the smaller one. Using machine stitching, I joined all the panels together seamlessly.
- For the waistband, I folded the top of the skirt to create a 1-inch channel, leaving a gap. I threaded the elastic through this gap, secured both ends of the elastic together, and then closed the gap with stitches.
Inspiration/Reference Photo
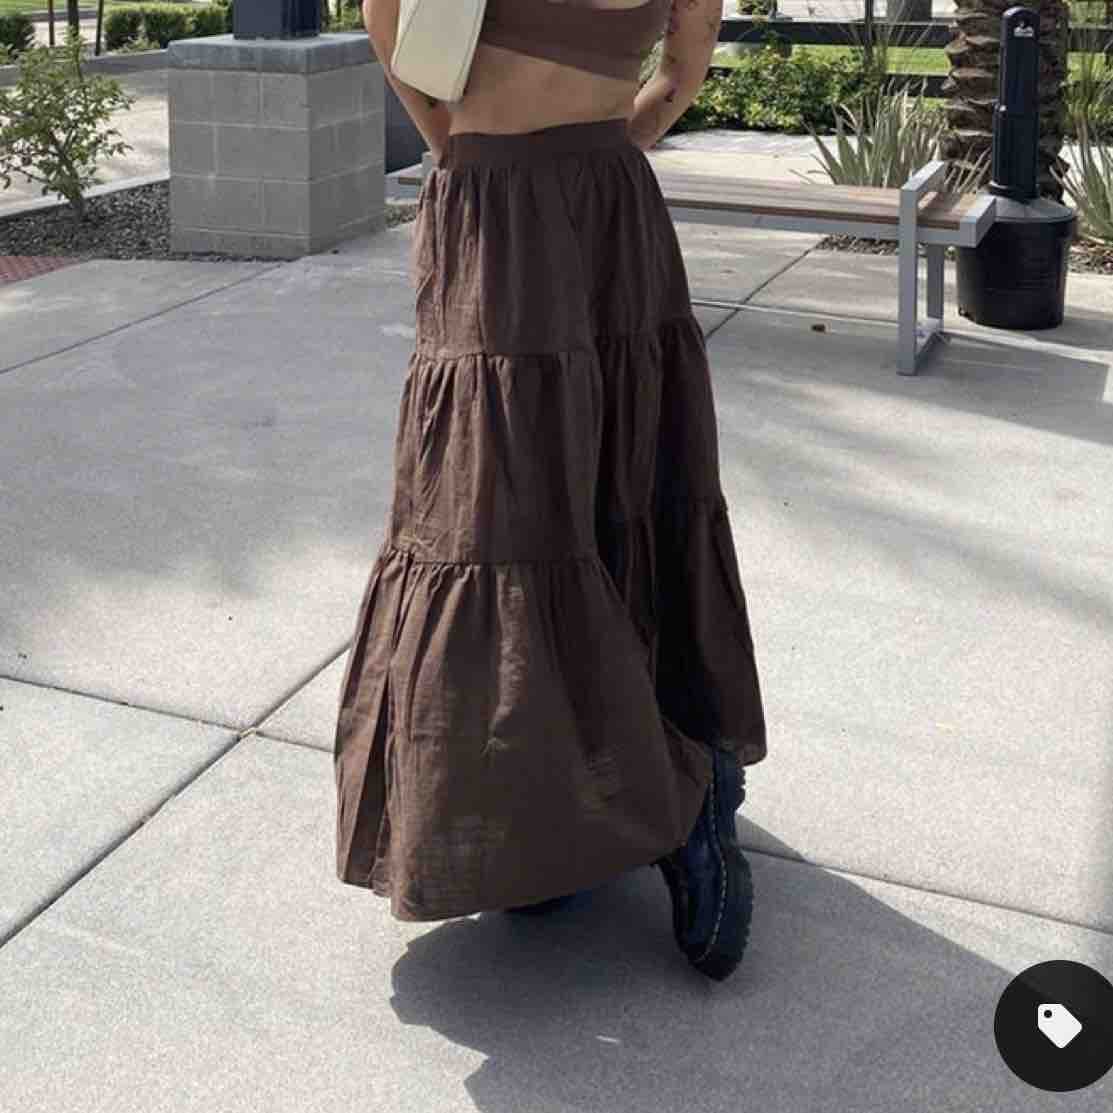
- This is the inspiration photo for the skirt I created.
Resources
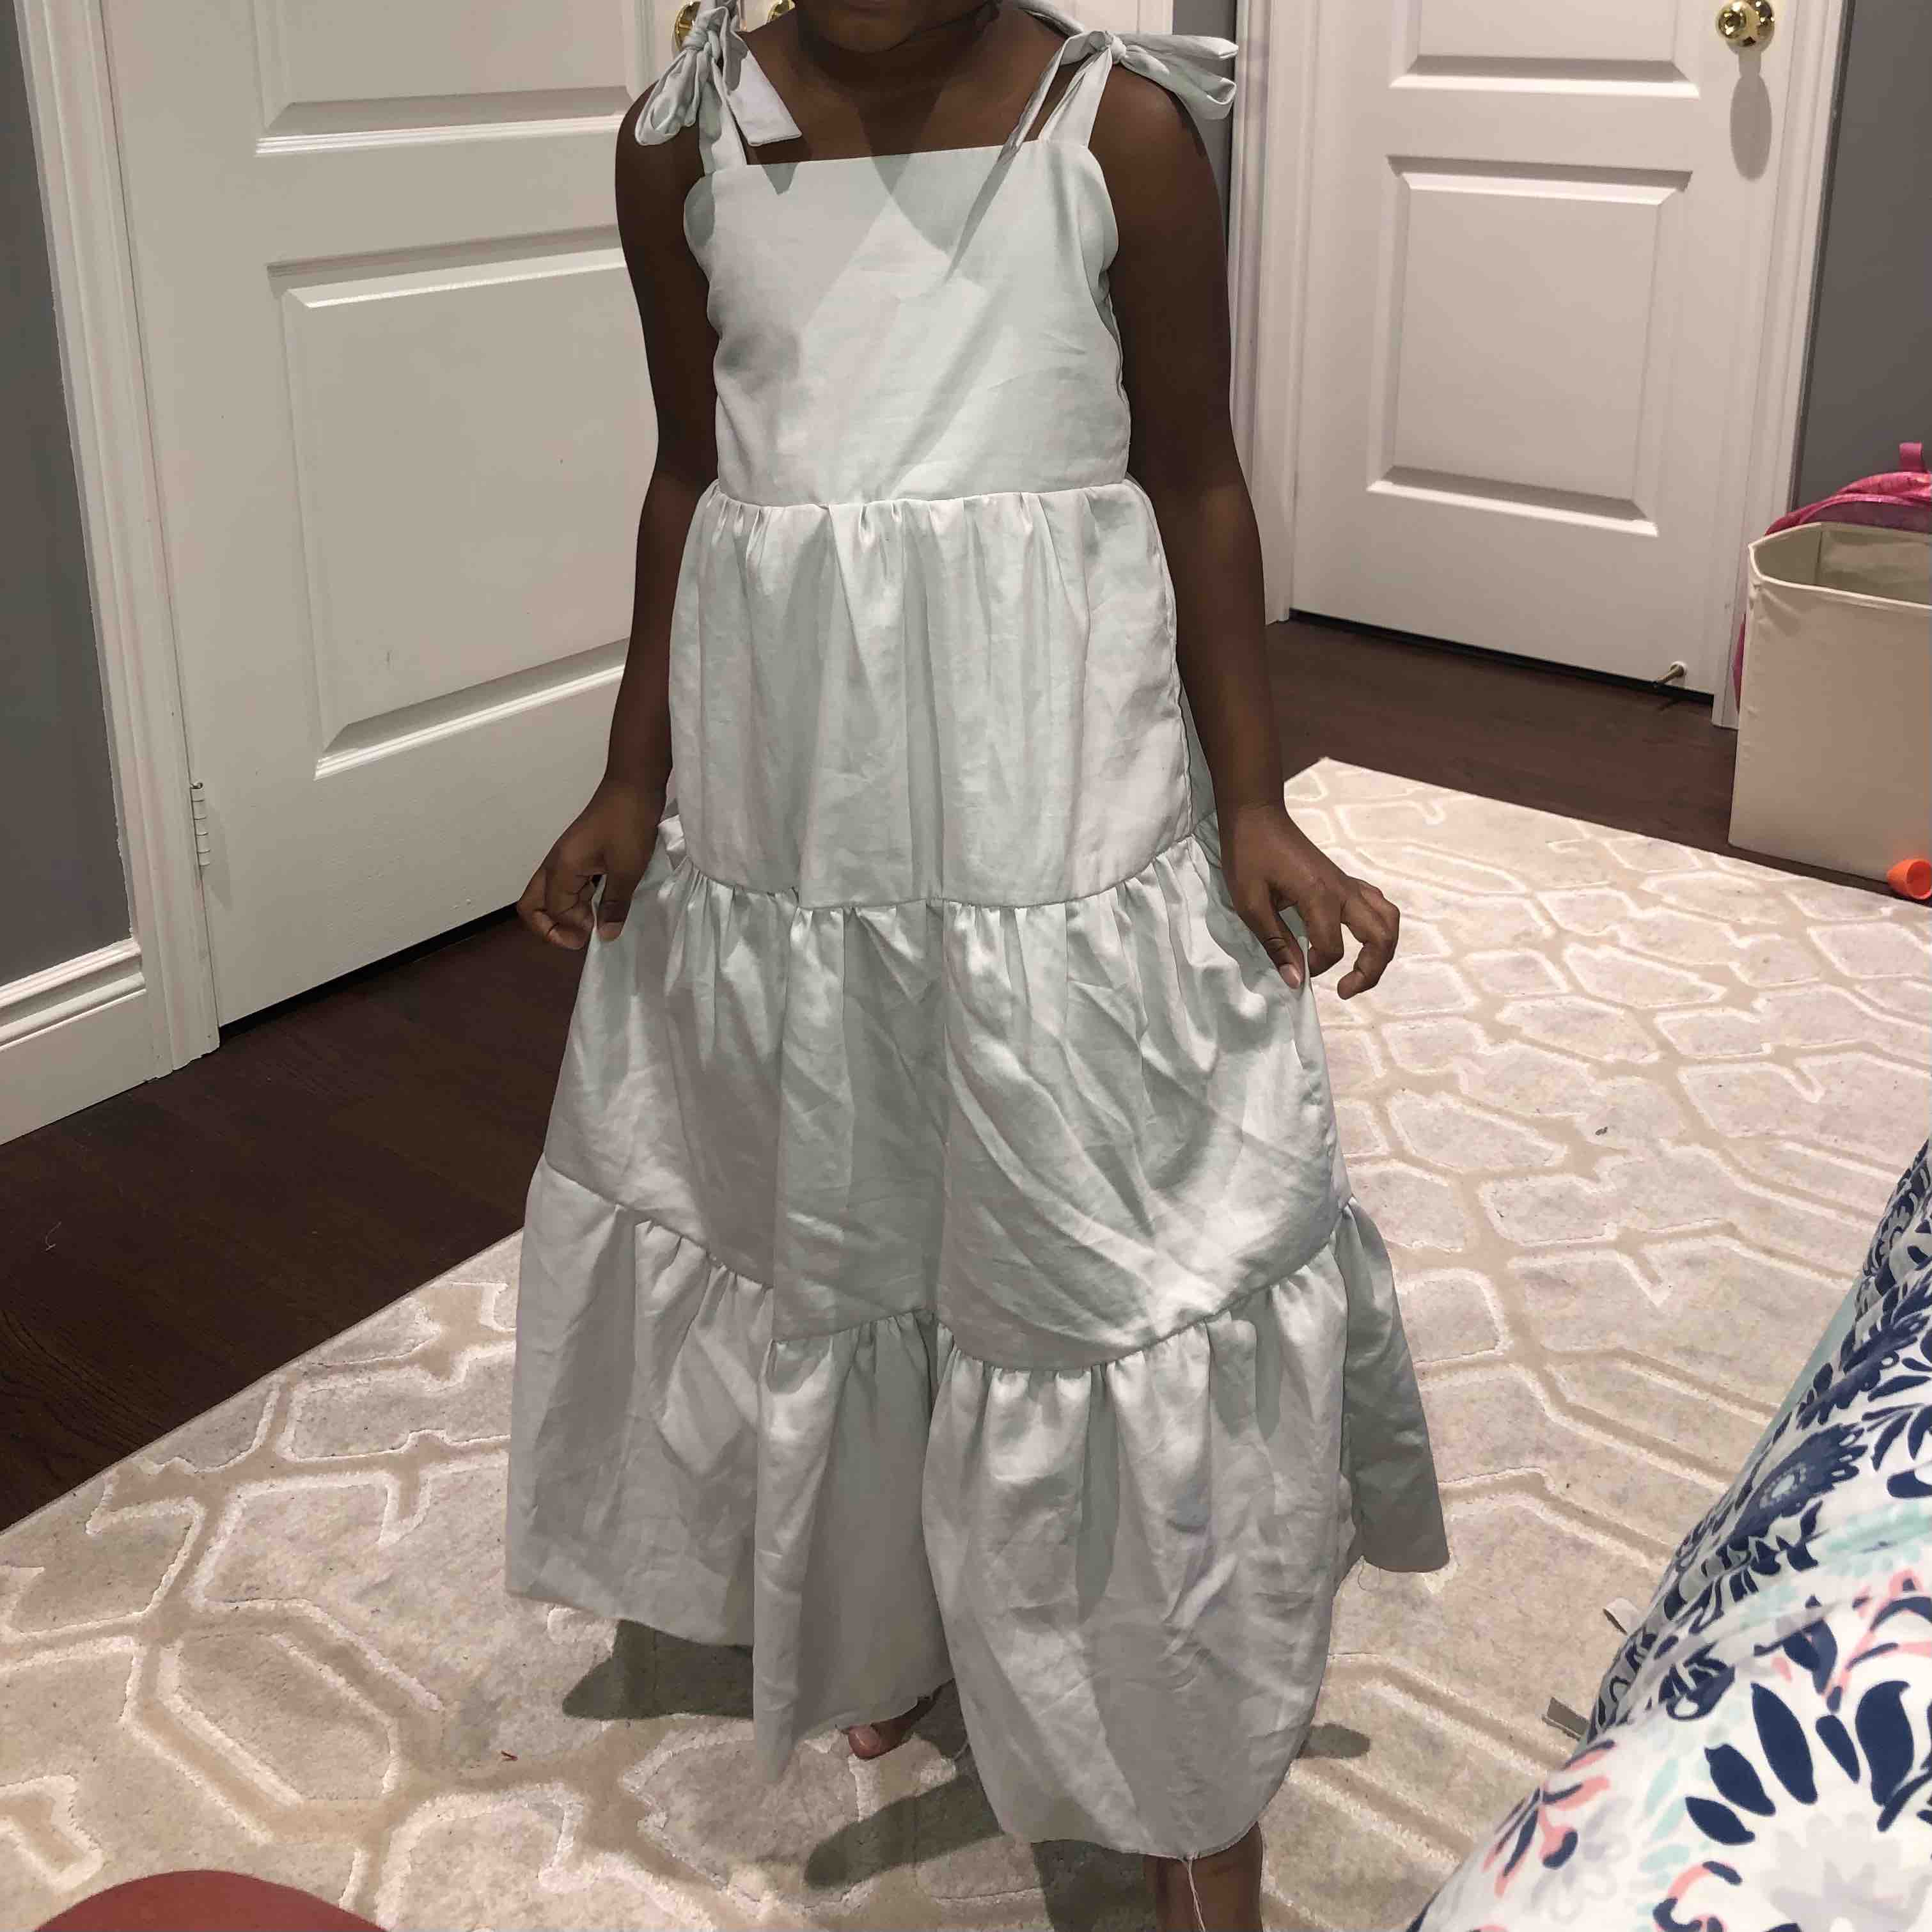
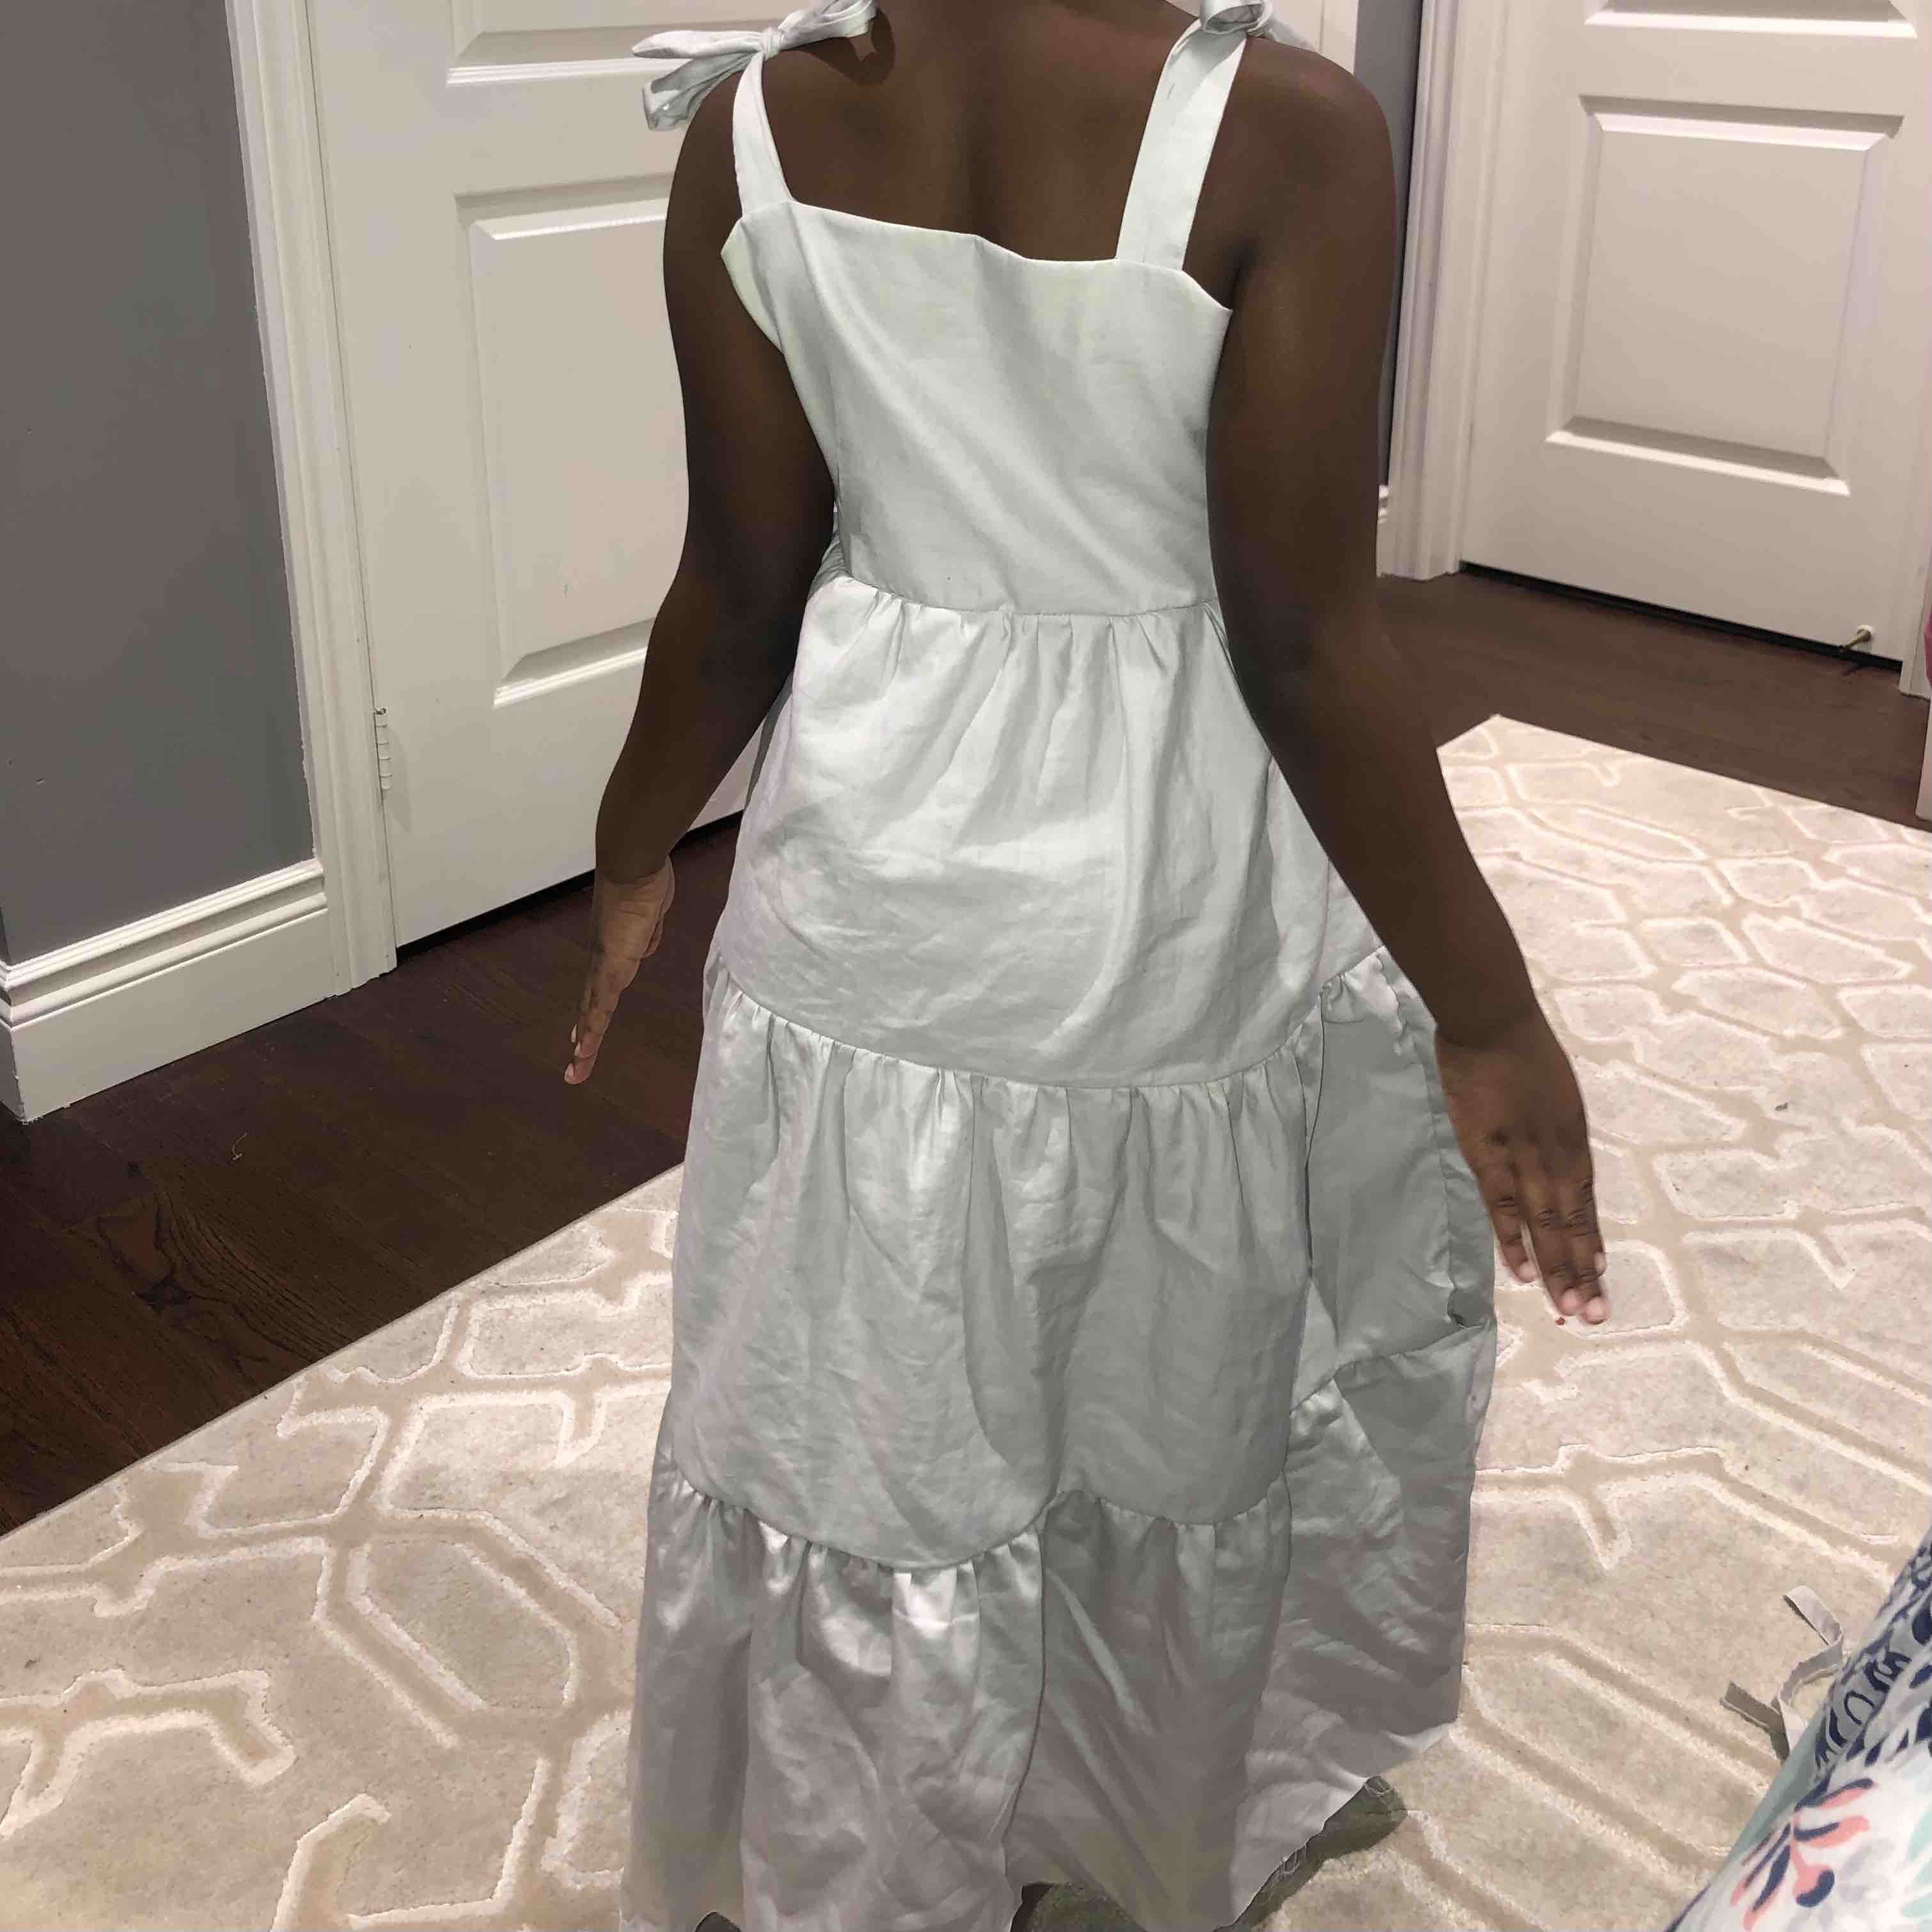
Grey Tiered Dress
This dress showcases a long skirt adorned with three tiered layers and complemented by strappy sleeves that elegantly tie at the shoulders. Crafted from a repurposed grey cotton bedsheet.
- Took me 5 days to complete
- Completed on January 5, 2023
Materials and Tools
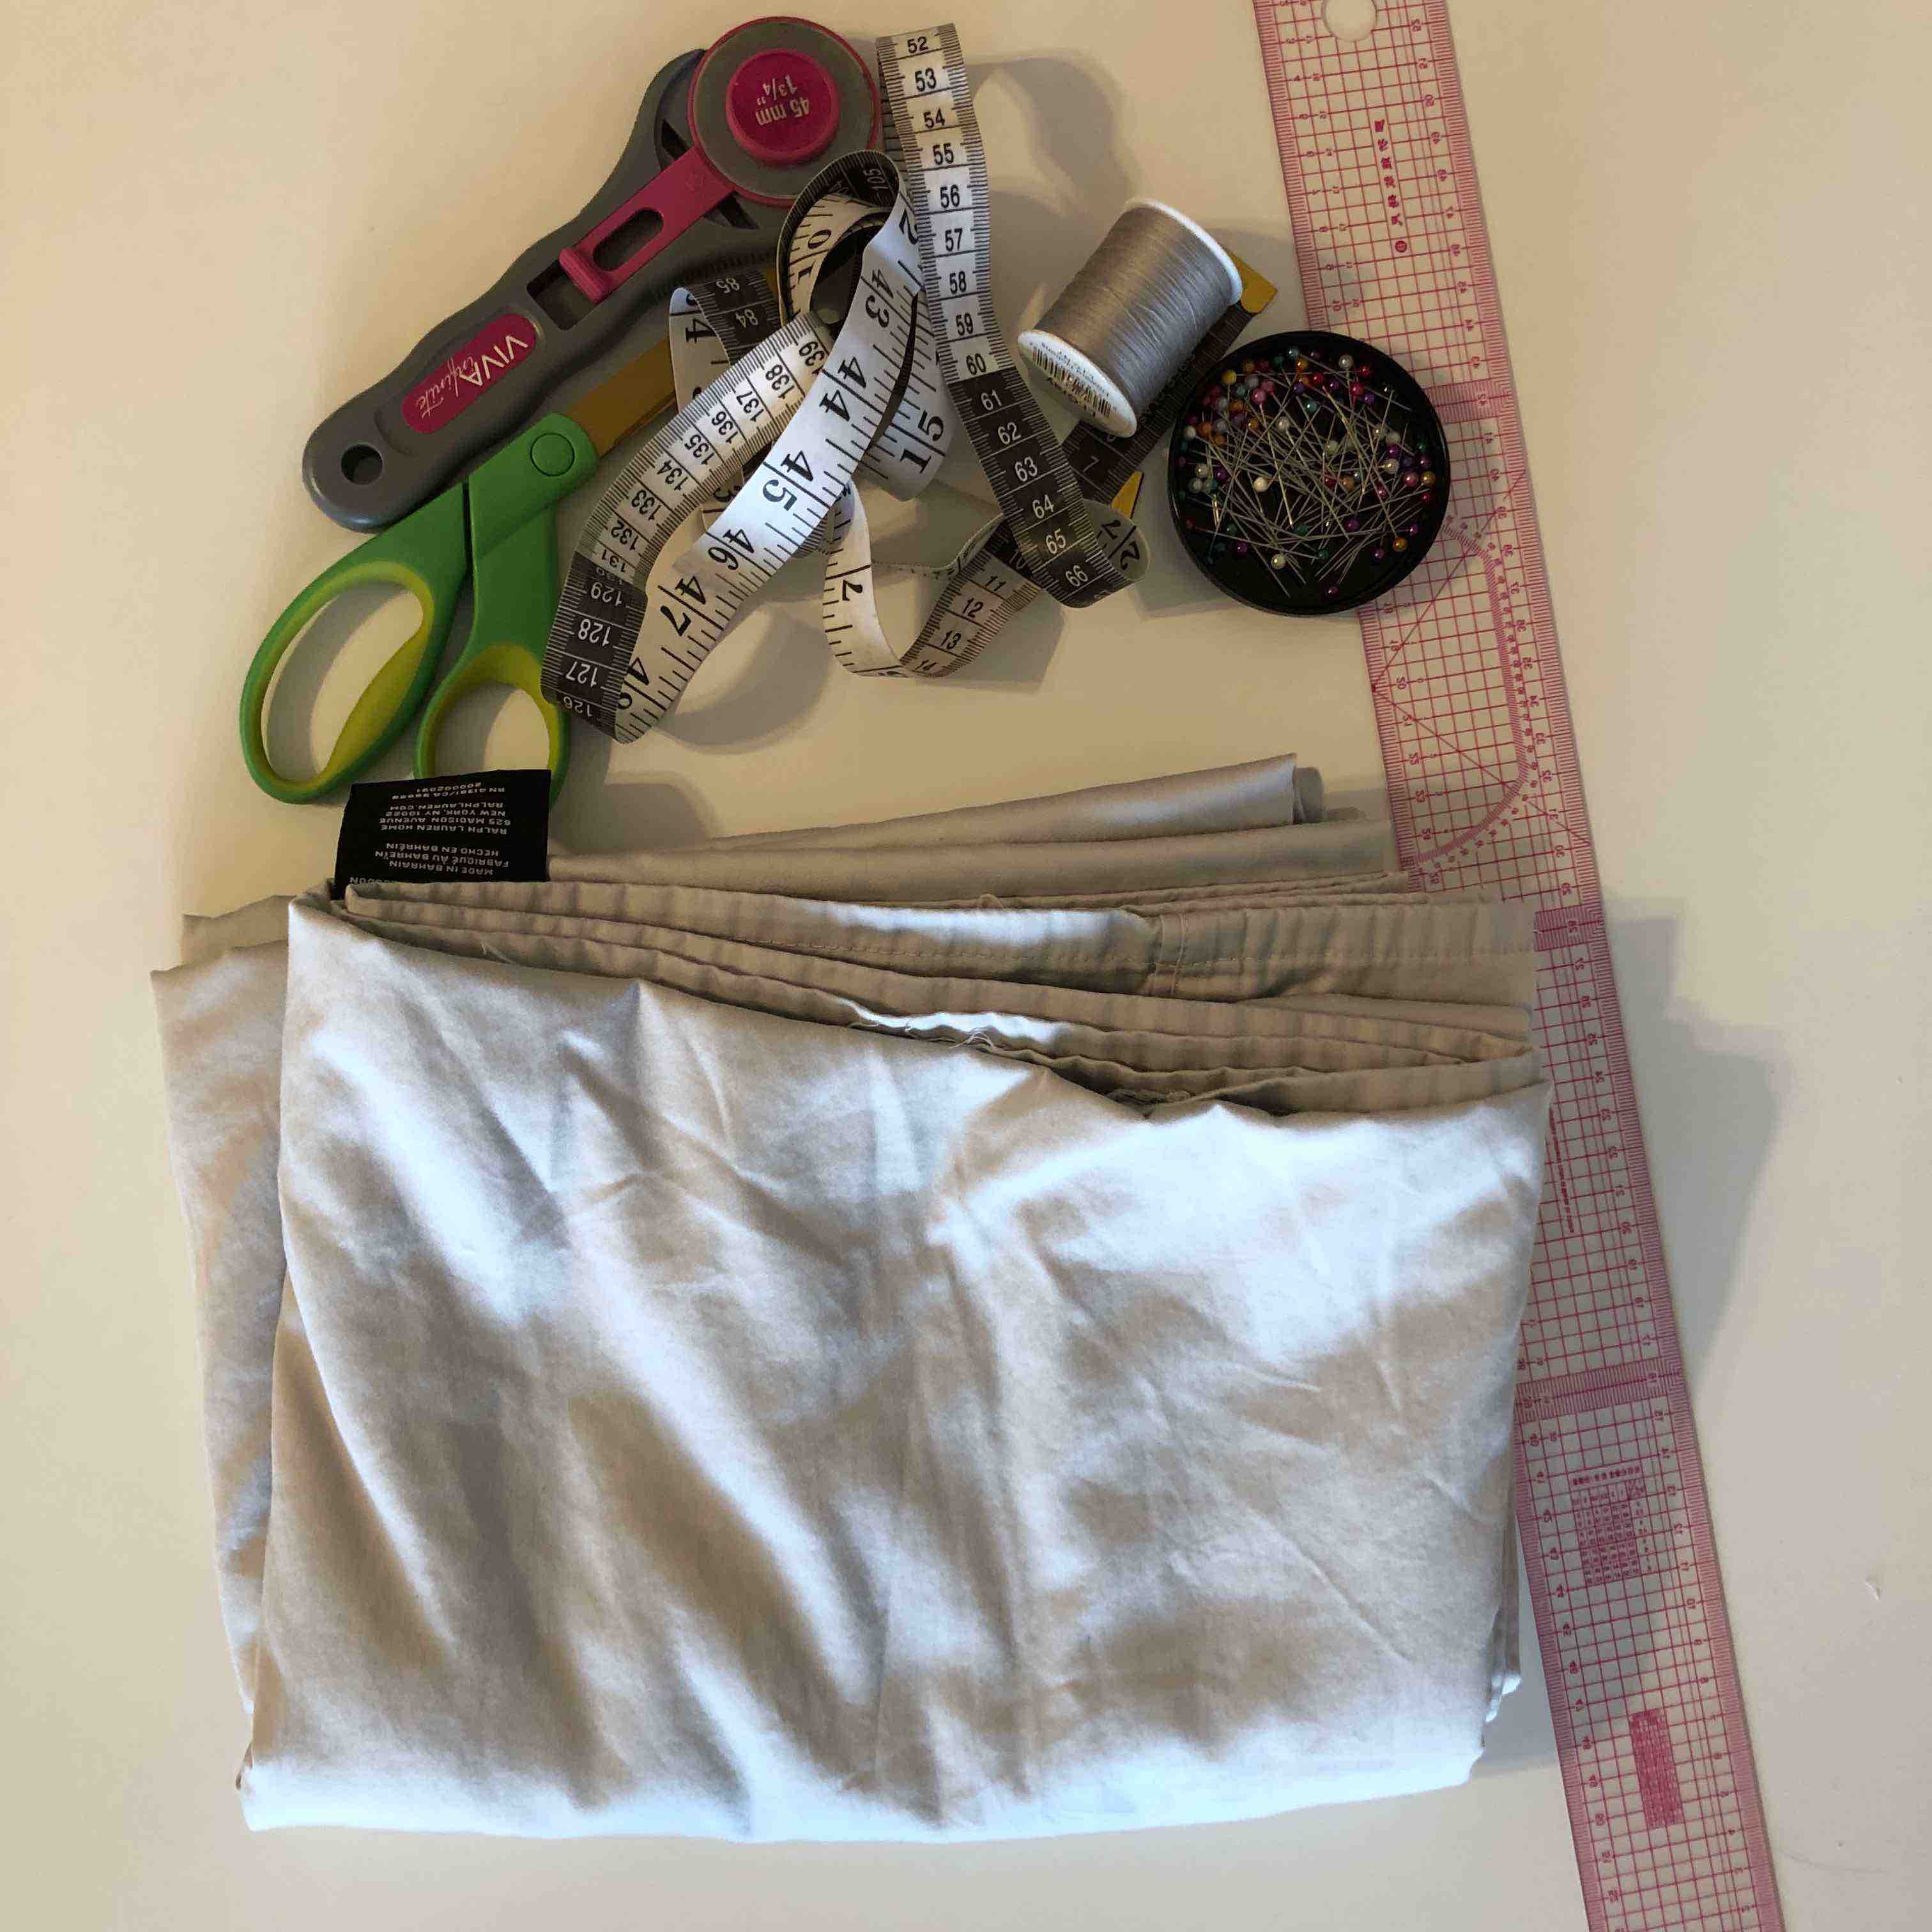
- The fabric I used was a grey bedsheet.
- The tools I used includes grey polyester thread, Brother sewing machine, pins, ruler, and scissors.
Assembly Process

- I drafted the pattern pieces following The Essentials Club's tutorial on YouTube. Keeping in mind my sister's request for a floor-length dress, I ensured the length accommodated her preference.
- For assembly guidance, I relied on the instructions provided in that specific YouTube tutorial.
Inspiration/Reference Photo
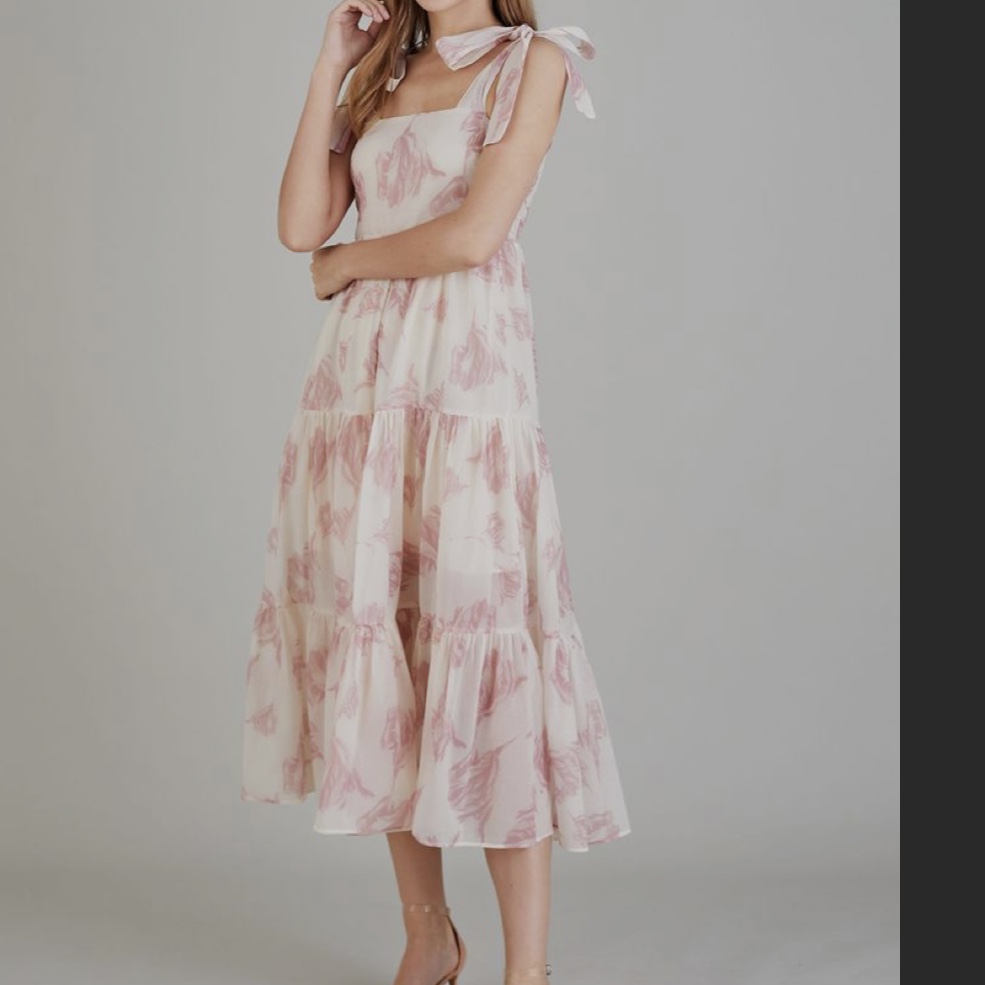
- This is the dress I was trying to replicate.
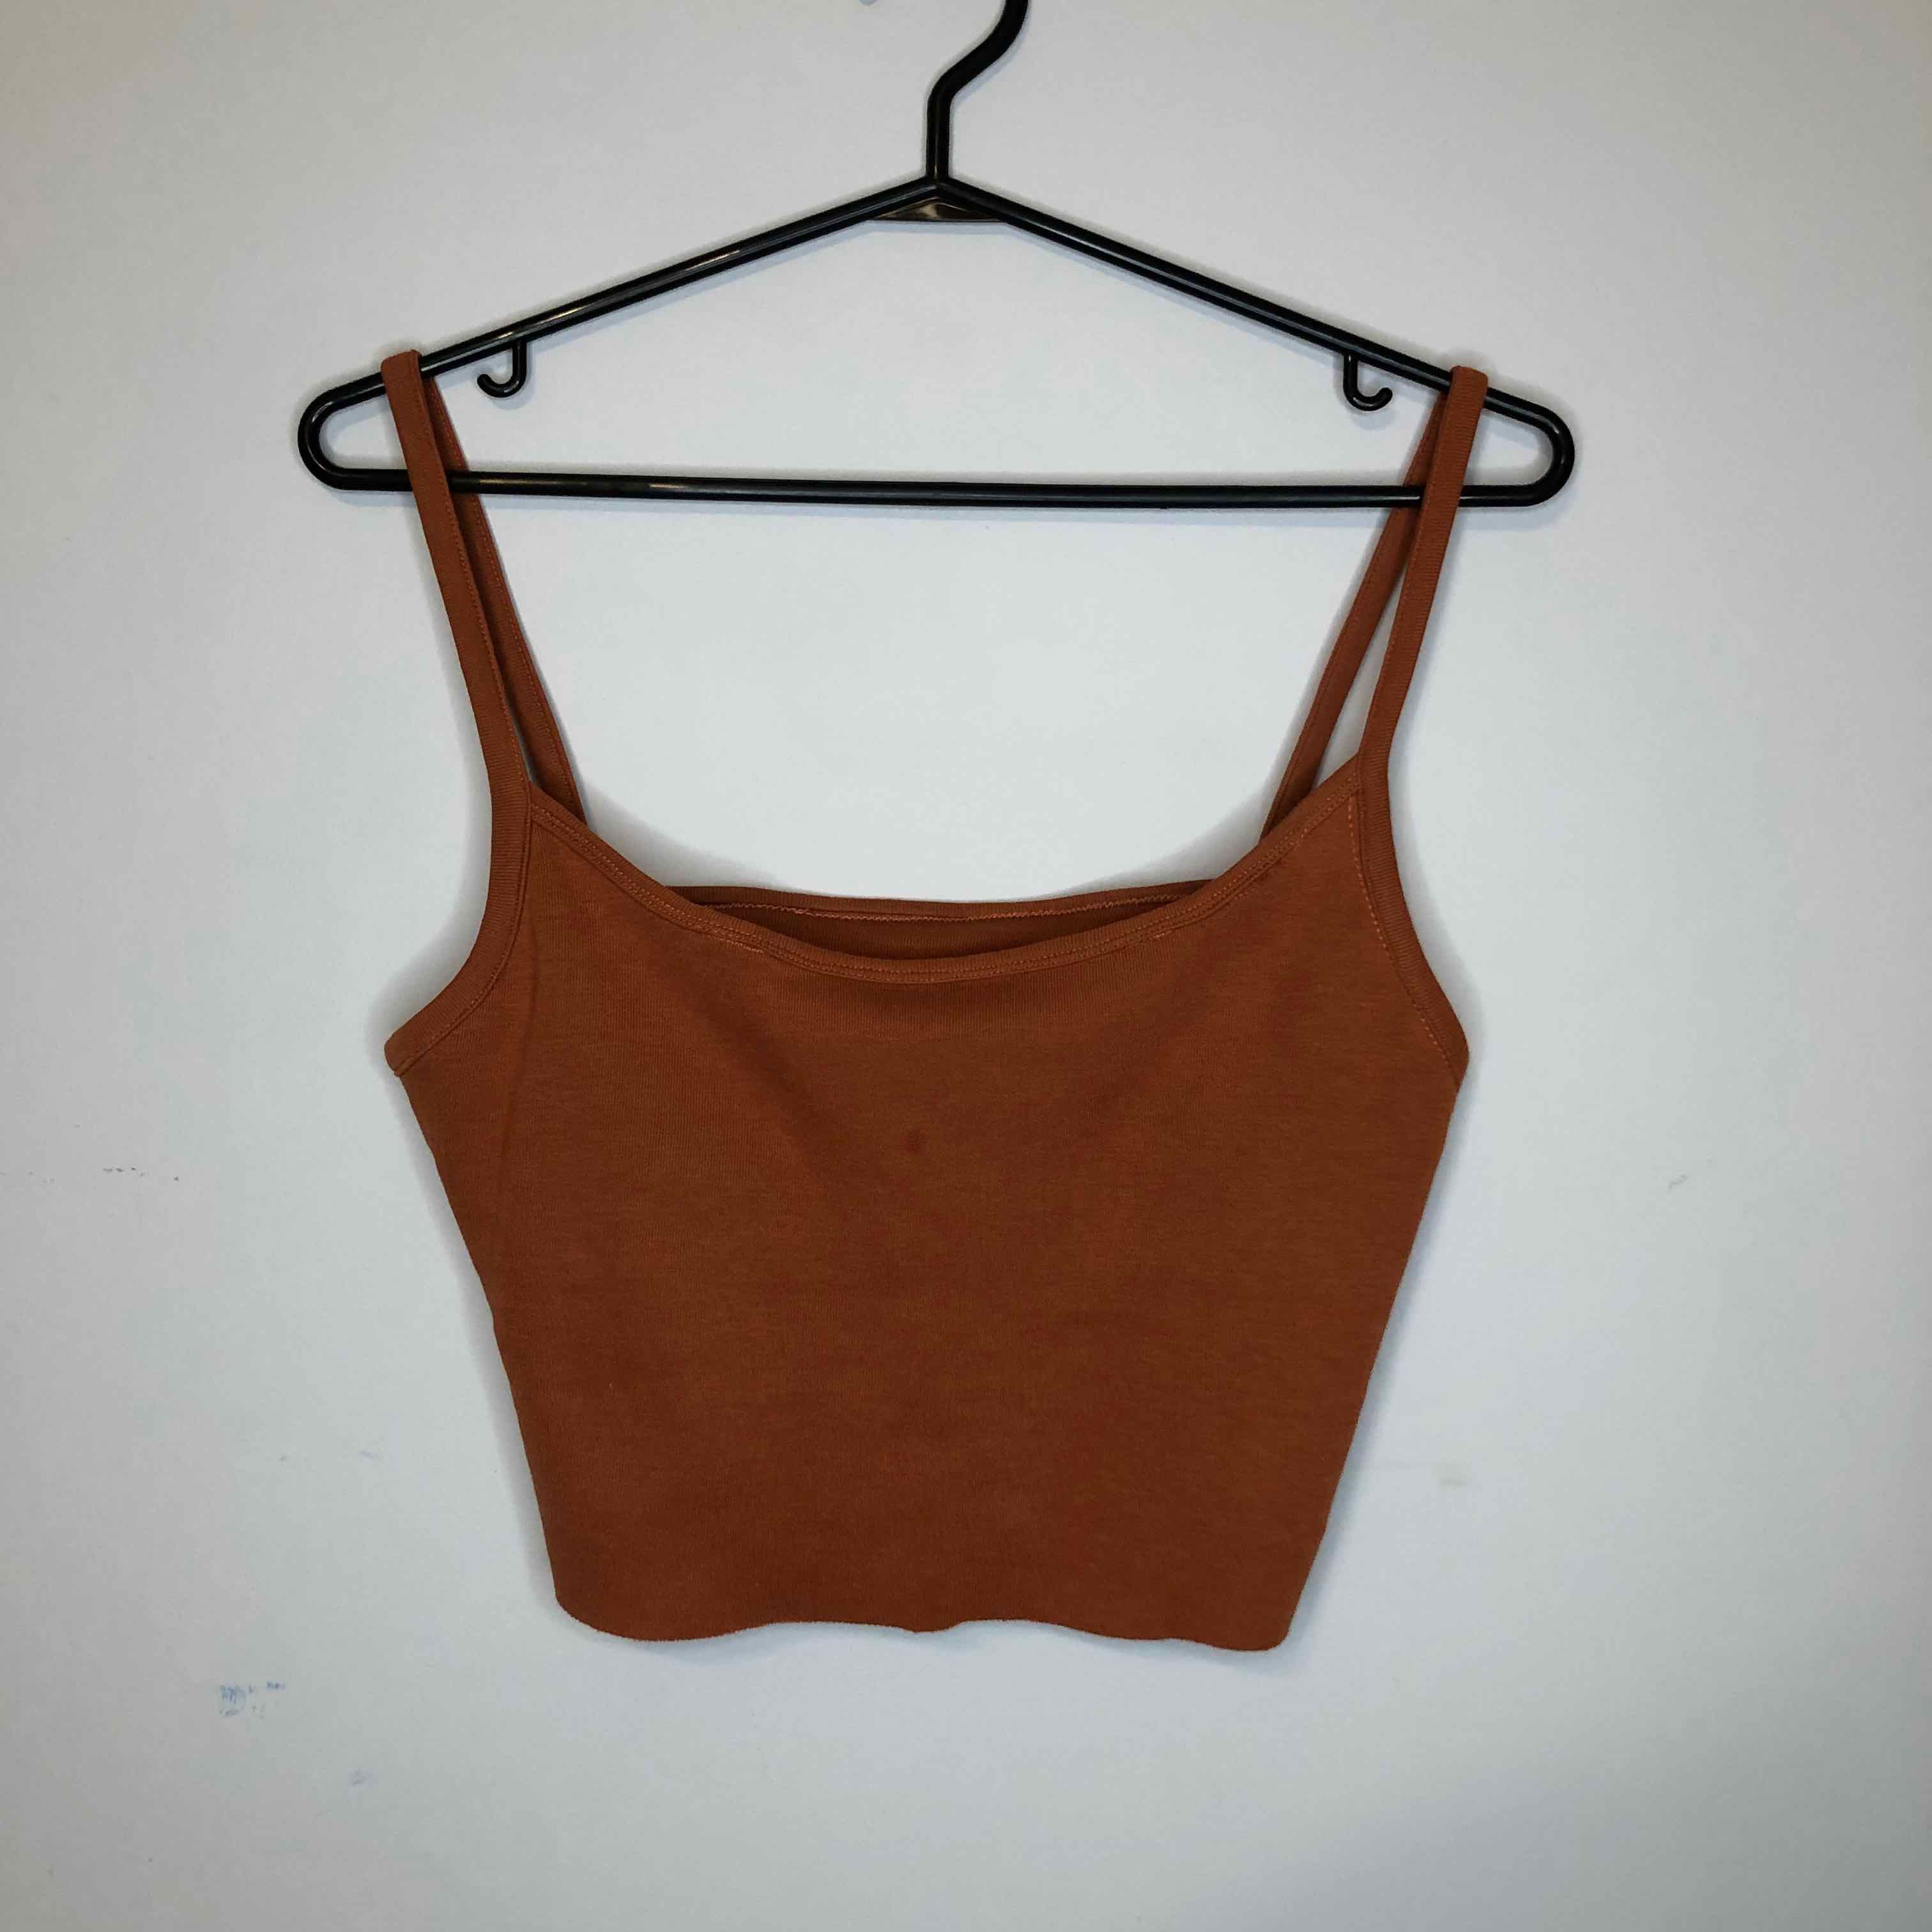
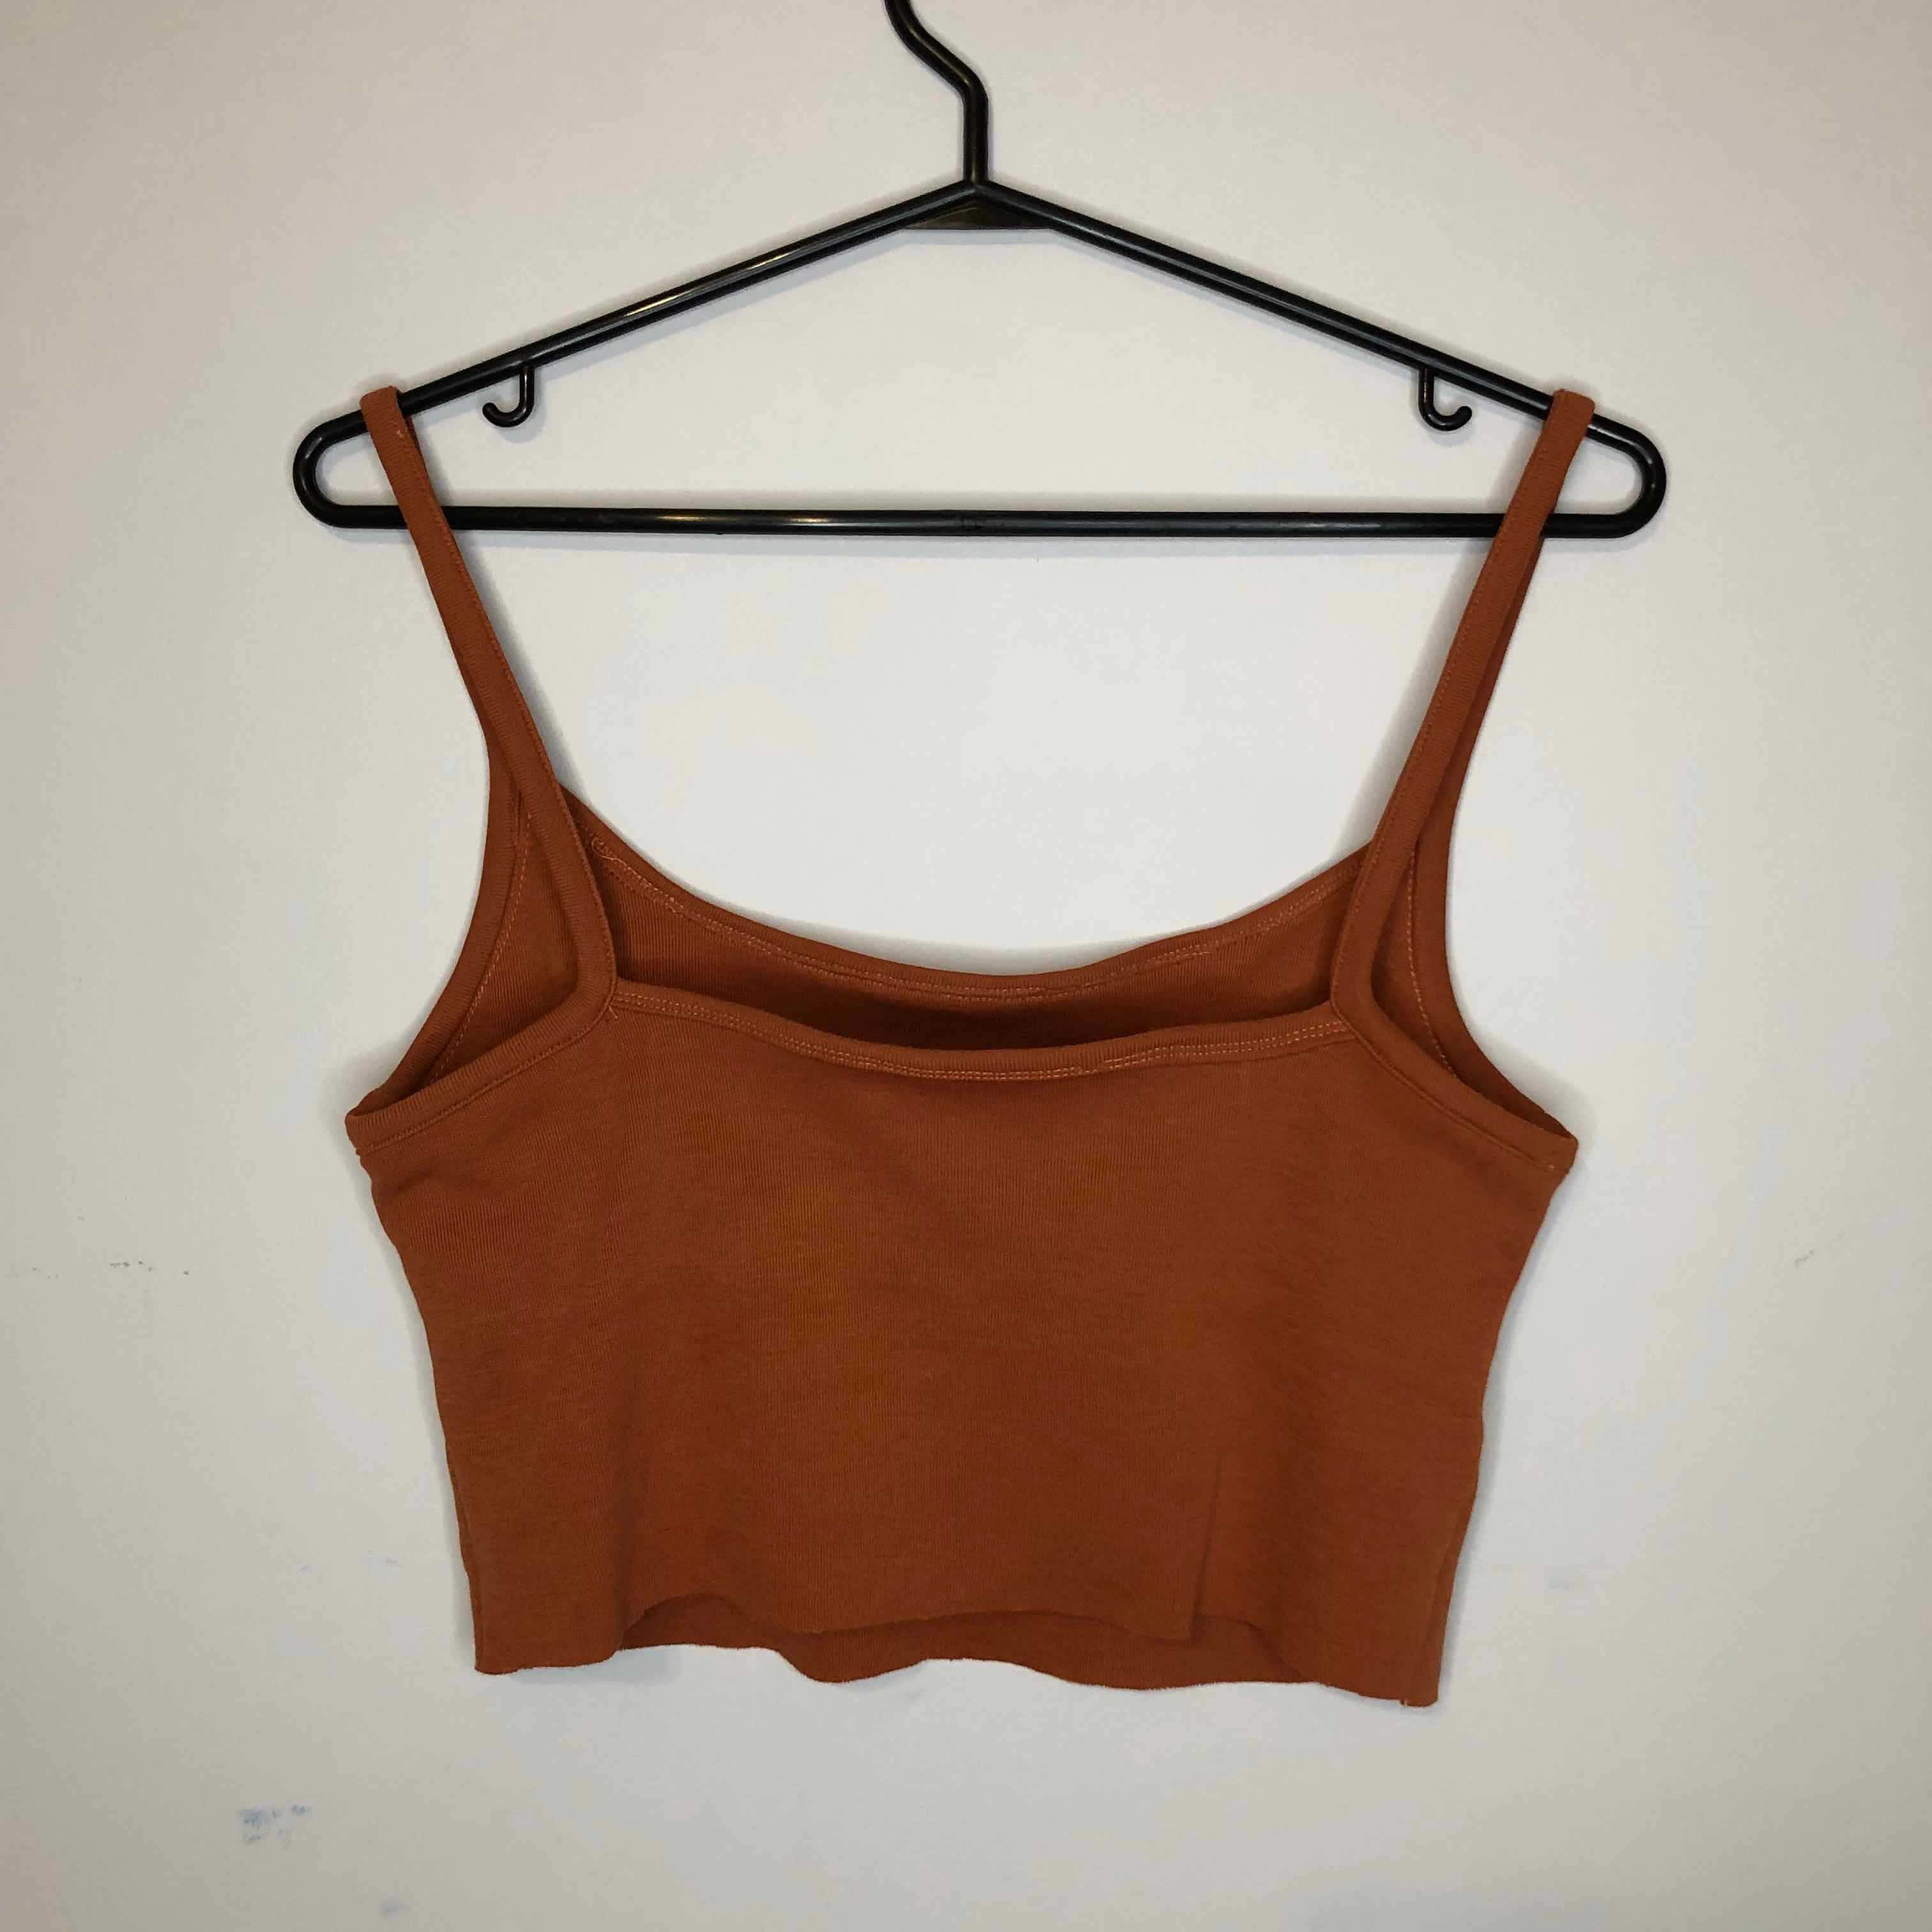
Orange Tank Top
Camisole top with scoop neck and straight back. With a built in bralette and 1/2 inch straps.
- Took me four days to complete
- Completed on October 8, 2023
Materials and Tools
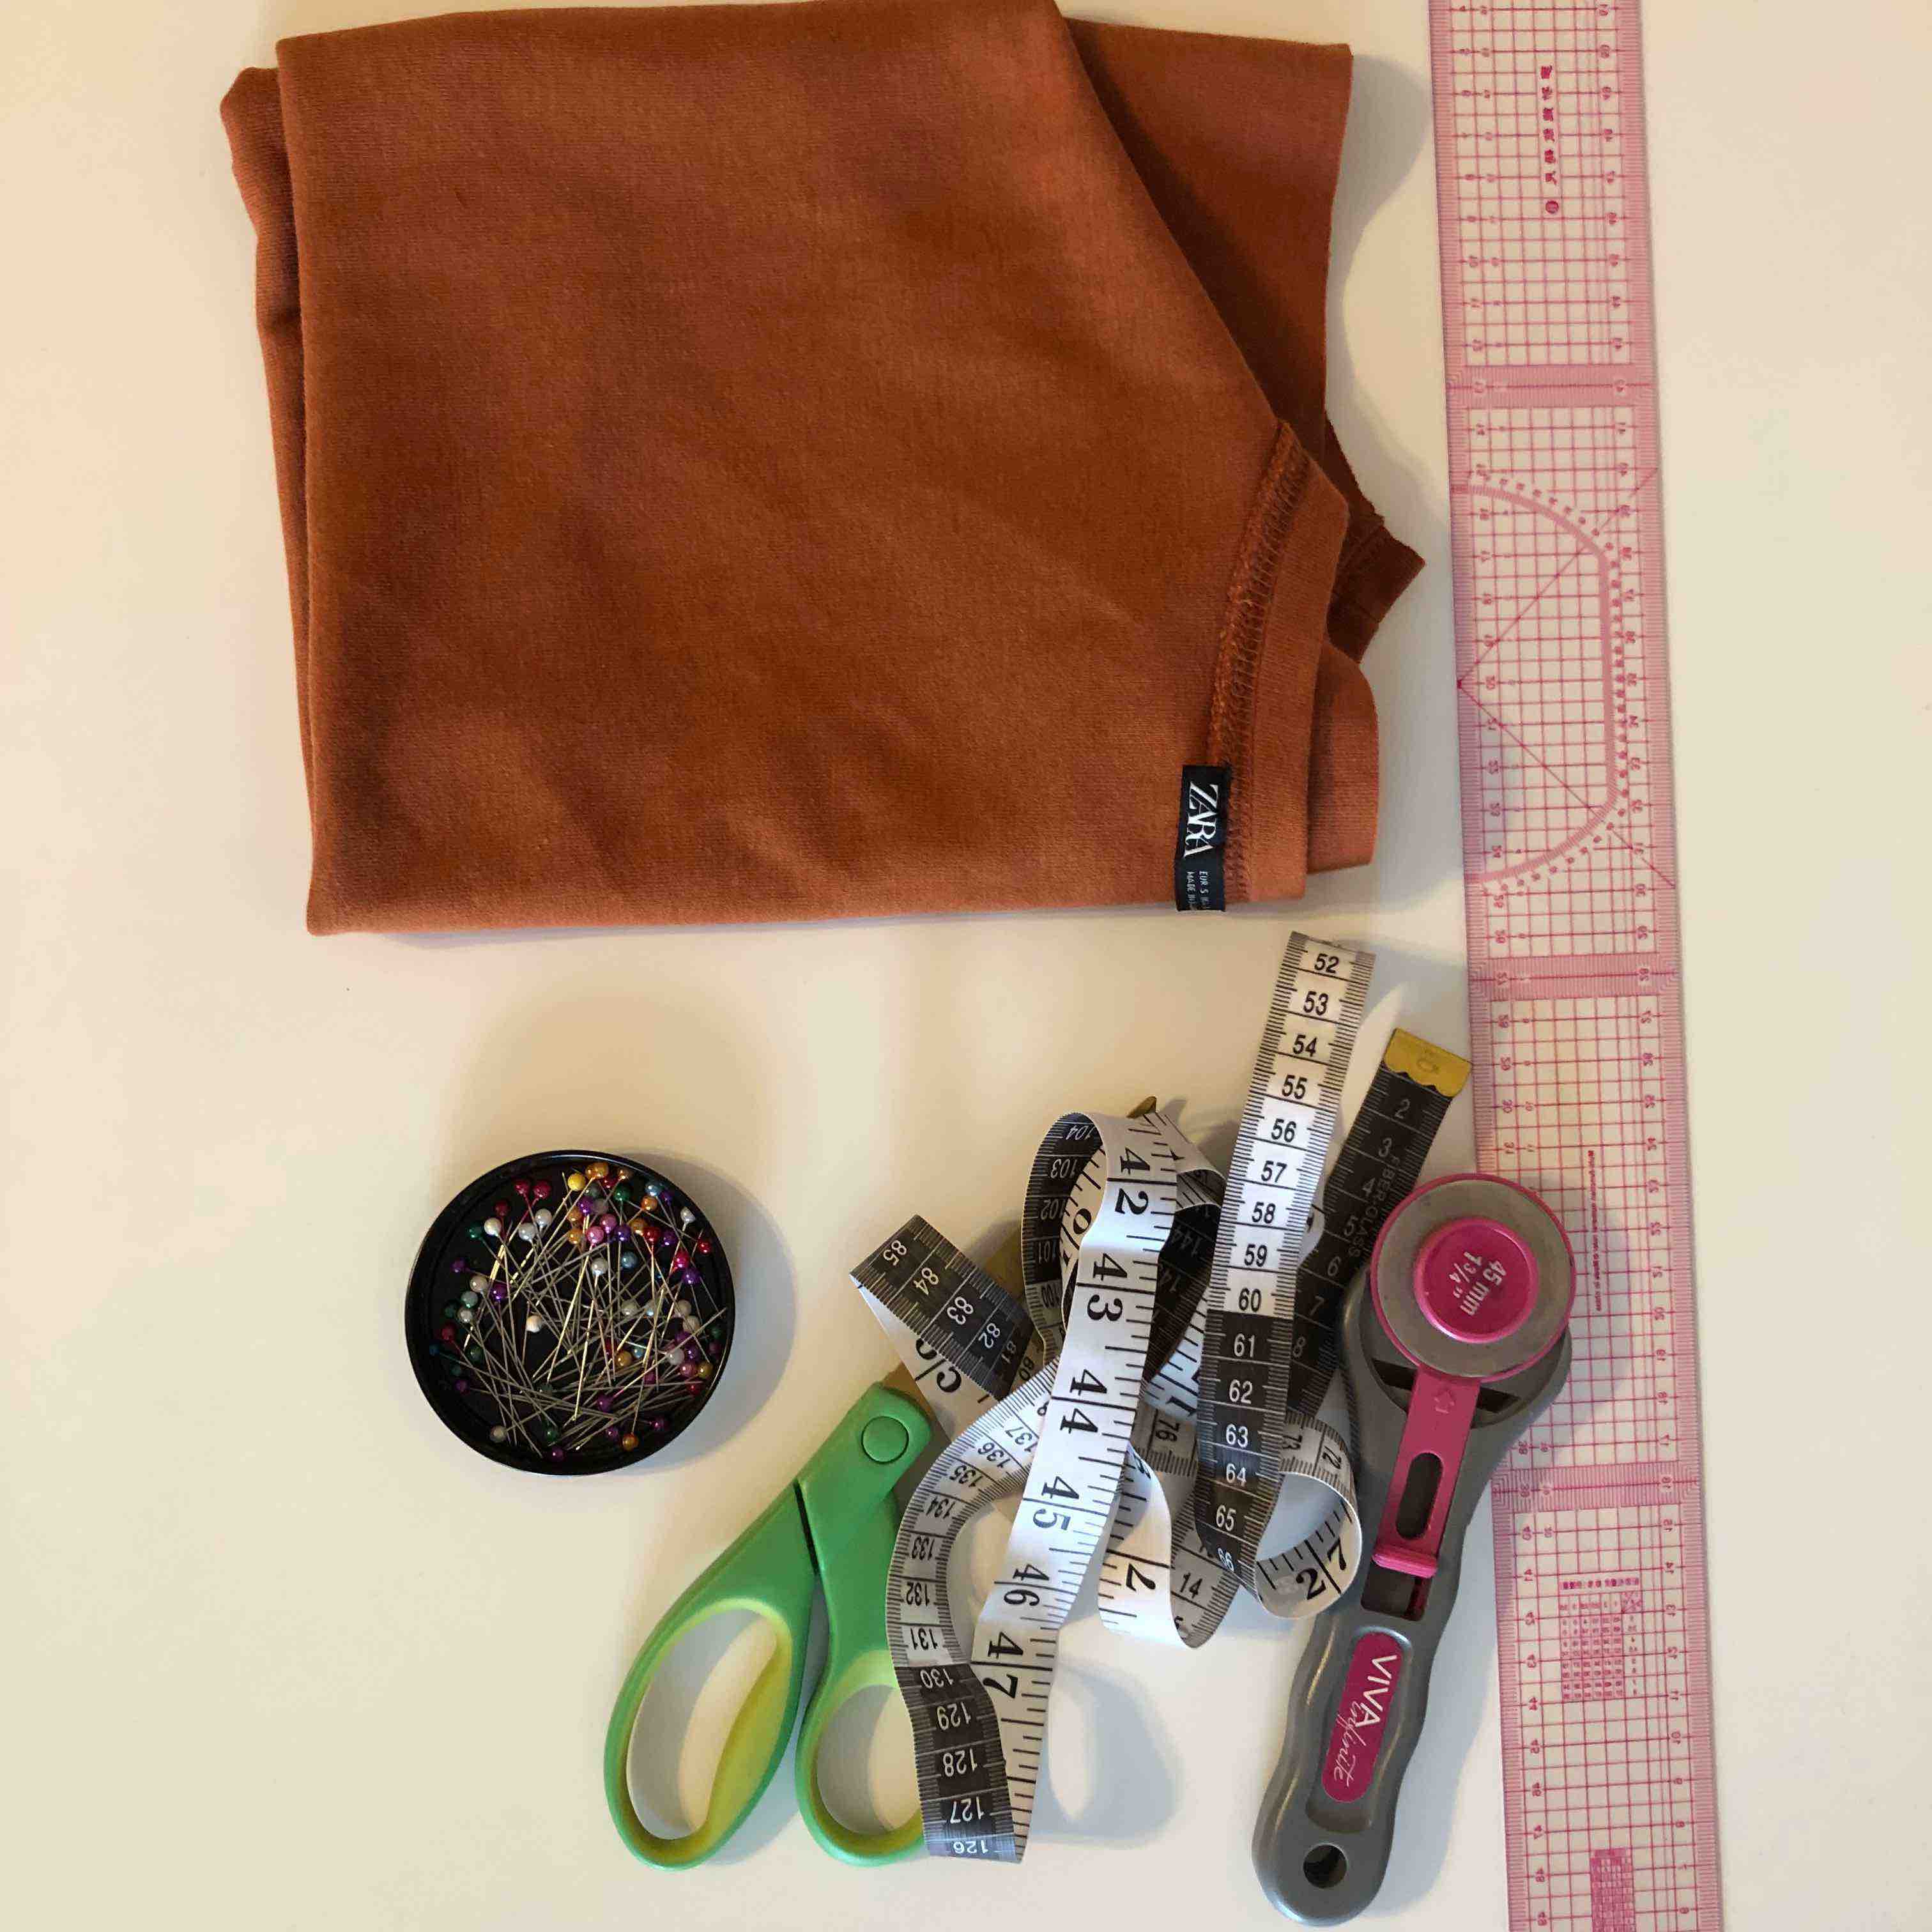
- For the fabric I repurposed an old knit dress shirt that I had in my closet (which I never wore).
- The tools I used include orange polyester thread, a Brother sewing machine, pins, a ruler, and scissors.
Assembly Process
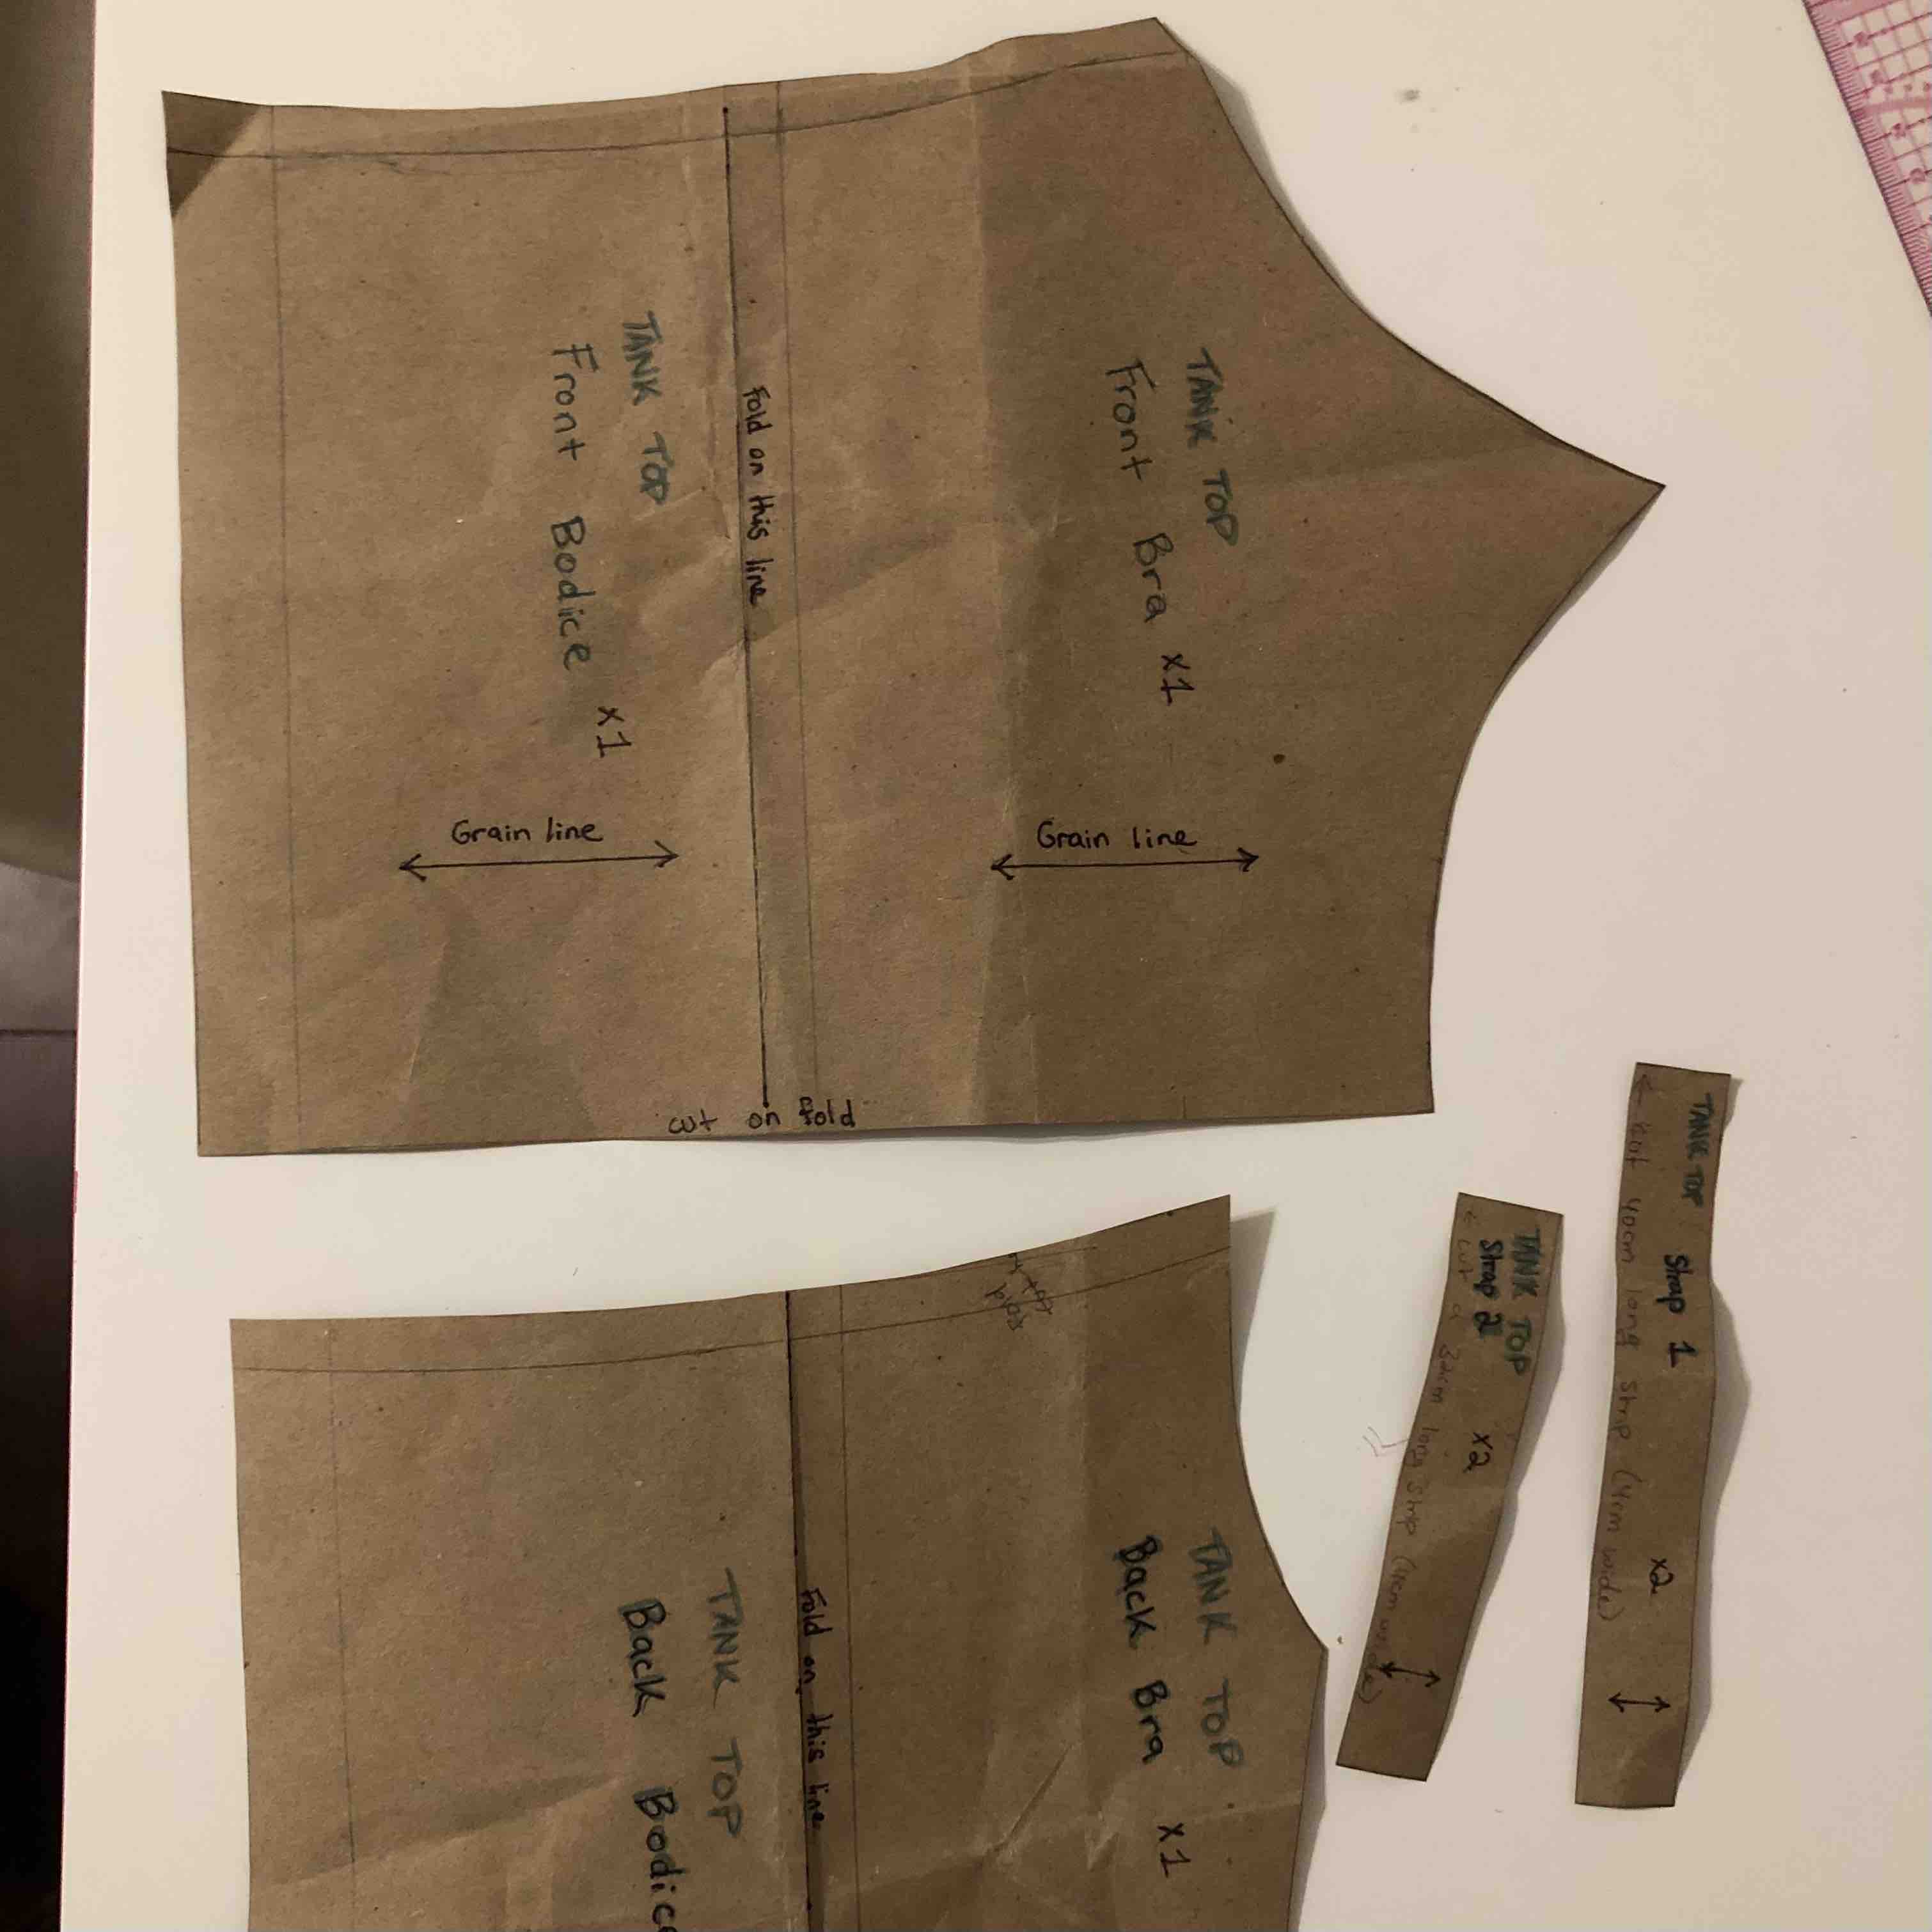
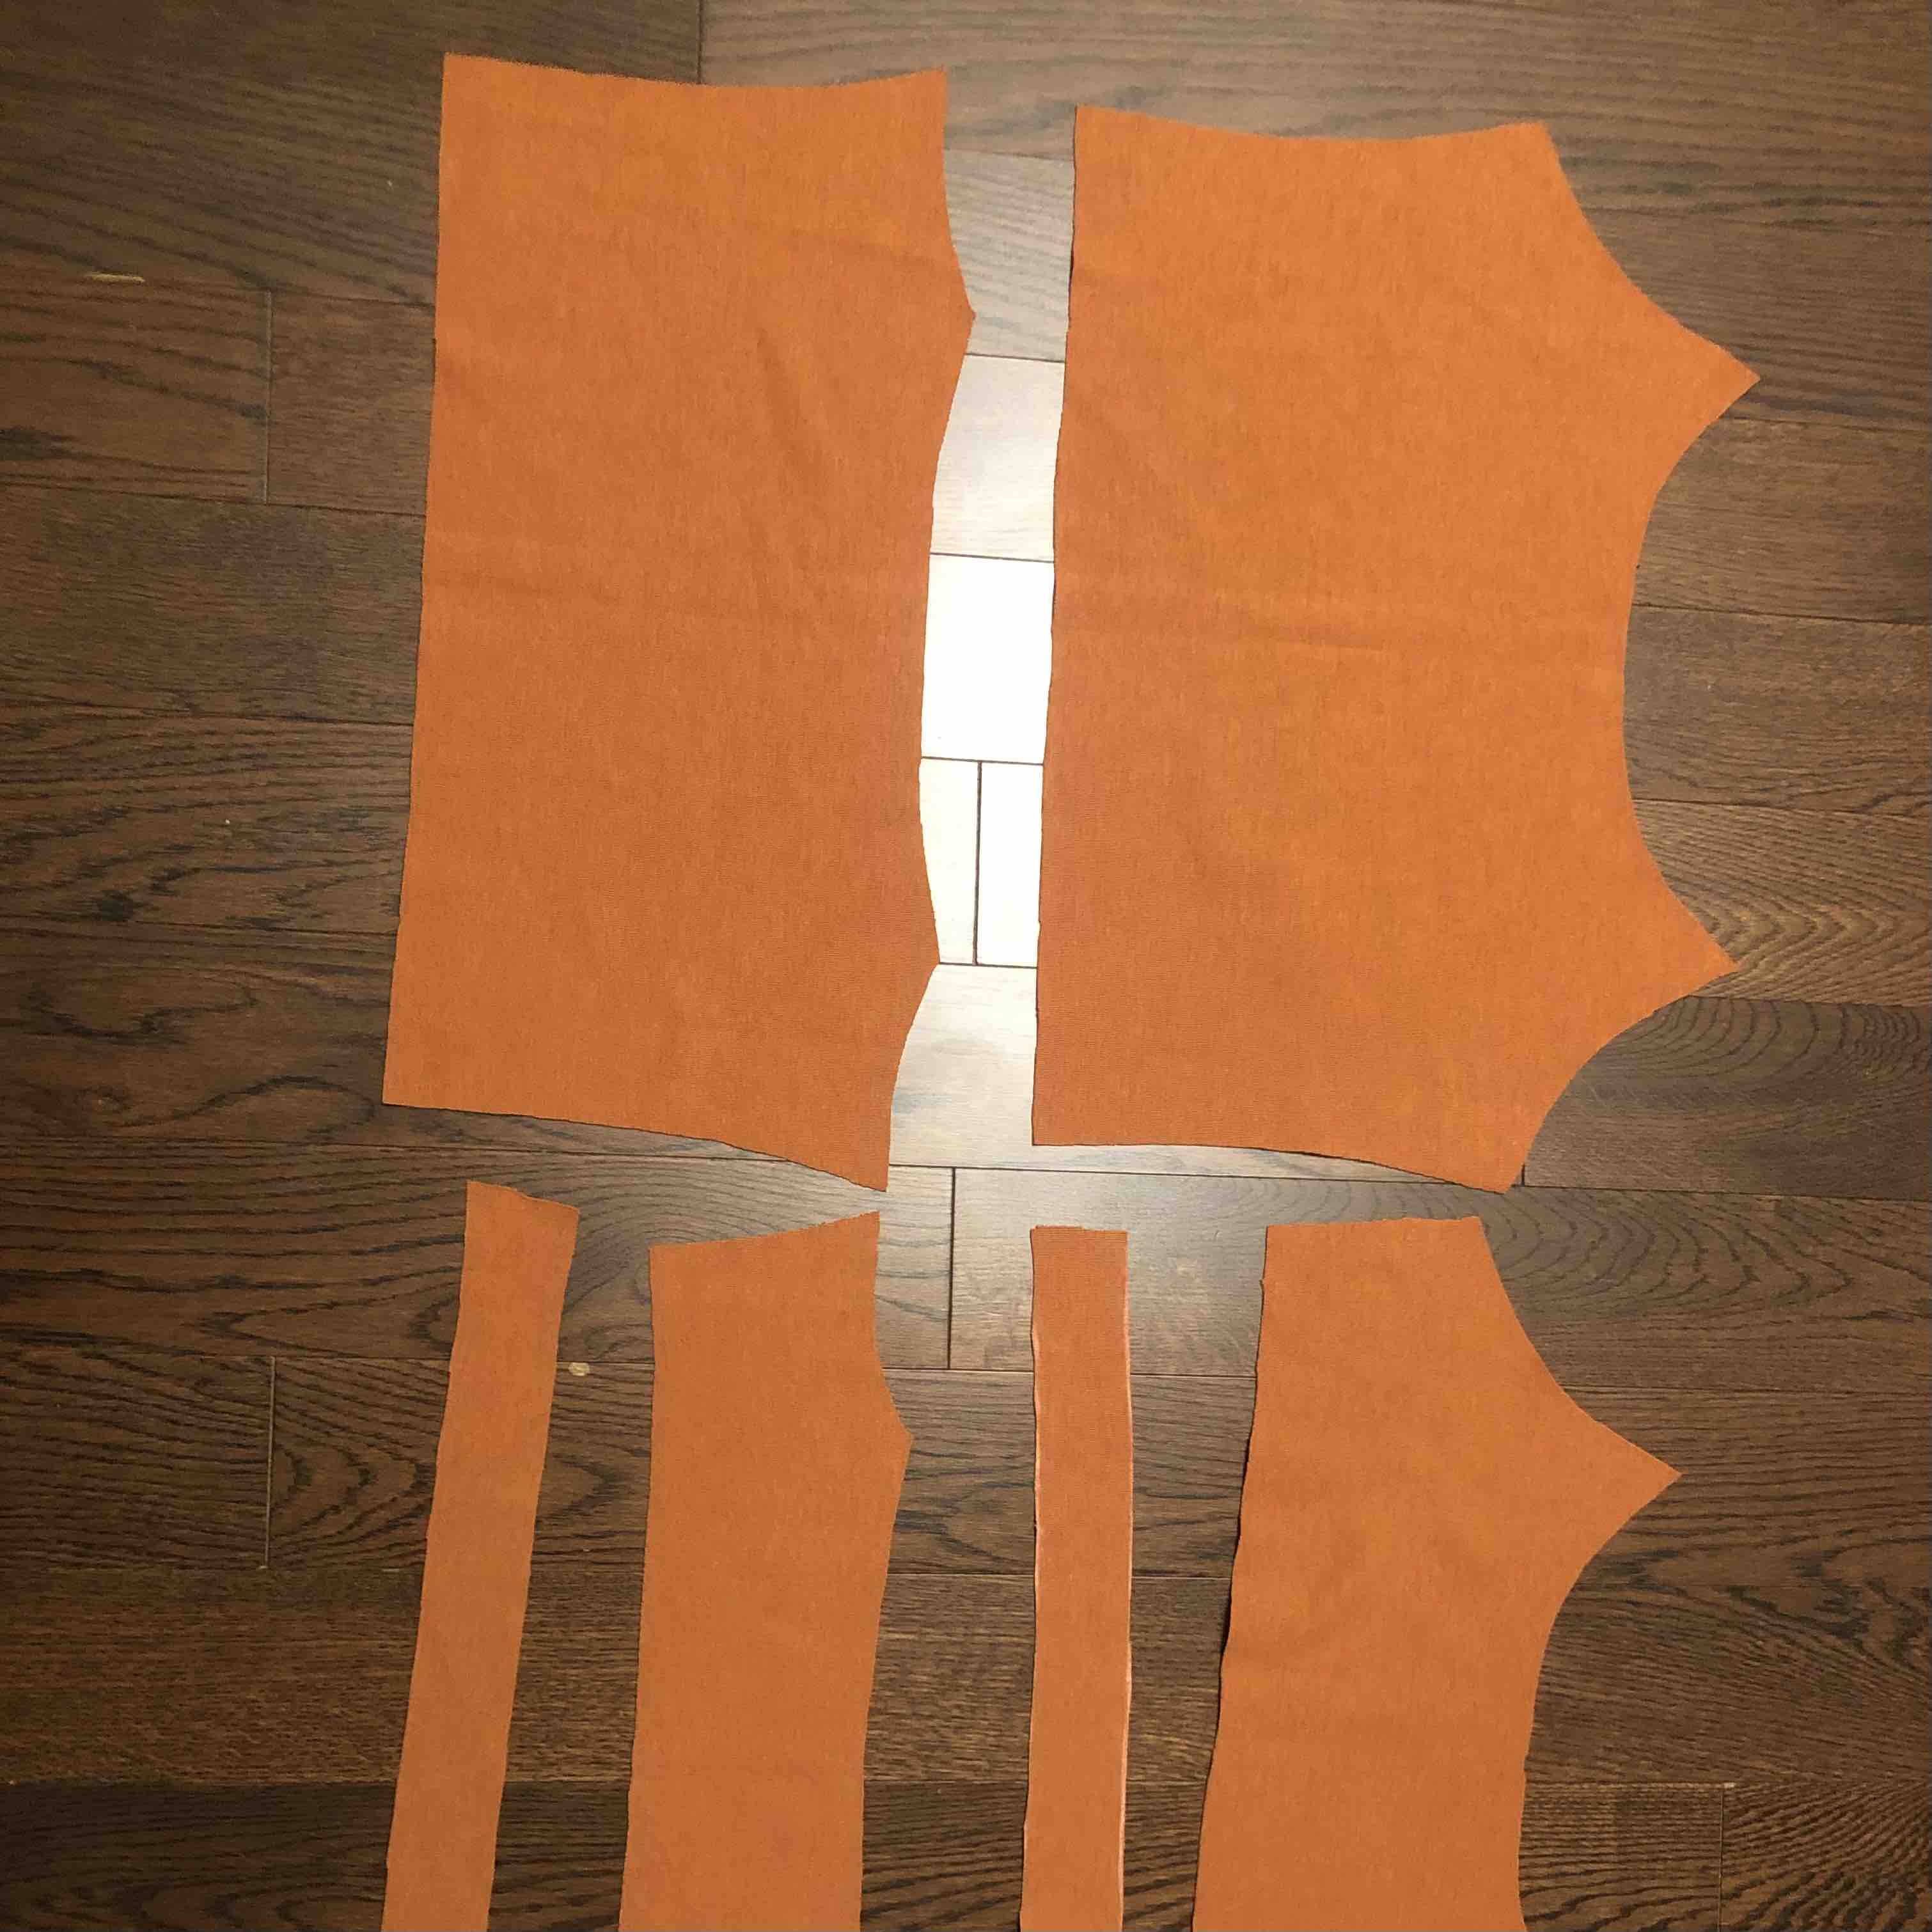
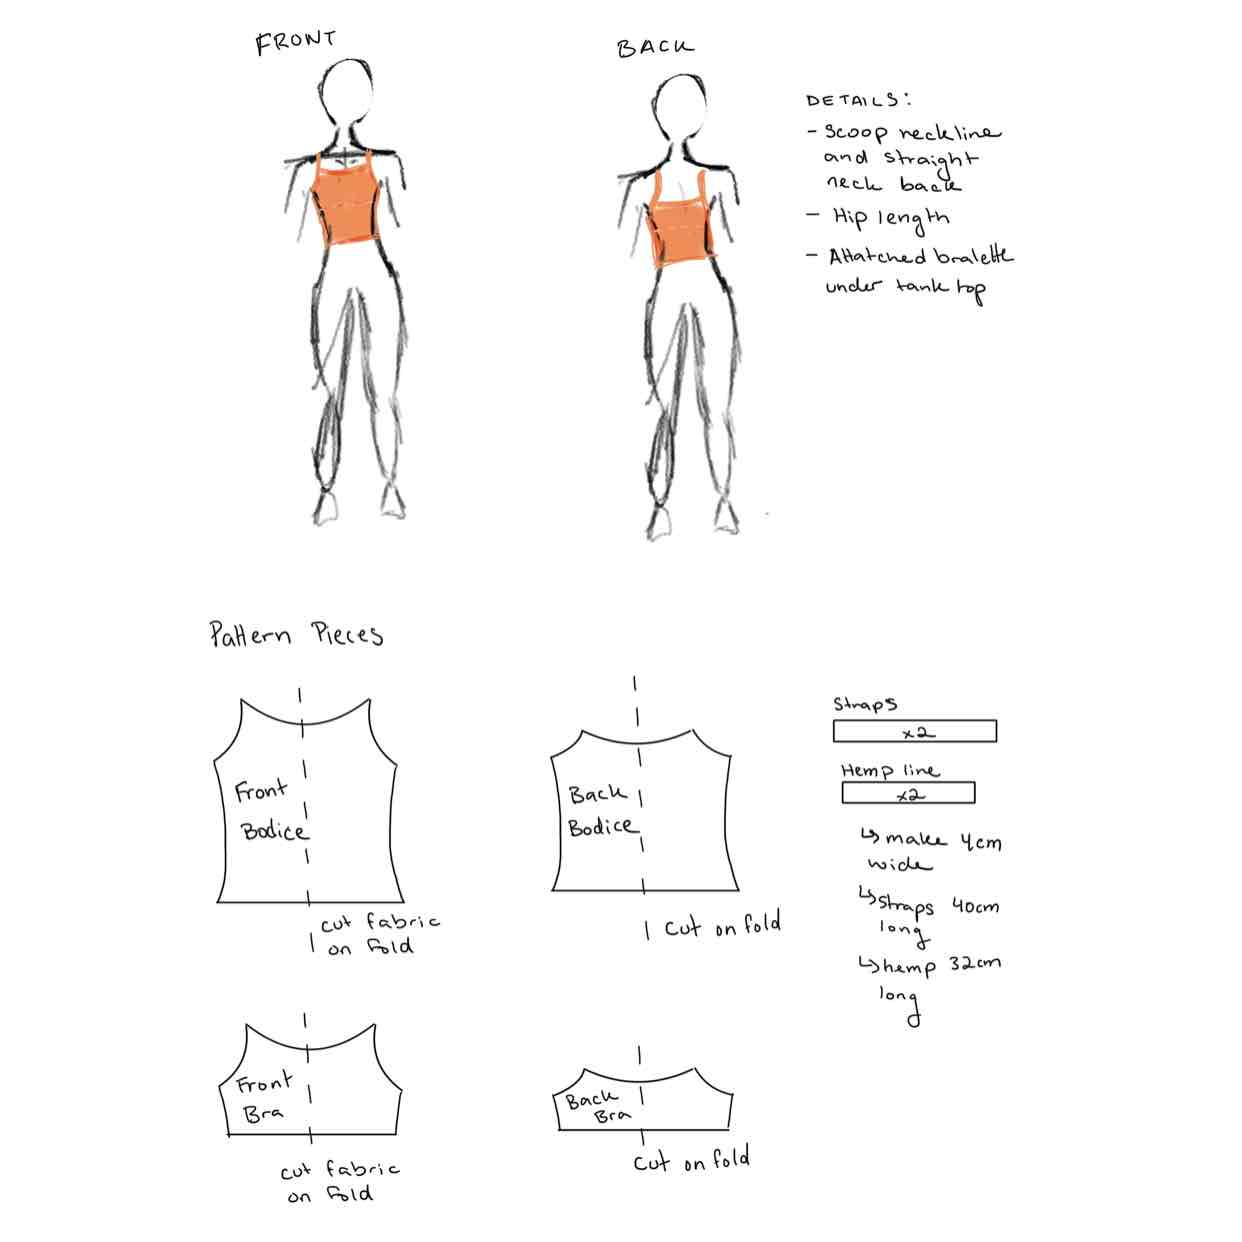
- I custom-drafted the paper pattern, tailoring it to reflect my desired shape by basing it on my bust and waist measurements.
- After cutting out all the fabric pieces, I meticulously followed the step-by-step guidance outlined in the Paradise Patterns YouTube video to assemble the top.
Inspiration/Reference Photo
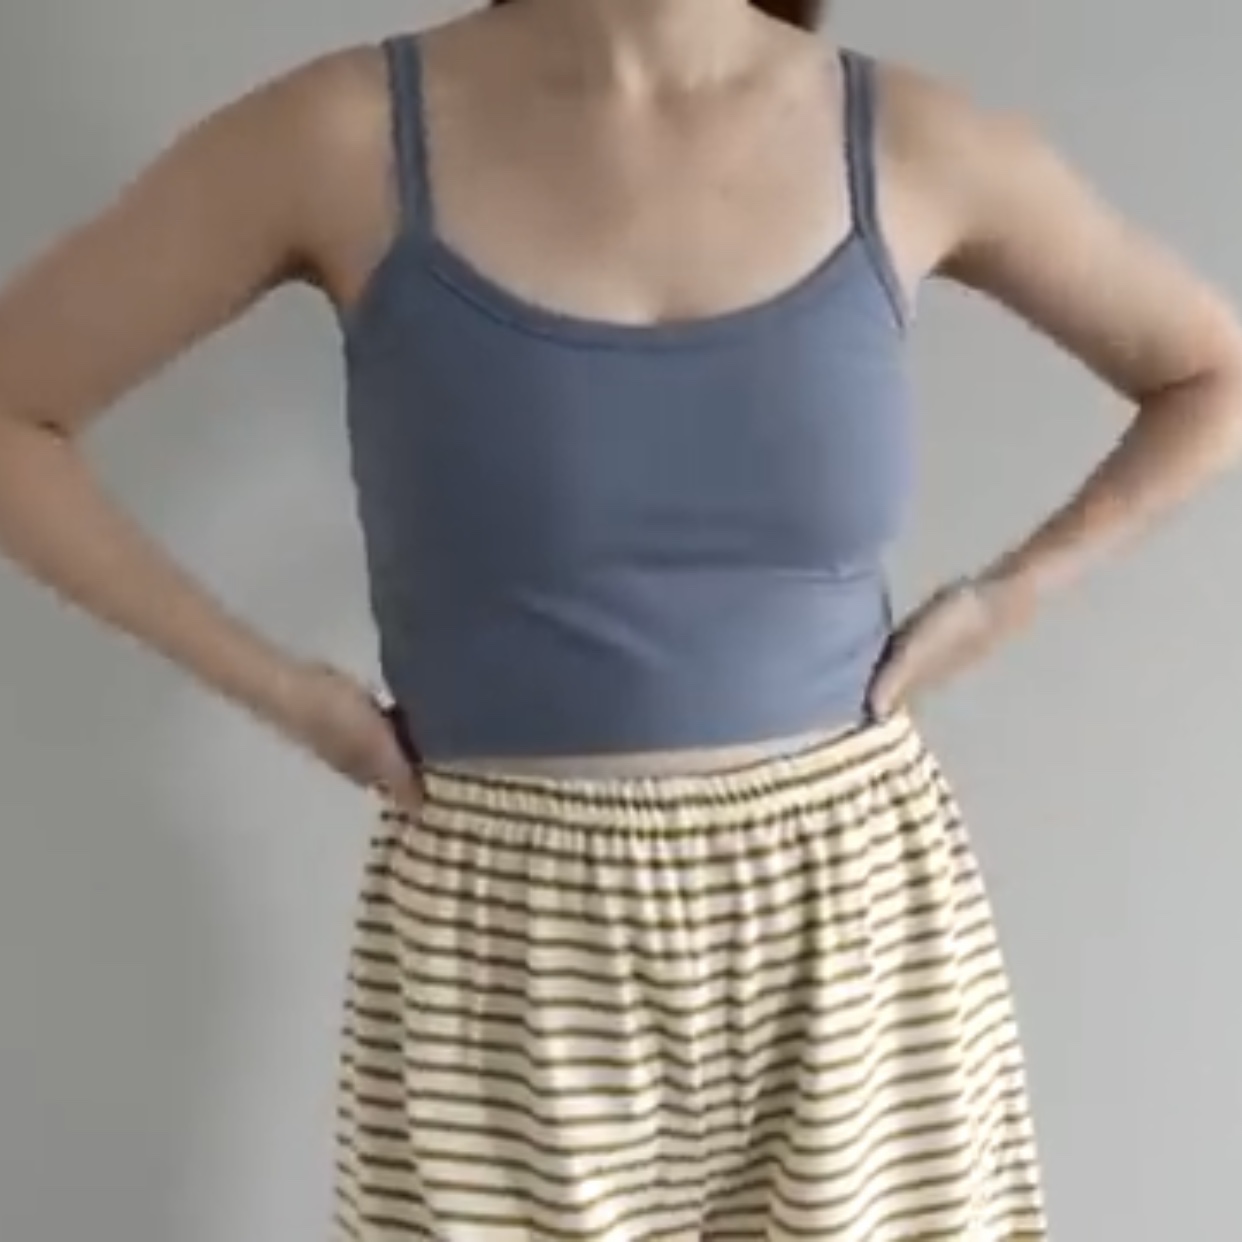
- This is a photo of the shirt I used as inspiration for designing the tank top.
Black Sunhat
A stylish black sunhat featuring a generously wide brim. Crafted from durable 10 oz charcoal-coloured cotton duck canvas.
- Took me two days to complete
- Completed on August 10, 2023

Materials and Tools
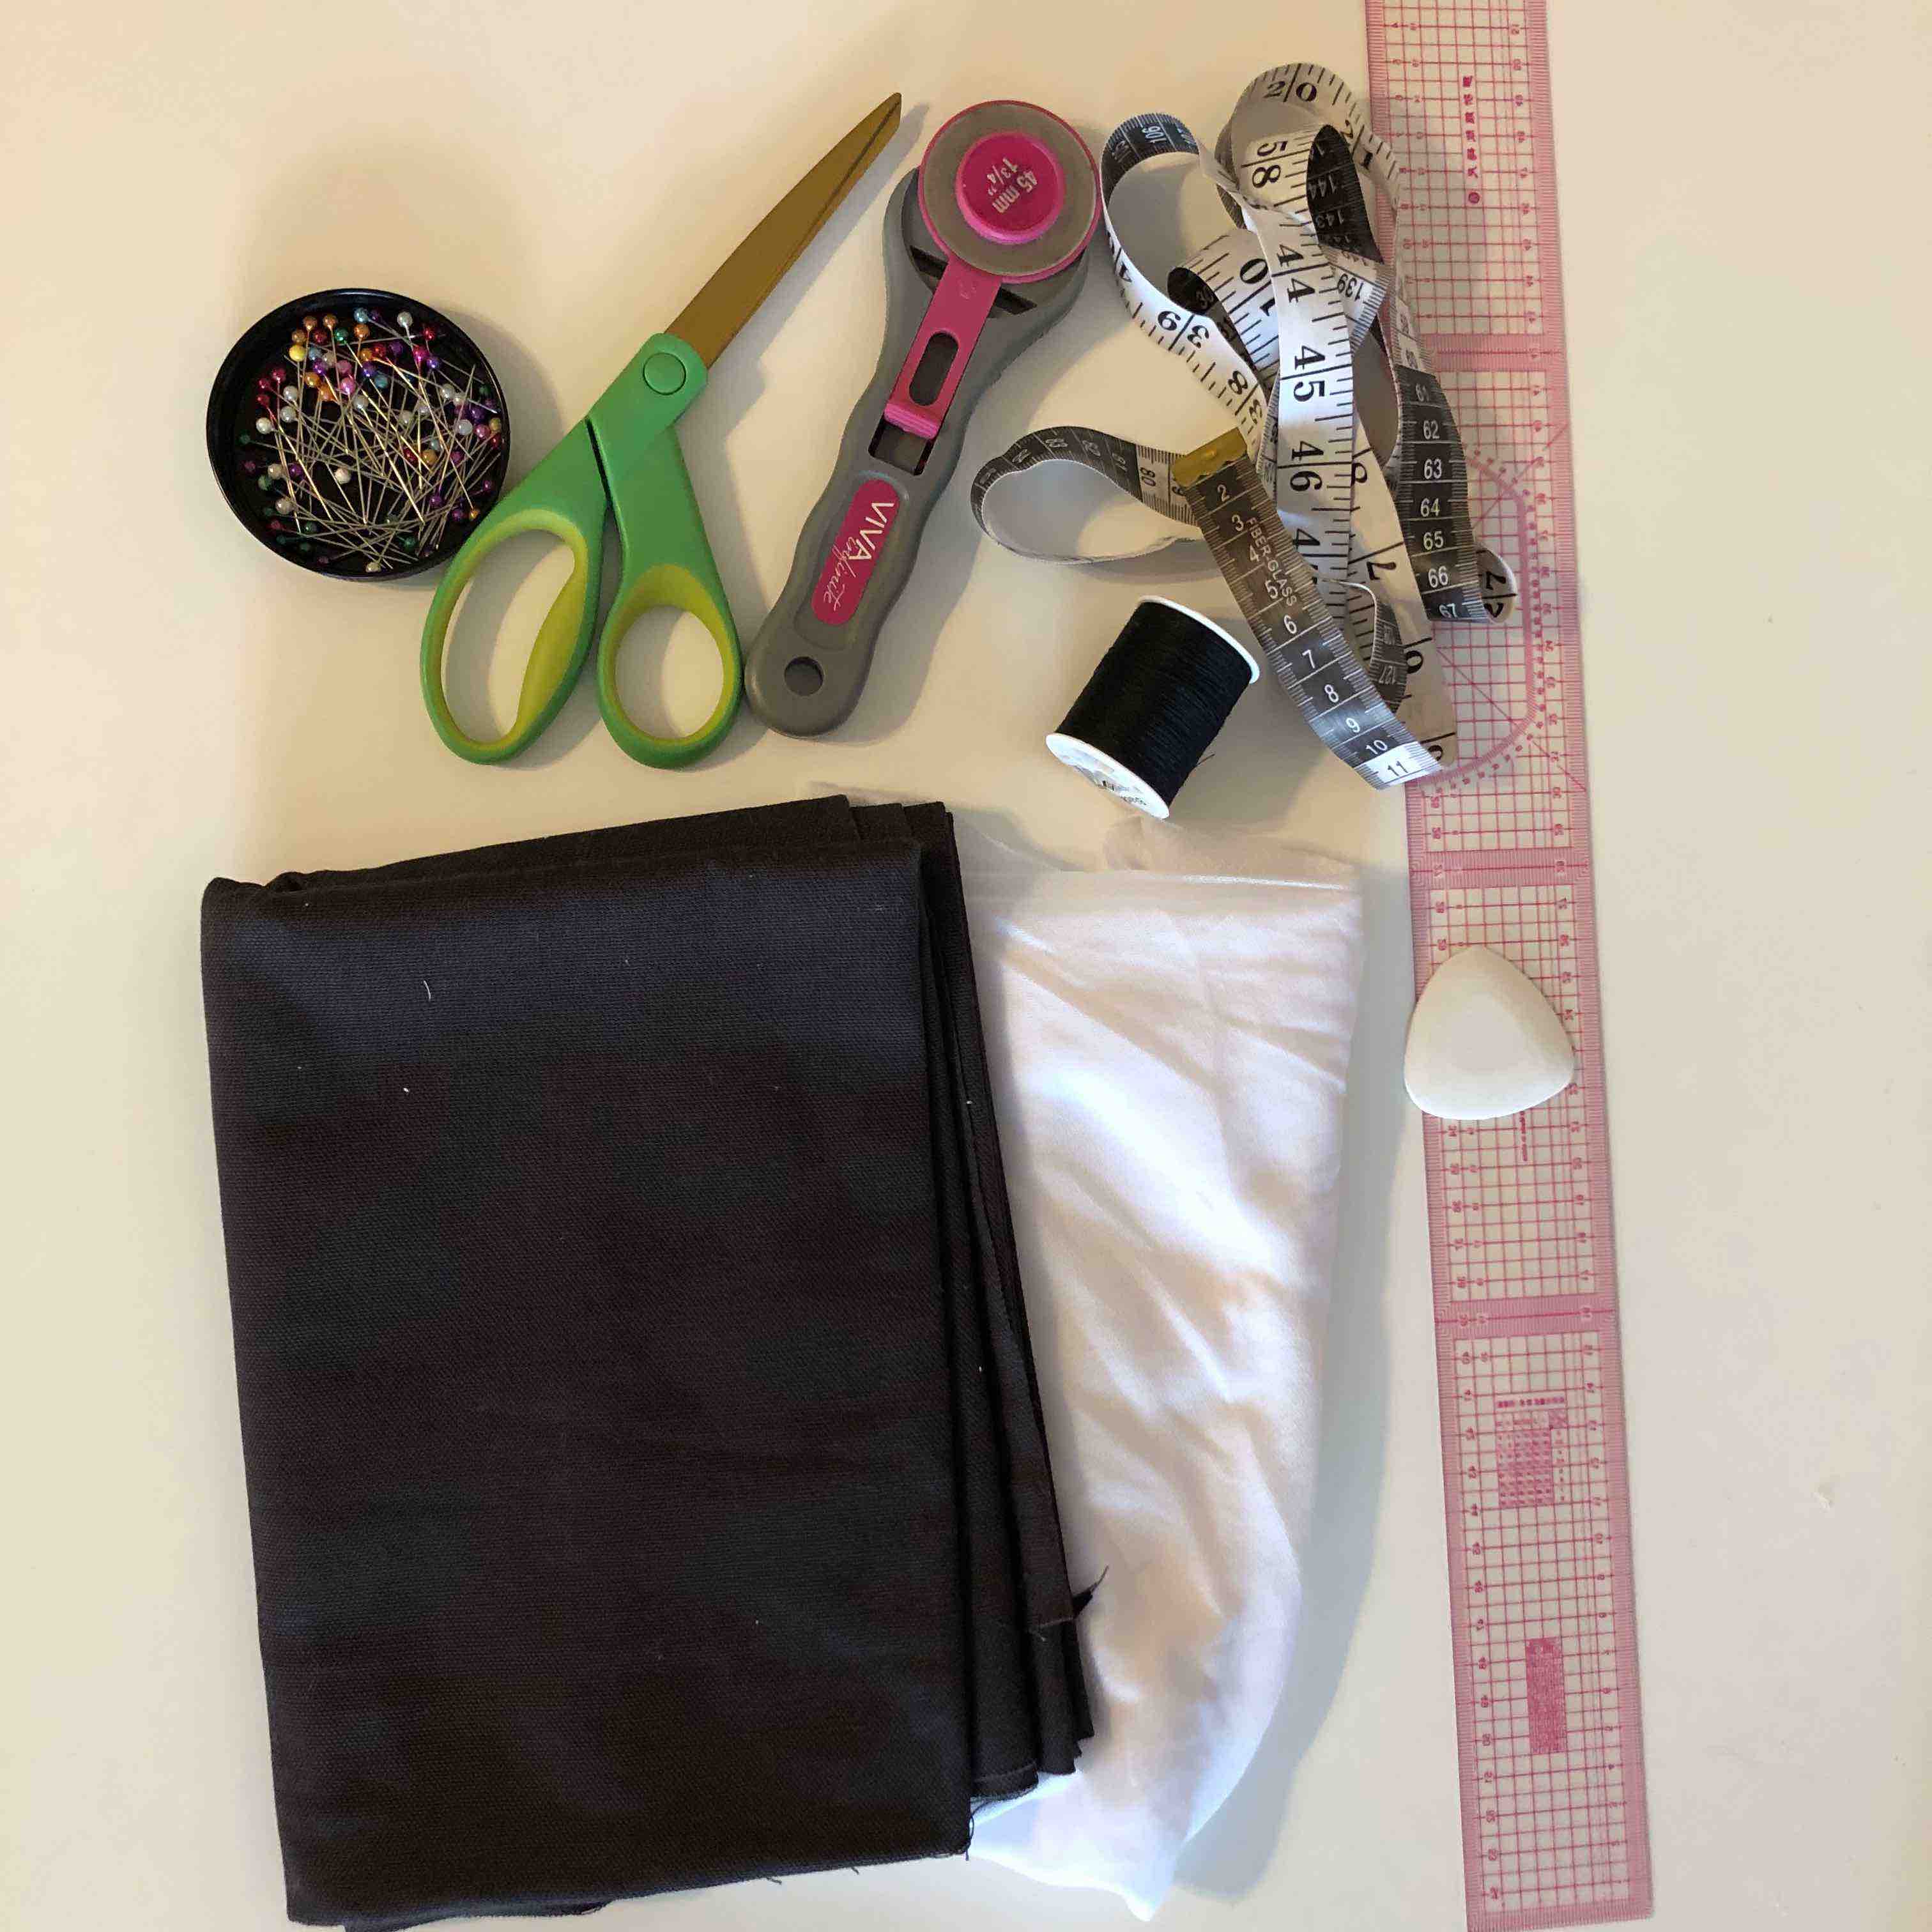
- I sourced 1/2 yard of charcoal 10 oz cotton duck canvas and 1/2 yard of white fusible interfacing from Fabric Wholesale Direct for this project.
- The tools utilized included black polyester thread, a Brother sewing machine, pins, and scissors.
Assembly Process
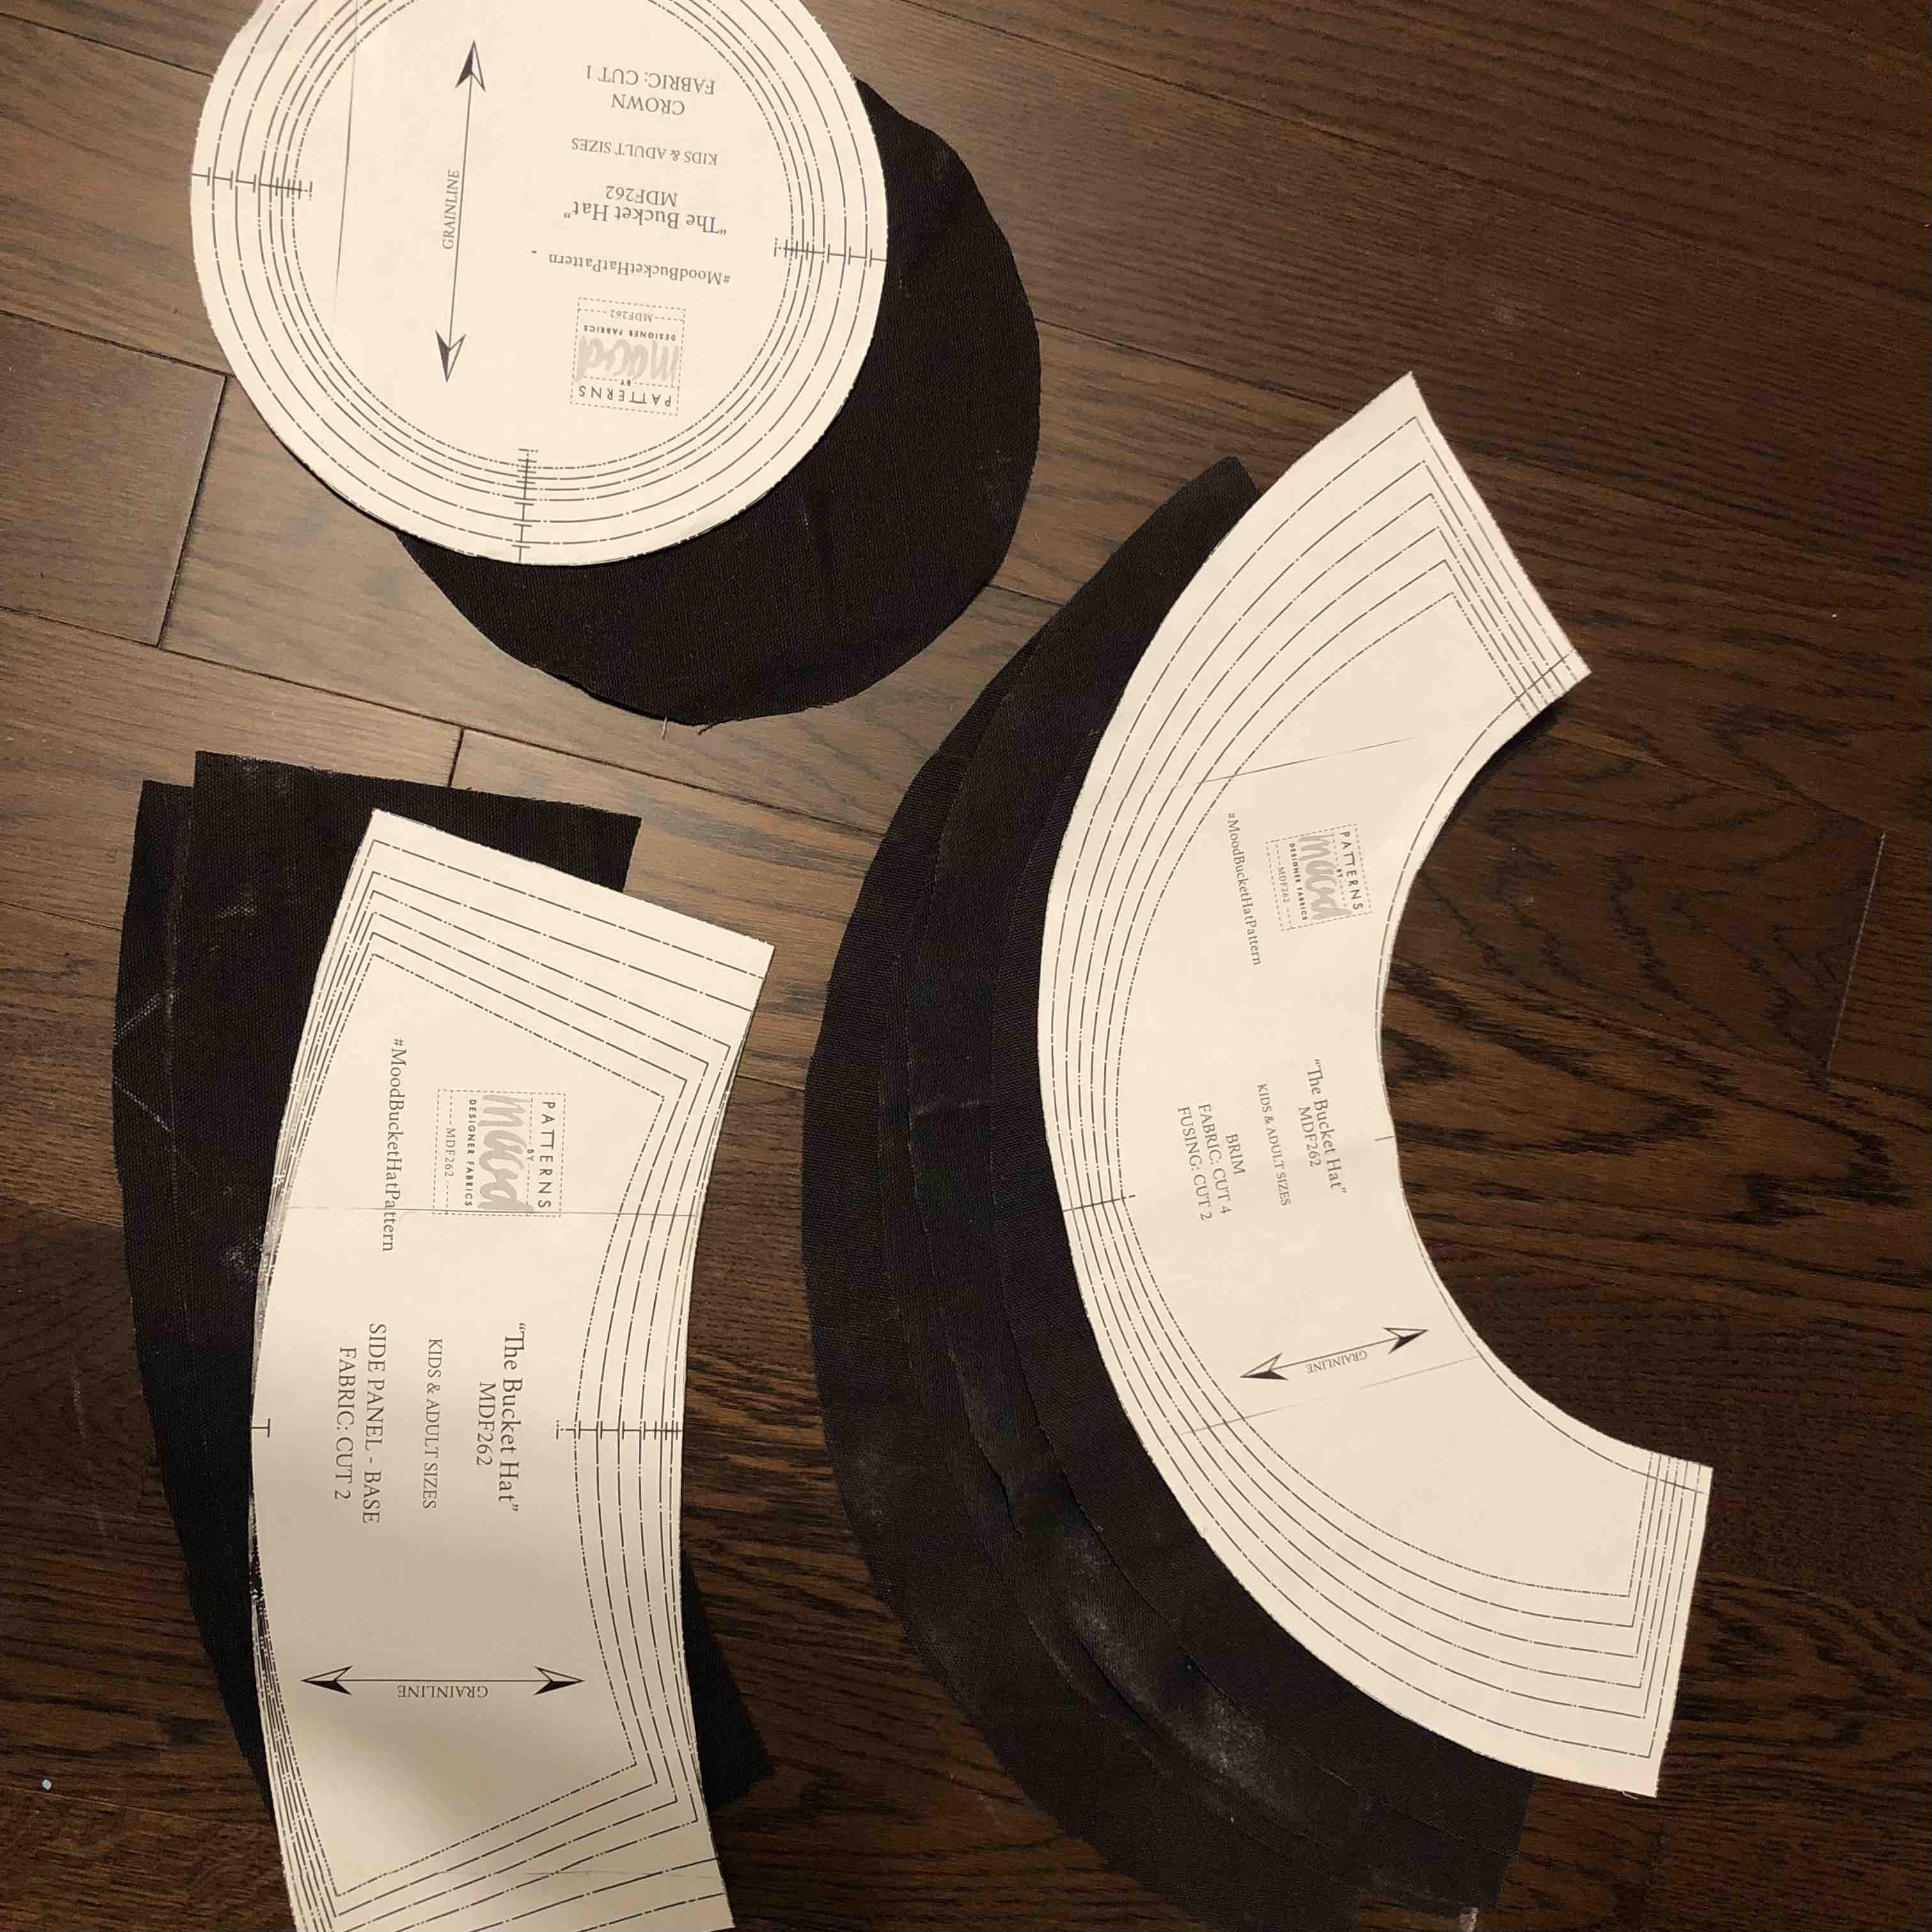
- I obtained the pattern from Mood Fabrics' blog, printed it out, and meticulously cut the paper pieces.
- Subsequently, I meticulously cut all the fabric pieces accordingly.
- Following the detailed instructions provided on the blog, I assembled the hat.
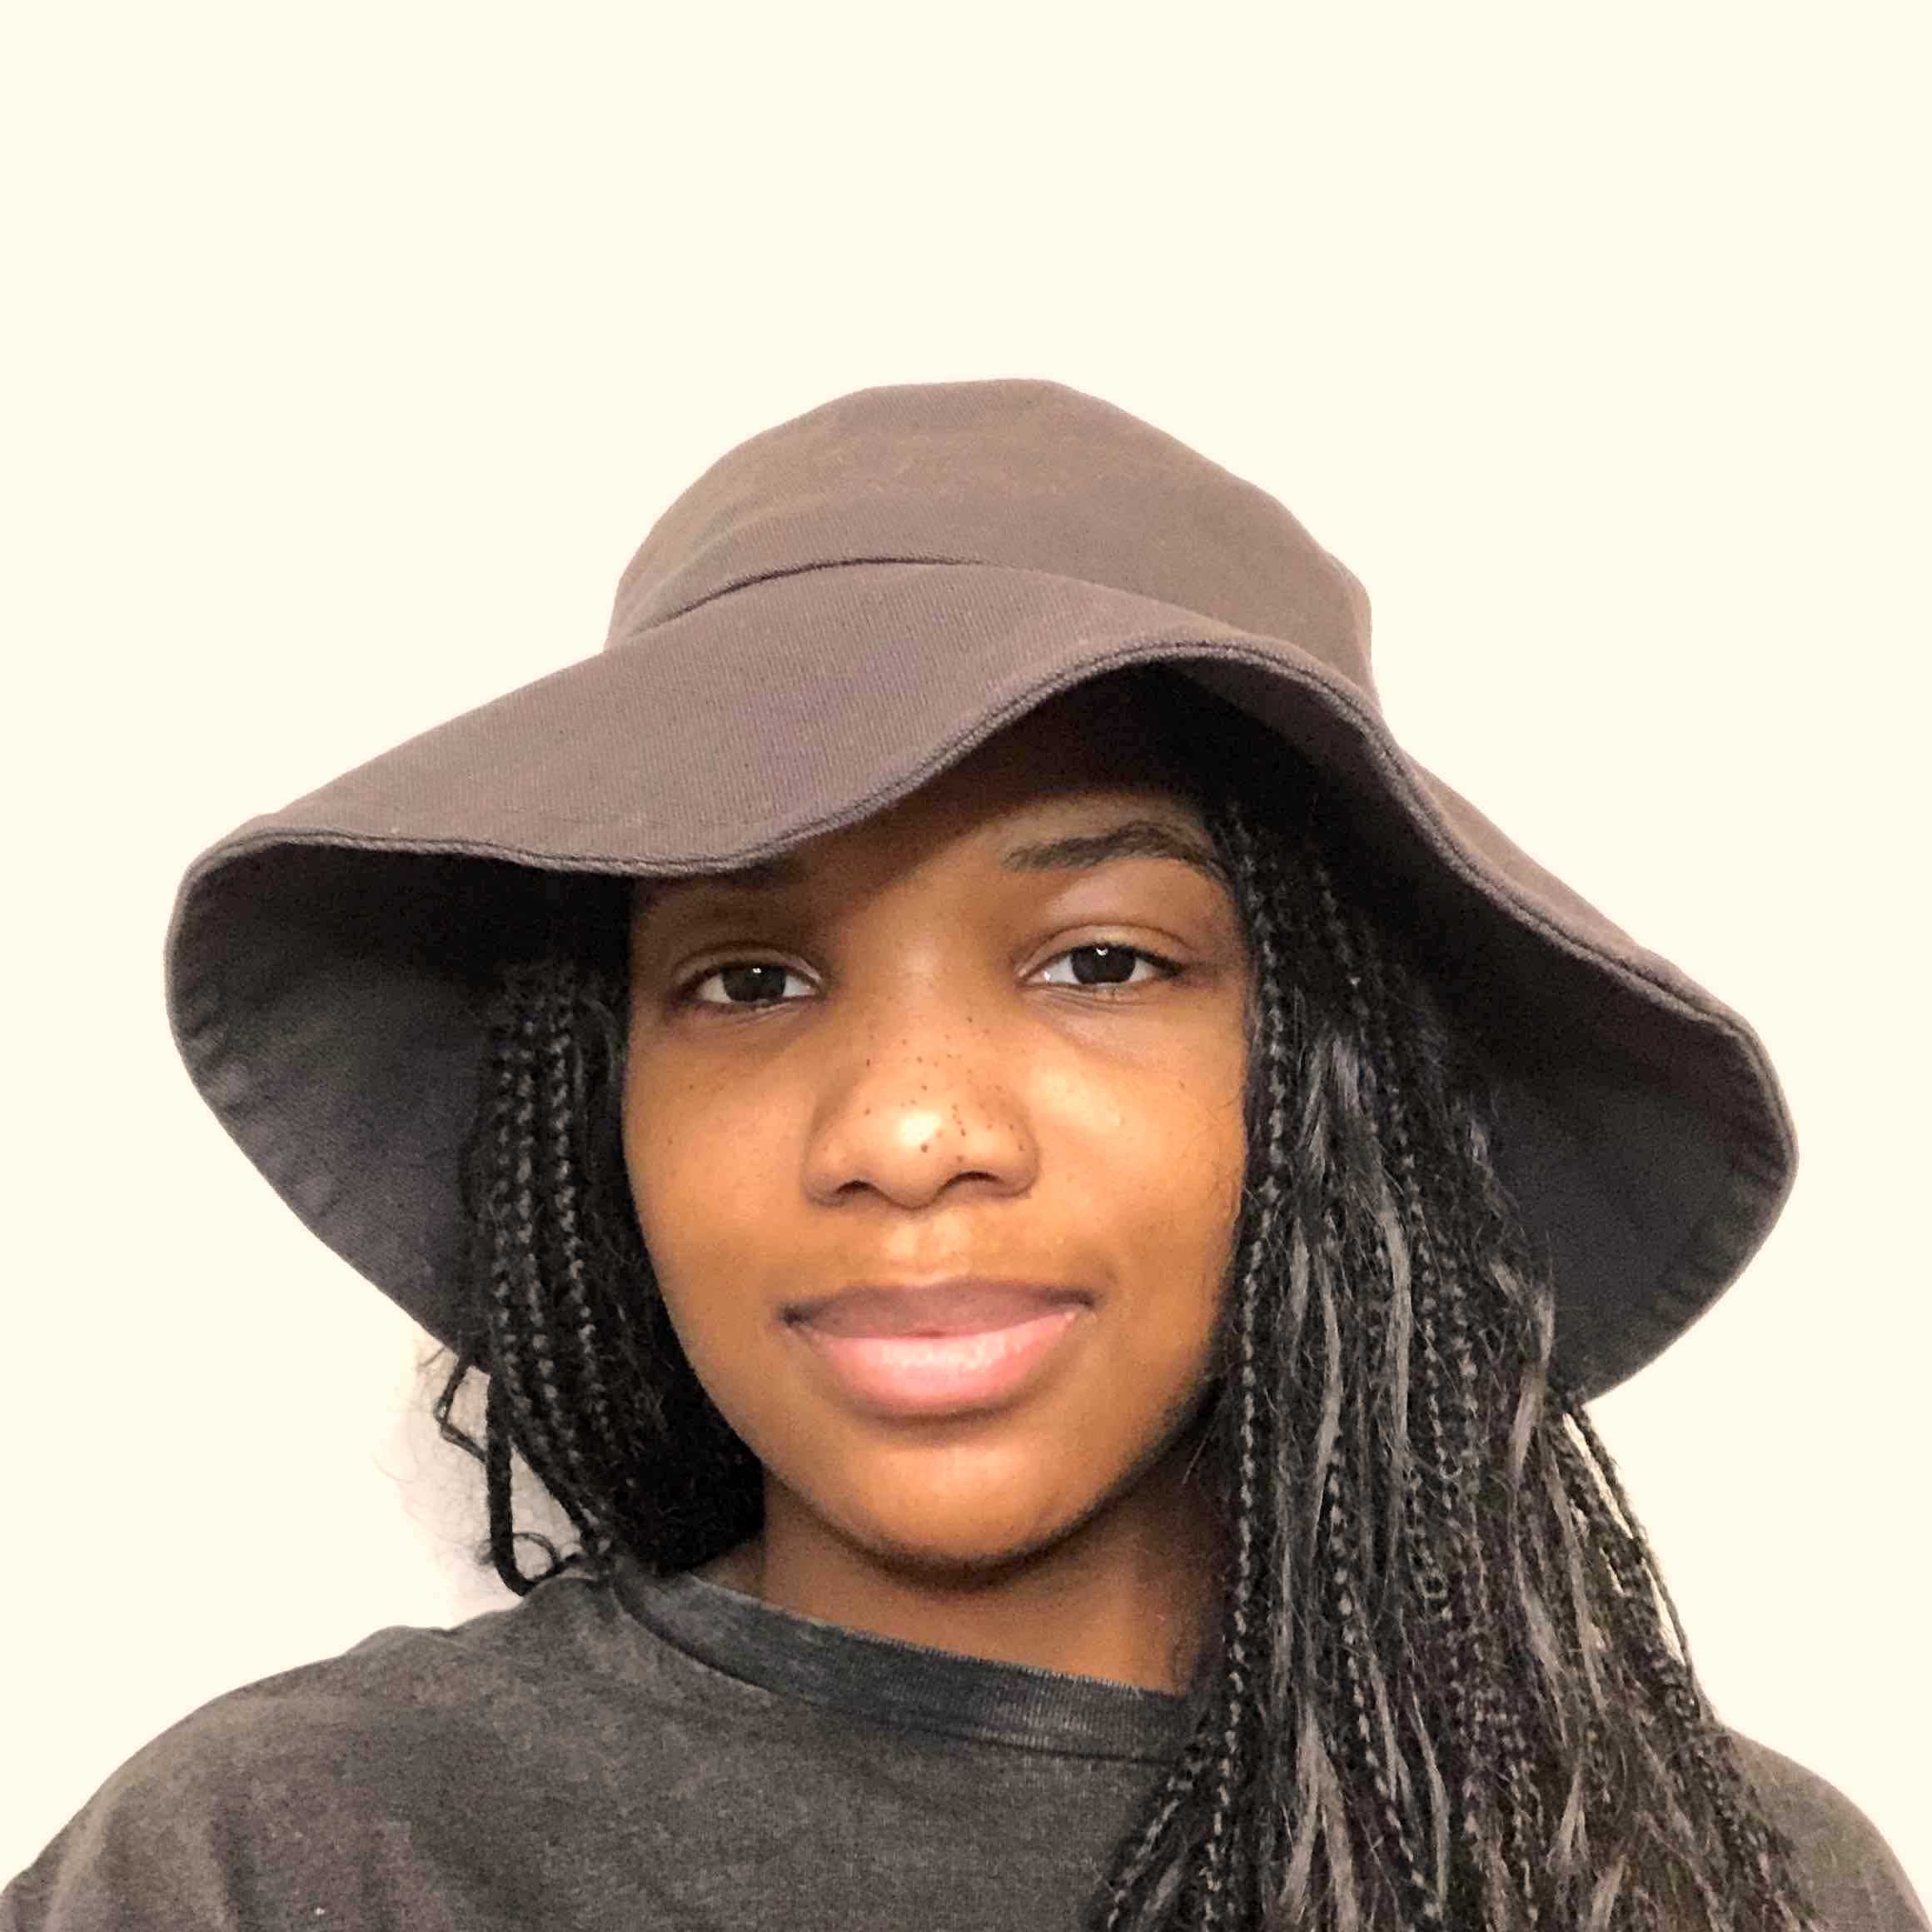
Inspiration/Reference Photo

- This is the hat that was the look I was trying to recreate.
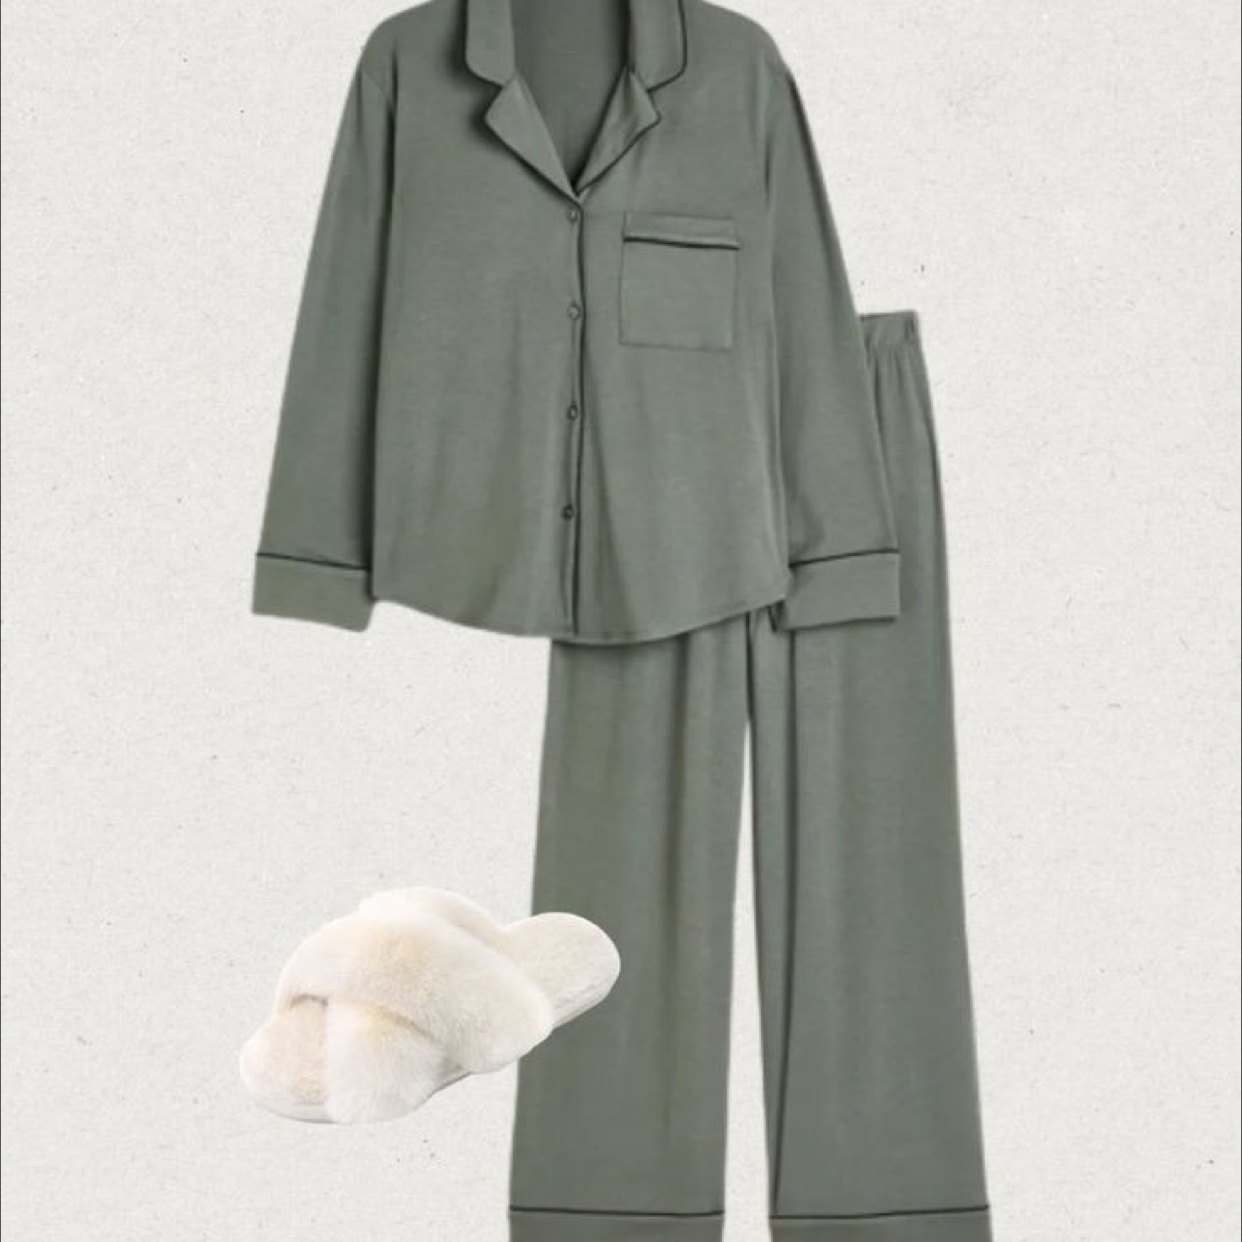
WORKS IN PROGRESS
Cotton Pajamas Set
I'm currently crafting a two-piece pajama set comprising a long-sleeved shirt and matching pants. The ensemble features button details along the front for added style and functionality.
- I am using black cotton jersey knit fabric from Fashion Wholesale Direct